
Hello everyone.
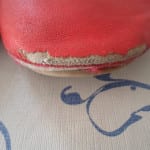
With the arrival of spring and the good weather, we began to change cabinets and without a doubt if you are mothers of girls you will get more than a few flats with peeled tip. What if? Well, at home, I have a little girl, just like you, flats have come to light with scratched ends, and before throwing them away I decided to get down to work to see what I could do to extend the useful life more.
So today I want to show you how I have done to recycle some flats of my girl that had been damaged on the tip but otherwise they were very good.
A very simple step by step with four different ideas to recycle your little ones' flats.
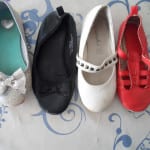
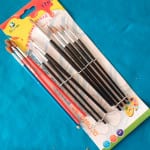
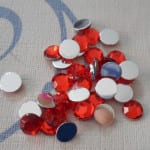
Materials I have used to recycle flats
- The flats that we want to recycle.
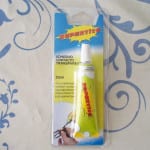
- Transparent strong glue.
- Thread and needles.
- Sequins, buttons, stars, etc.
- Ribbons
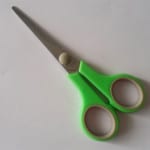
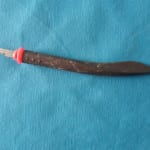
- Cutter and scissors.
- Needle and embroidery thread.
- Textile paint and brushes.


Procedure
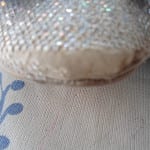
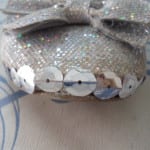
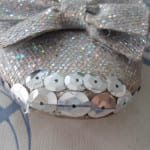
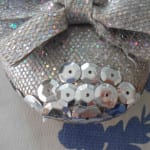
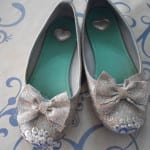
Well, as you can see in the list of materials, there are four different pairs of flats that I have recycled. First I will show you how I recycled some silver flats. First of all what I did was clean them well and brush them to remove dust or other debris that the flats may have. For these I chose some silver sequins of various sizes and I was sticking them in three rows until covering the part that was damaged. Then I let them dry well and to further reinforce the sequins I I gave a coat of colorless varnish soft to fix them even more to the tip of the mitten.

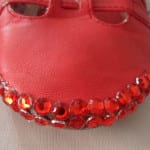
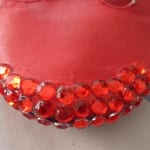
For the second pair I used red rhinestones that match the color of the flats, I also followed the same procedure, I was pasting rows until the area that was damaged was completely covered and I let it dry, then applying the layer of varnish to fix and finish them. I glued a rhinestone on the strip that rises towards the instep.


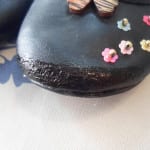
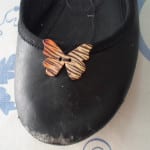
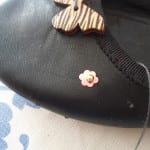
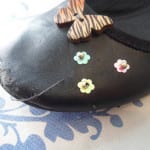
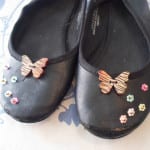
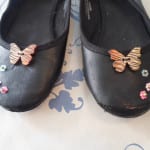
For the third pair what I did was use textile paint black to paint the part that was worn since it was not much and I could cover it perfectly with paint. To decorate these flats I used a wooden button in the shape of a butterfly and sewed some flowers on the side.

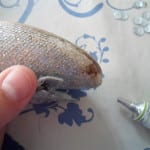
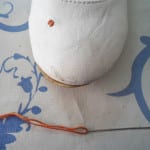
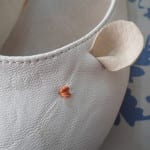
And for the last pair and personally the one that I liked the most, what I did was make a mouse face on the tip of the mitten. I did it as follows, to begin with I removed the bracelet from the mitten with sharp scissors you can cut it without problem. The next thing was to sew the mouse's eyes with embroidery thread and a large needle. We can mark with a marker where we want to put each eye so that the two flats are the same. I was stitching until I had the volume I wanted and with the same strand of thread I went to the other eye and followed the same procedure, once I had the desired volume, cut the thread from the inside, leaving as little loose as possible inside to avoid discomfort to the baby.
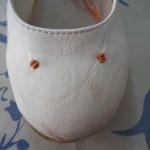
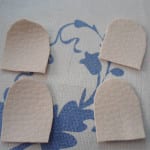
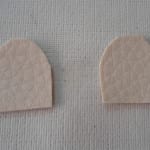
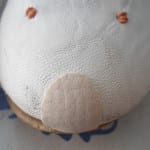
The next thing is to trim the nose and the ears on the fabric that we want to use. In my case I used a piece of beige leatherette. I cut off two pairs of ears and one pair of noses. Nose I glued it with extra strong transparent glueI started at the edge of the sole of the mitten and smoothed it with my finger so that it adhered well.
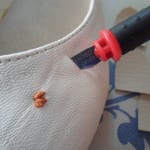
When the nose was stuck the next thing I did was place my ears, for this I made a small cut with the cutter in the place where I was going to put the ears, then I put the ear carefully and I gave him several stitches with thread White, which is the color of the mitten so that it does not stand out too much and they remain well attached.

To continue with the transformation of these ballet flats I added some whiskers to the mouse, with an embroidery thread brown in color. What I did was with a large needle, I gave two stitches, one on each side of the nose and passed two strands of thread. Then I tied a knot on each side and I had four pieces of thread left for whiskers.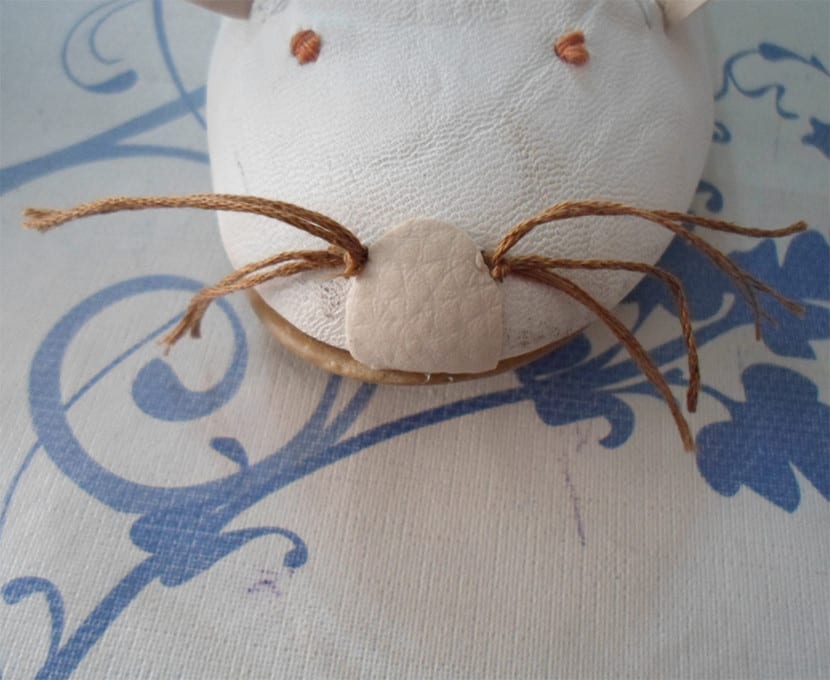
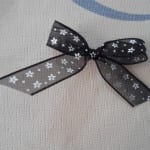
And finally to finish decorating the flats I turned the mouse into a mouse, putting a bow on one ear. I did it with printed organza ribbon and sewed it with several stitches on the ear that I liked the most.

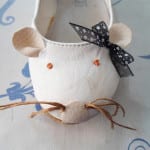
The end result of these cute flats mice It is the one you see in the photo.


I hope you liked and served this tutorial and that you can be inspired by my ideas to recycle your ballet flats and extend their useful life.
Leave me your comments!