
Decorate a children's room sometimes it is a very complicated task, but only sometimes. In this post I am going to teach you how to do this very spring children's painting recycling a plastic plate that we all have at home.
Materials to make the children's painting
- Square plastic plates
- Decorated papers
- Scissors
- Glue
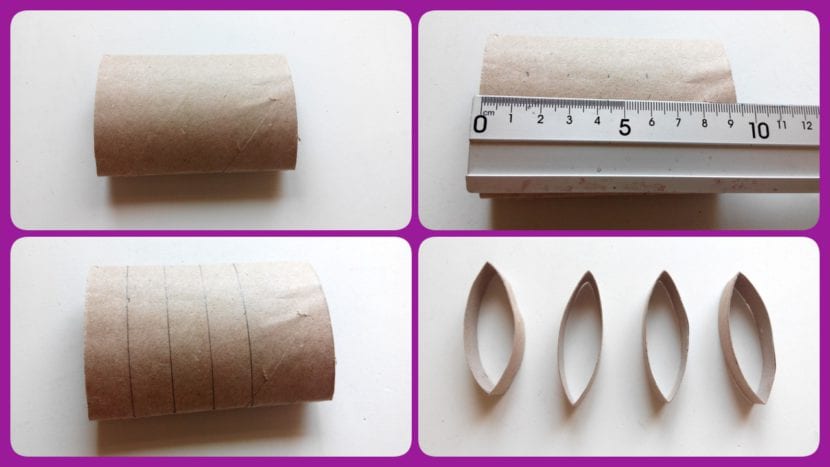
- Ruler
- Eva rubber flowers
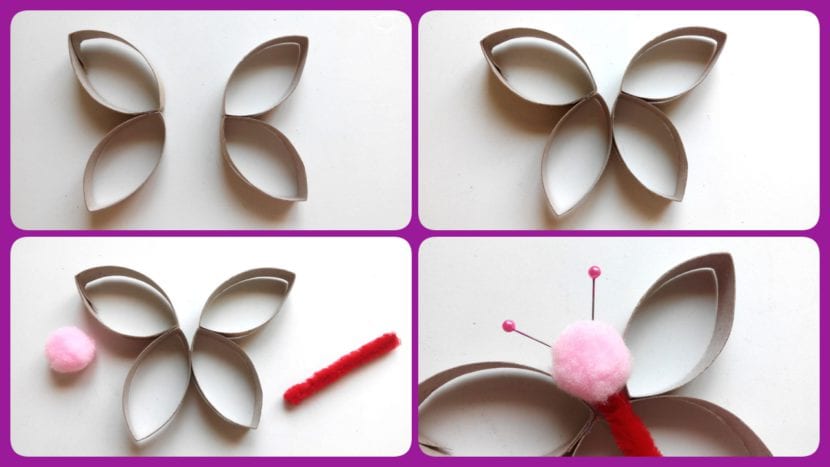
- Cardboard rolls of toilet paper
- Round pins
- Pipe cleaner
- Pompons
- Eva rubber punches
Elaboration of the children's table
Cut a paper of the measurements of the center of our plate. In my case it is square, but if it were circular, it would be necessary to cut out a circle whose diameter coincided with that of the plate.
With a strip of green paper forms the grass. I have used a simple green folio from the one sold in stationeries and bazaars.
Then decorate the scene from the field with eva rubber flowers. I have also used a sun.

Then I am going to leave you the Step by Step to build the butterfly that is necessary to finish our children's painting. If you remember, I taught it to you in a previous idea. You can make it in the colors that best suit the room where you are going to place this painting and you can also make several models so that they have a partner and the space is even fuller.
If you want to consult all the details in case you have doubts you can CLICK HERE.
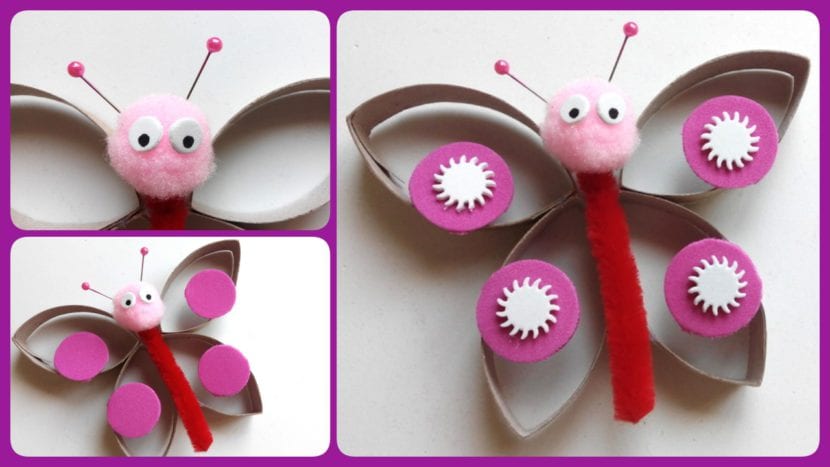
Once we have the butterfly, we just have to stick it in the sky to decorate our painting and give it a special touch.

I have used a butterfly, but you can use another type of animal, such as this bird. Click on the image to take you to the tutorial.

And so far today's craft. I hope you liked it. If you do, you can send me a photo through any of my social networks.
See you on the next idea.
Bye!