
Today Crafts On, we will show you a step by step of how to make cardboard flowers and Eva Gum.
Do not miss it.
When we talk about flowers, we think of colors, sunny days, summer and joy.
Therefore, this tutorial that I bring you today is perfect to decorate your house with lots of color and summer airs.
In one part of the world, many are beginning to enjoy the heat and the beautiful days and thus also landscapes full of flowers and colors.
Already in another part of the world, many are beginning to live the coldest days, that does not prevent them from taking the opportunity to keep the home super cozy, decorating it with flowers and a lot of color, to break a little cold that that season brings us.
Entonces let us fill our house with flowers.
Flowers of all kinds, natural flowers, paper flowers and cardboard flowers and eva rubber that I will show you below.
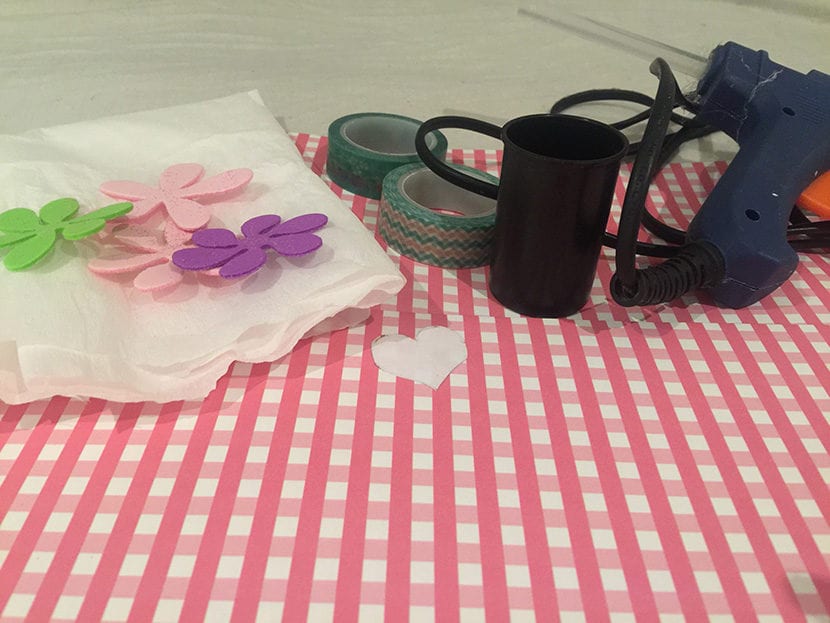
Materials to make cardboard and Eva Gum flowers:
- Colored and patterned cardboard, I opted for a pink checkered cardboard.
- Tissue paper or crepe paper
- Flowers and leaves of Goma Eva, they can be made in Goma Eva with glitter or they can also be easily obtained in any craft store
- 1 heart, to use as a mold
- Washi tape
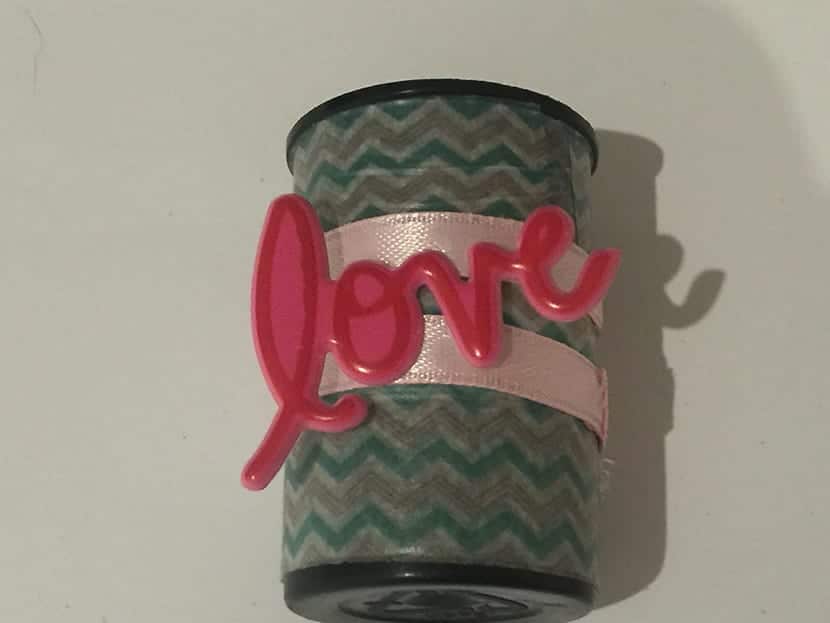
- A small bottle, I used the old ones, where the rolls of photos used to come. Remember?
- Glue gun
- Scissors
- Wooden sticks
Steps to make cardboard and Eva Gum flowers:
Step 1:
We passed the heart mold to cardboard what do we choose, we cut several hearts.
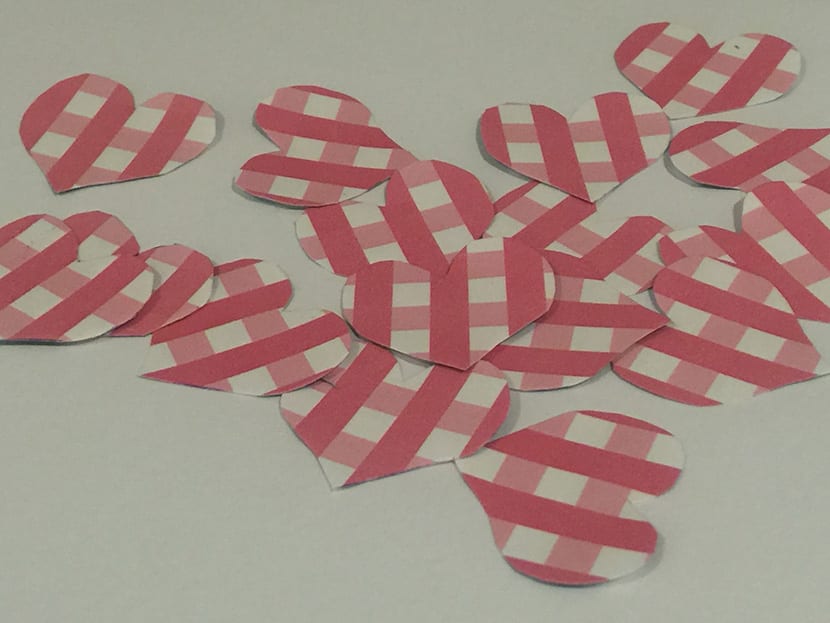
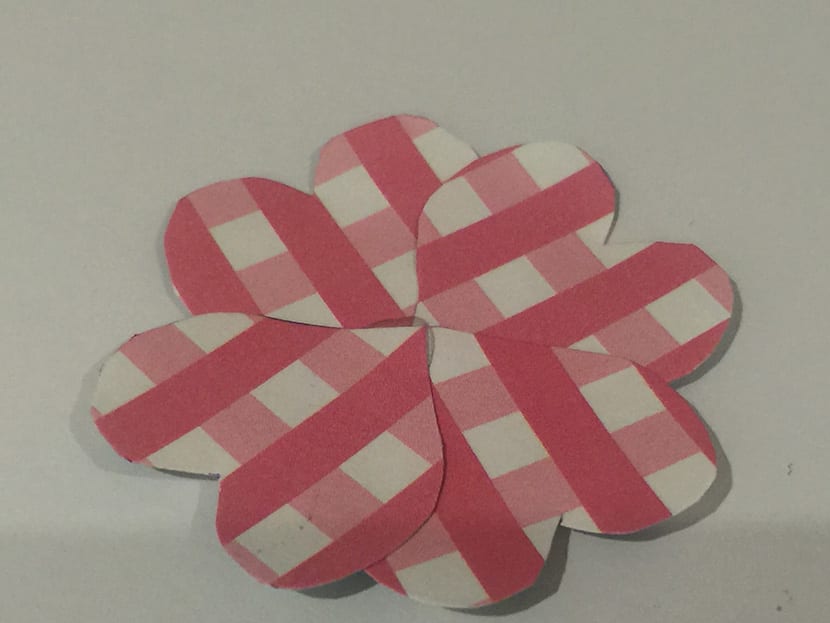
Step 2:
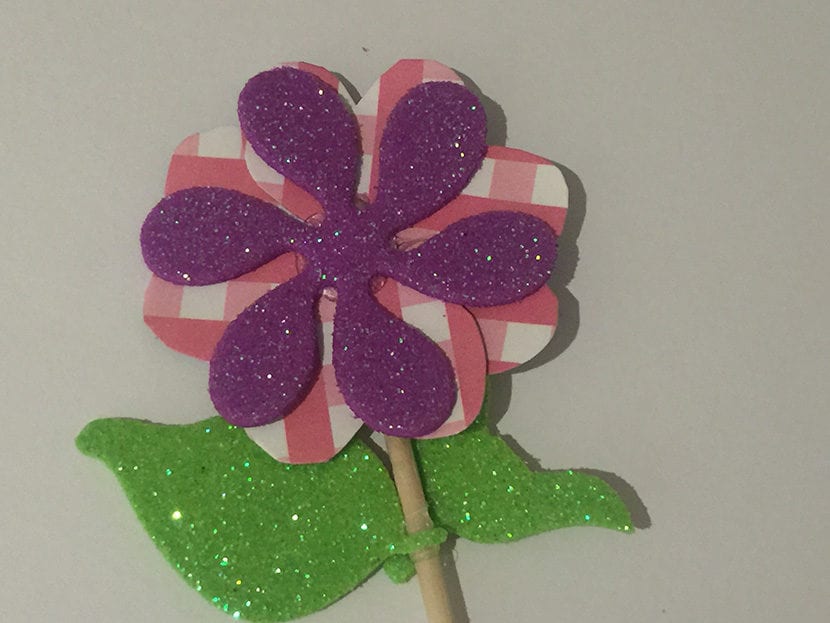
To make each flower, we will need 4 hearts, hence the importance of cutting several hearts before starting.
We stick each heart through the center, as we see in the image below:
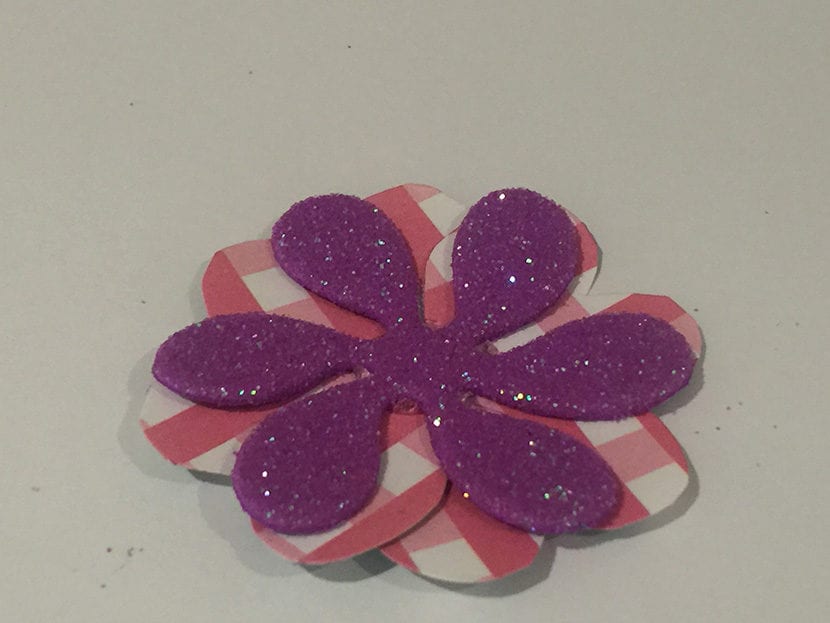
Step 3:
Above our cardboard flower already assembled, we will stick one of Goma Eva.
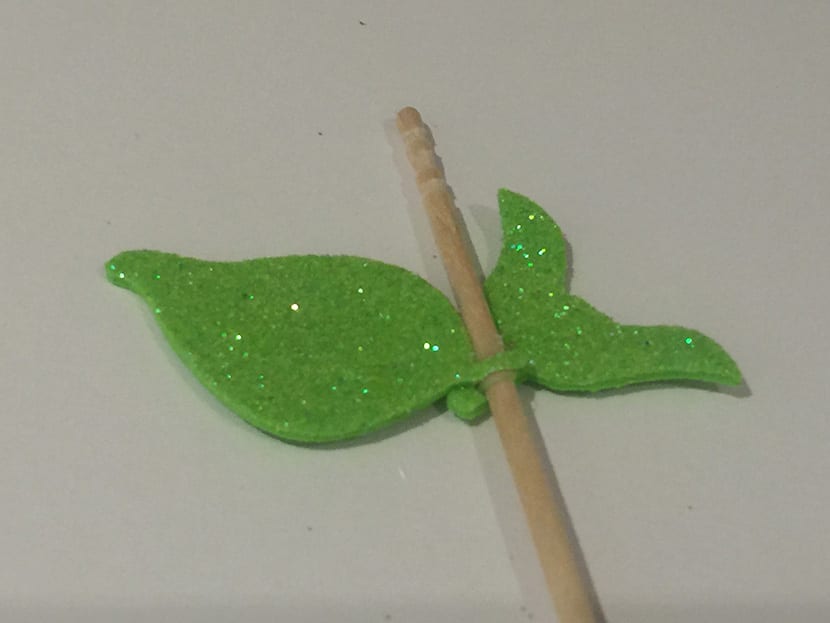
Step 4:
On the wooden stick we glue the sheets of Goma Eva.
Step 5:
We glue our cardboard flower and Eva Gum at the end of the wooden stick, thus forming the full flower.
Step 6:
We decorate the bottle which we will use as a mini pot for the cardstock flowers.
I decorated it, pasting Washi Tape all around, then tape around it and finish it off with a Scrapbook glue.
We place the flowers inside the mini pot and it would be ready to decorate any space, such as a bedside table, kitchens or terraces.
I hope you enjoy!
We meet in the next one!