
This craft rocket shaped It is a creative idea to entertain children for the purpose of flying. They can have fun building some pieces and then they can play throwing the glass and see how it makes shuttle. The result is formed by making the rubber bands push one structure with another and being able to simulate how it flies, you will love the result!
If you like rocket-shaped crafts you can visit how to make these «space rockets with cardboard tubes«.
The materials I have used for the space rocket:
- 3 silver finish cardboard cups.
- Two elastic bands.
- Two chopsticks.
- A piece of blue cardboard.
- A piece of red cardboard.
- Two stickers in the shape of little stars.
- Hot silicone and his gun.
- A compass.
- A pen.
- Scissors.
- Something sharp to make the holes.
You can see this craft step by step in the following video:
First step:
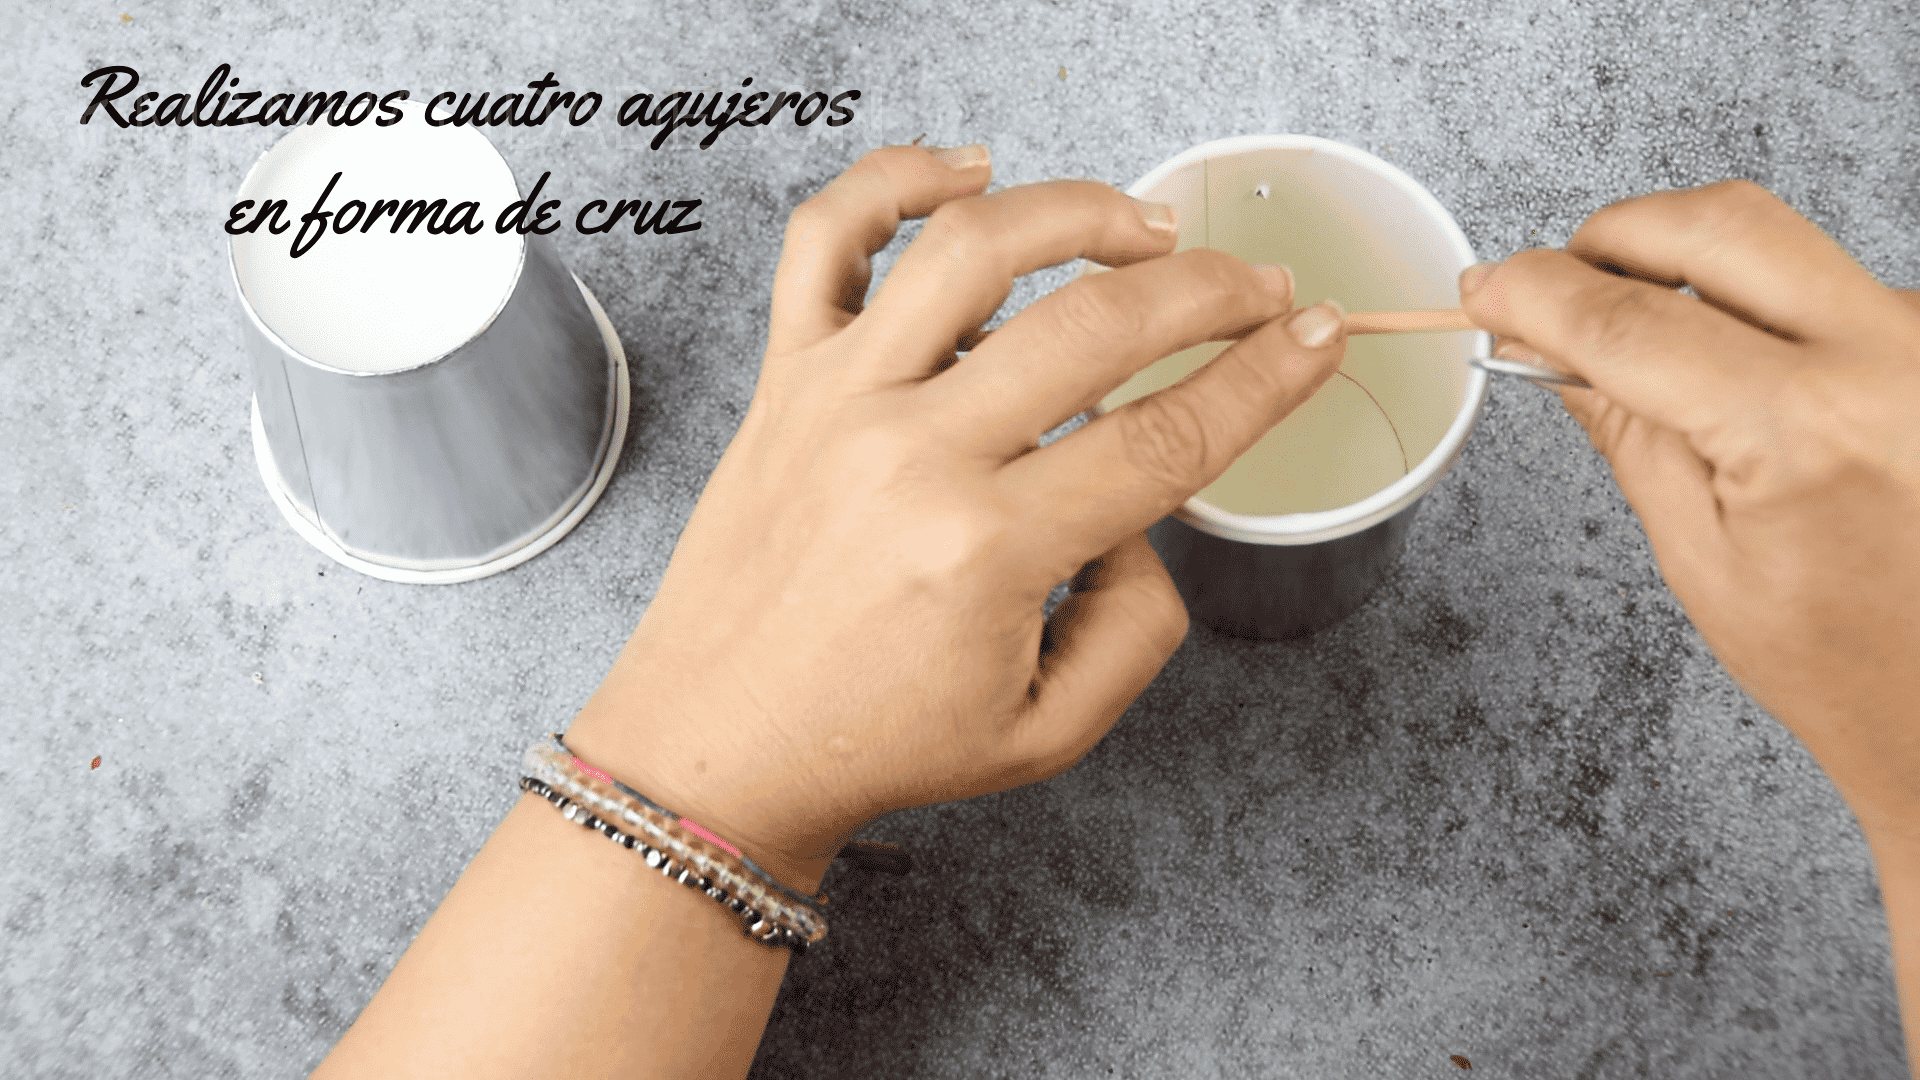
We place a glass inside another glass. We will make four holes in the glasses in cross shape. For this we can guide ourselves with a stick and make the holes perpendicularly. When making the holes we can help ourselves with something sharp and thick.

Second step:
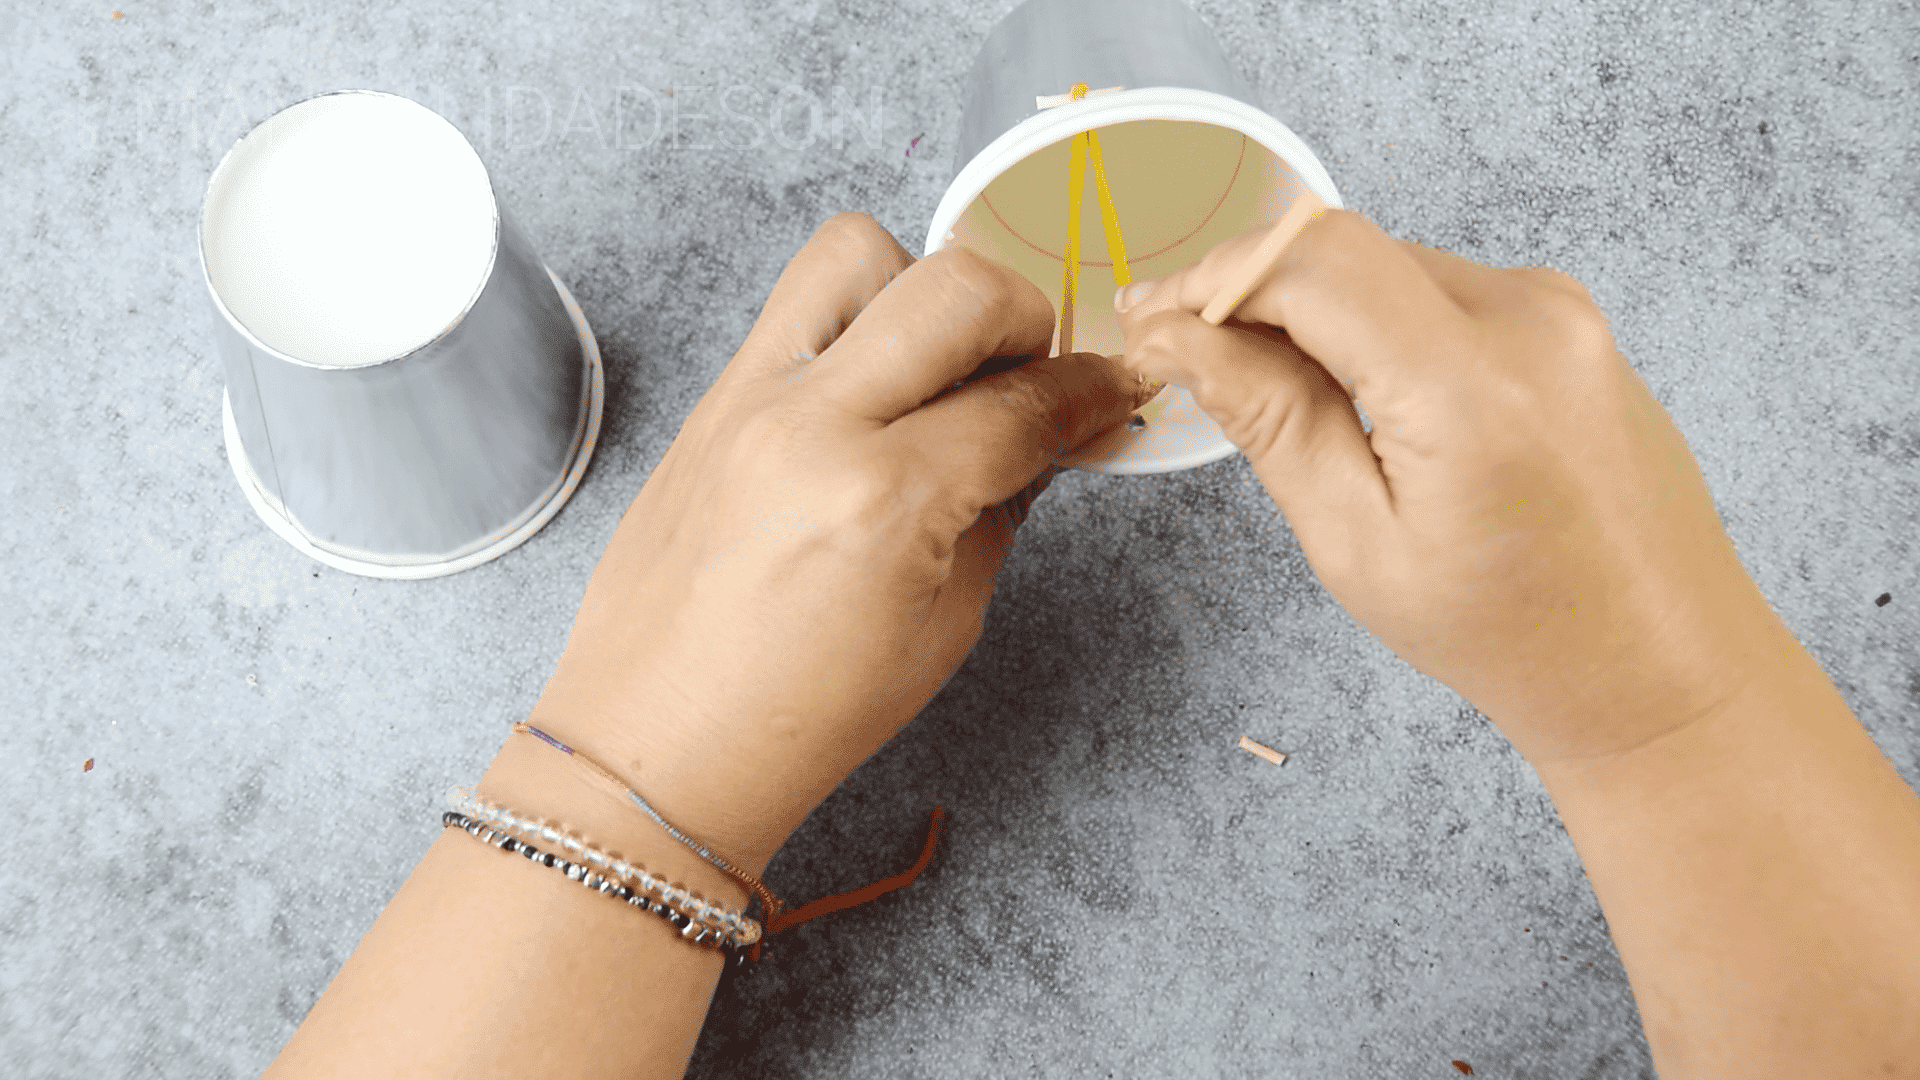
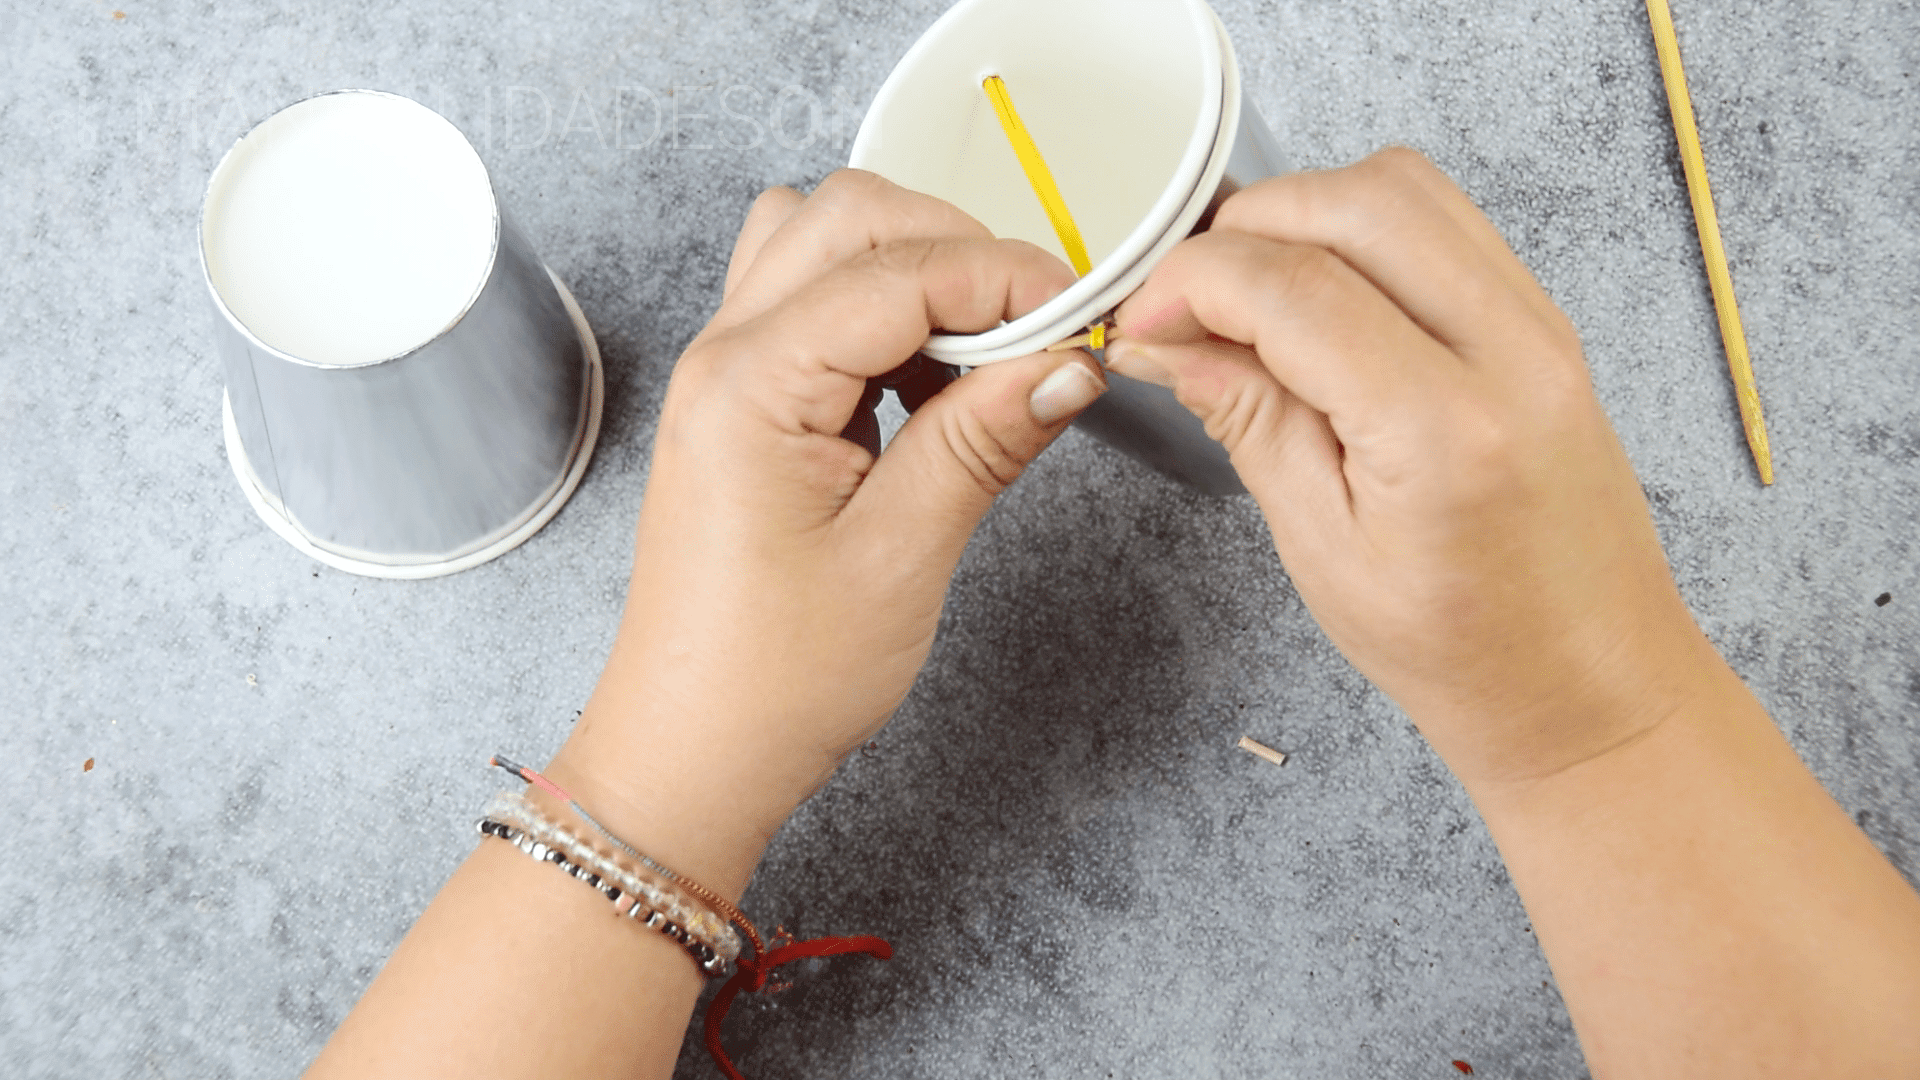
We put the rubber bands in the holes. You have to attach a rubber one of the holes with the other that is opposite. When a rubber band is inserted, it will be held with the help of a piece of toothpick so that it does not escape inside. At the other ends we will place the other pieces of toothpick for the rubber bands to hold.
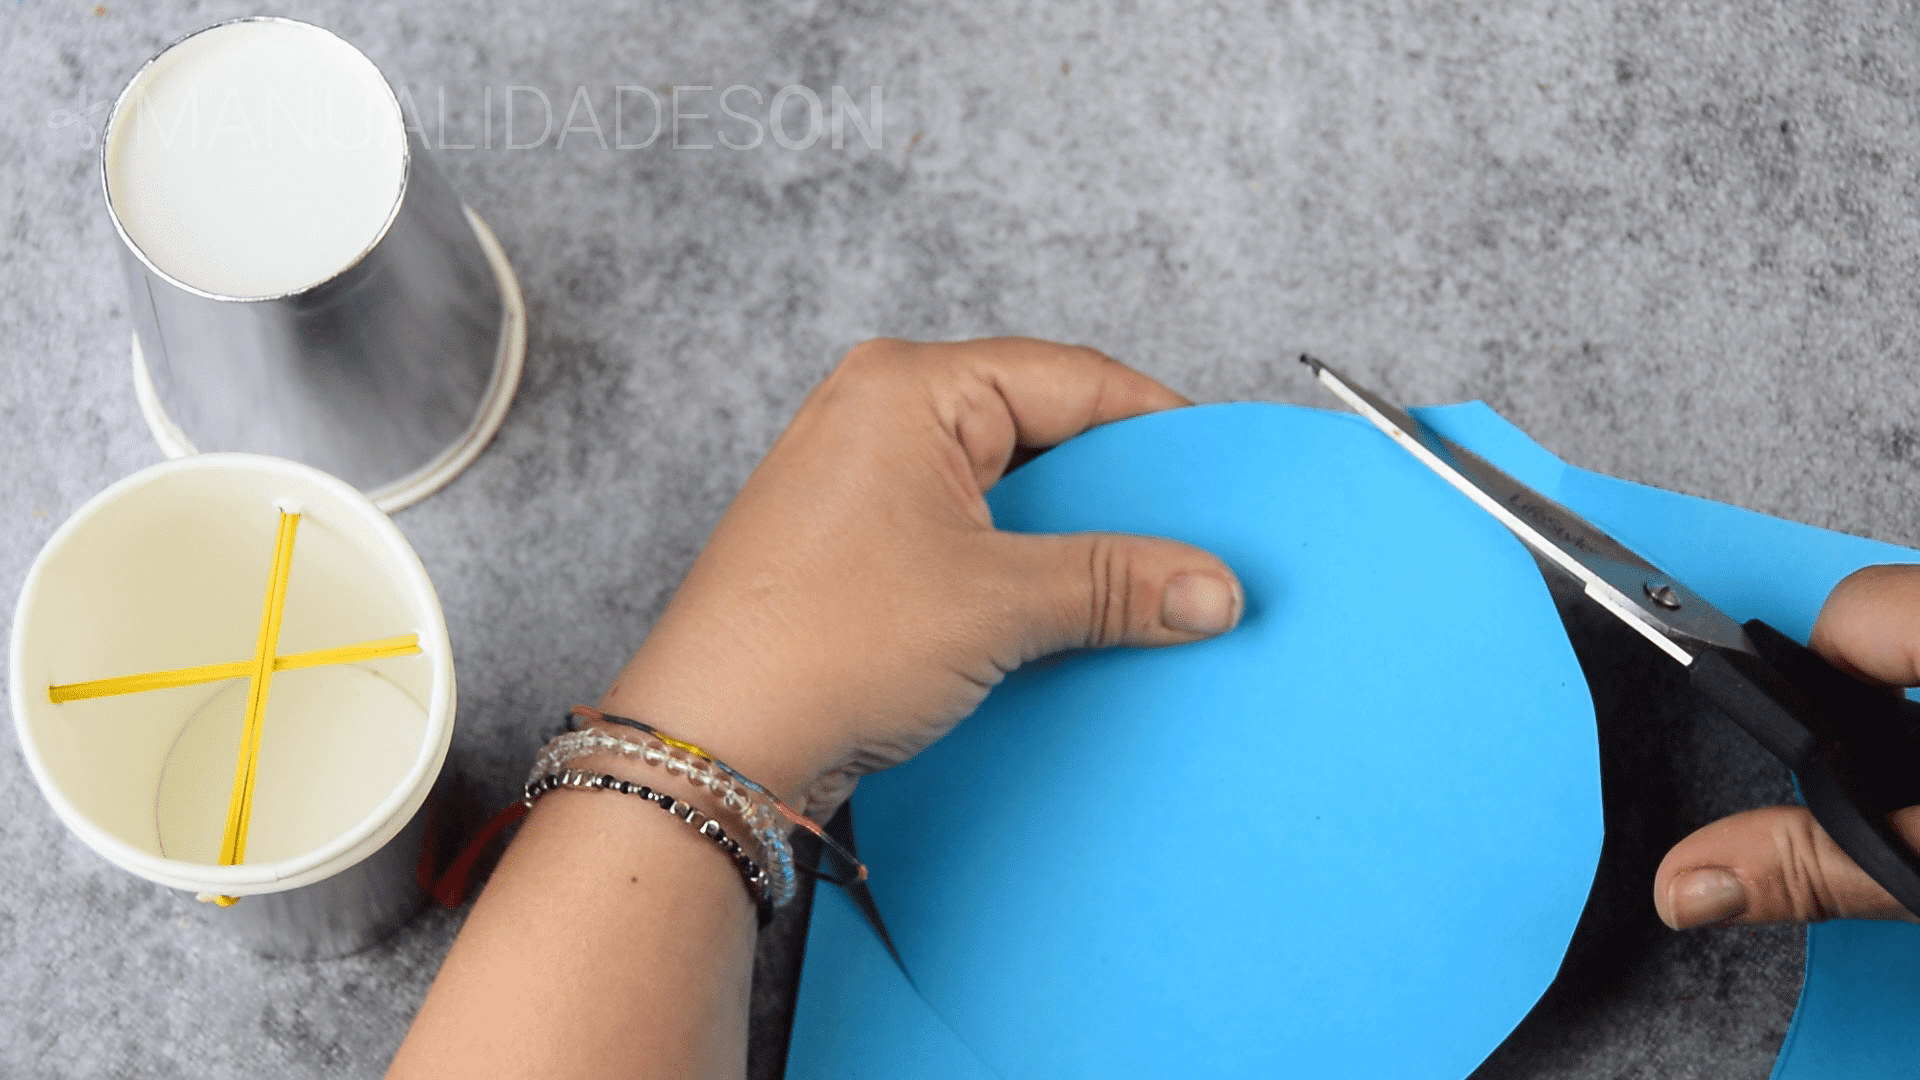
Third step:
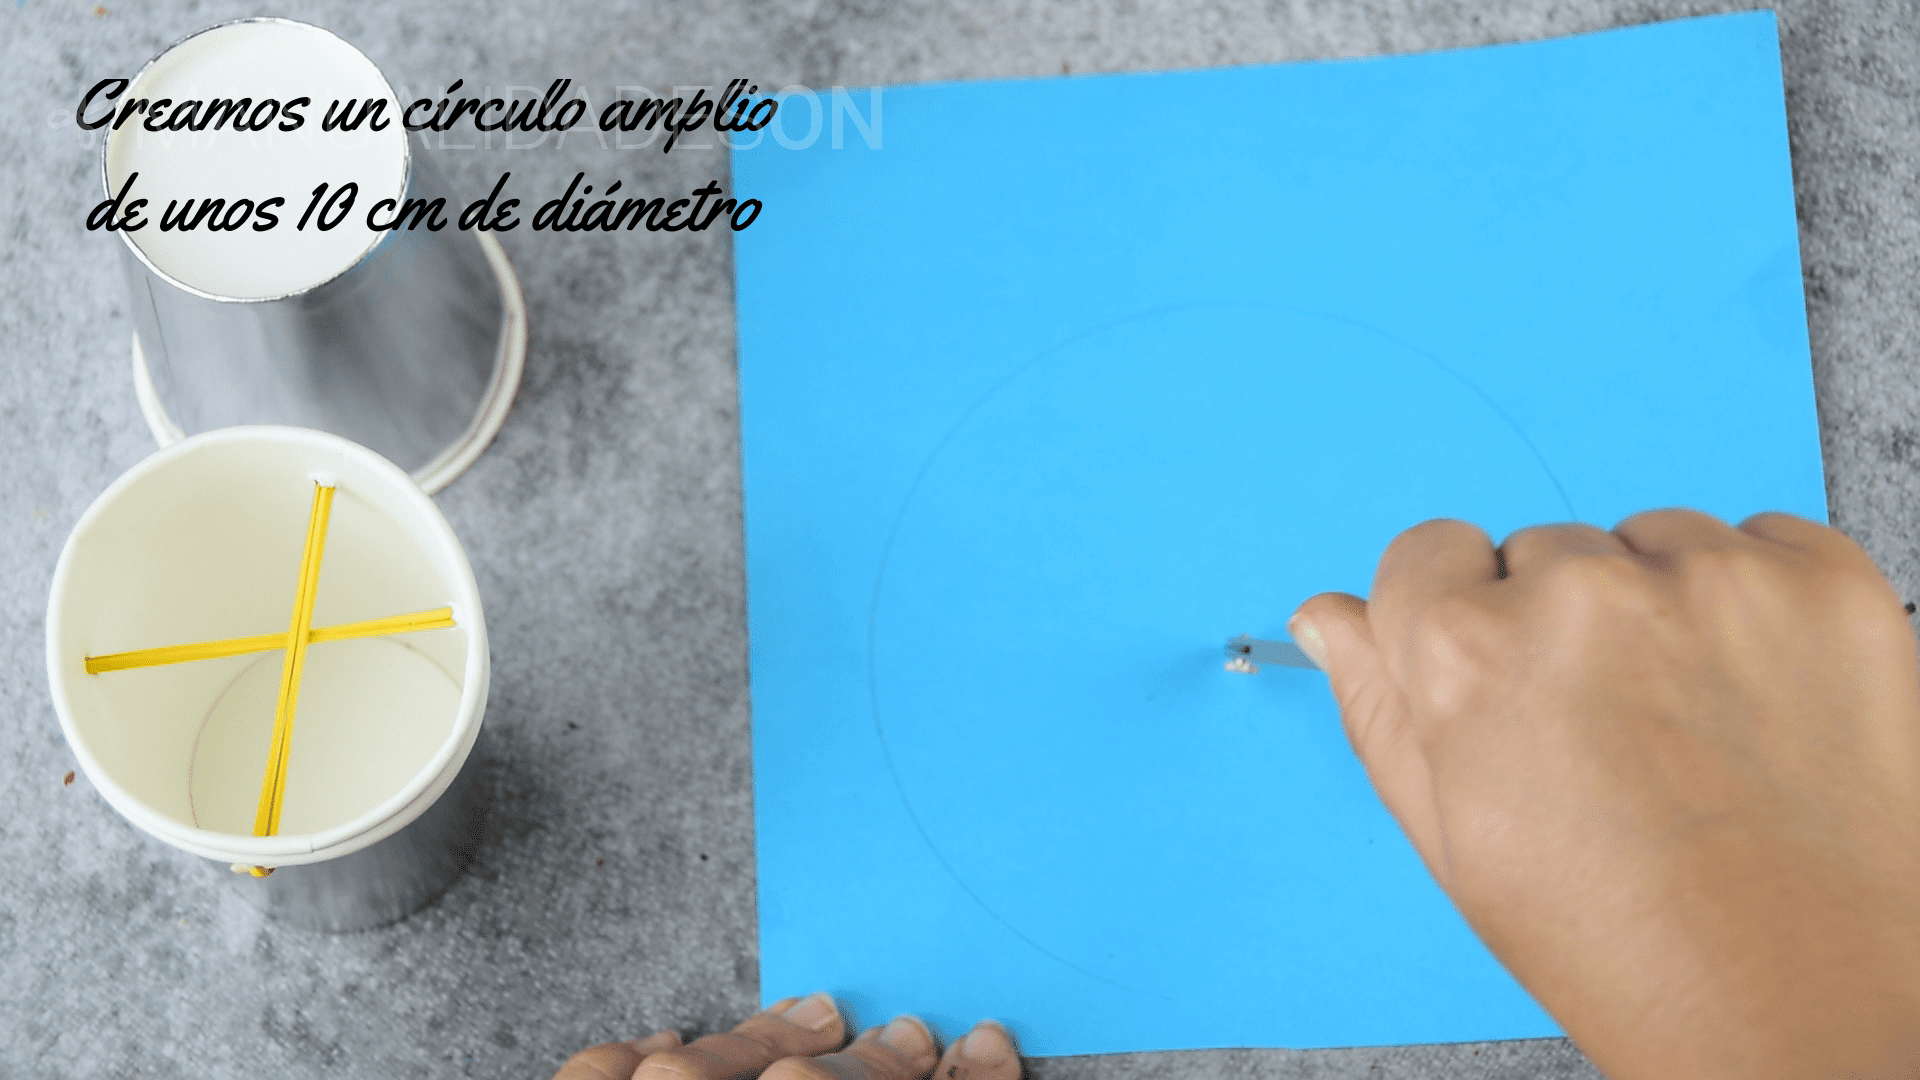
We draw a circle about 10 cm in diameter on a blue card. We cut it out.
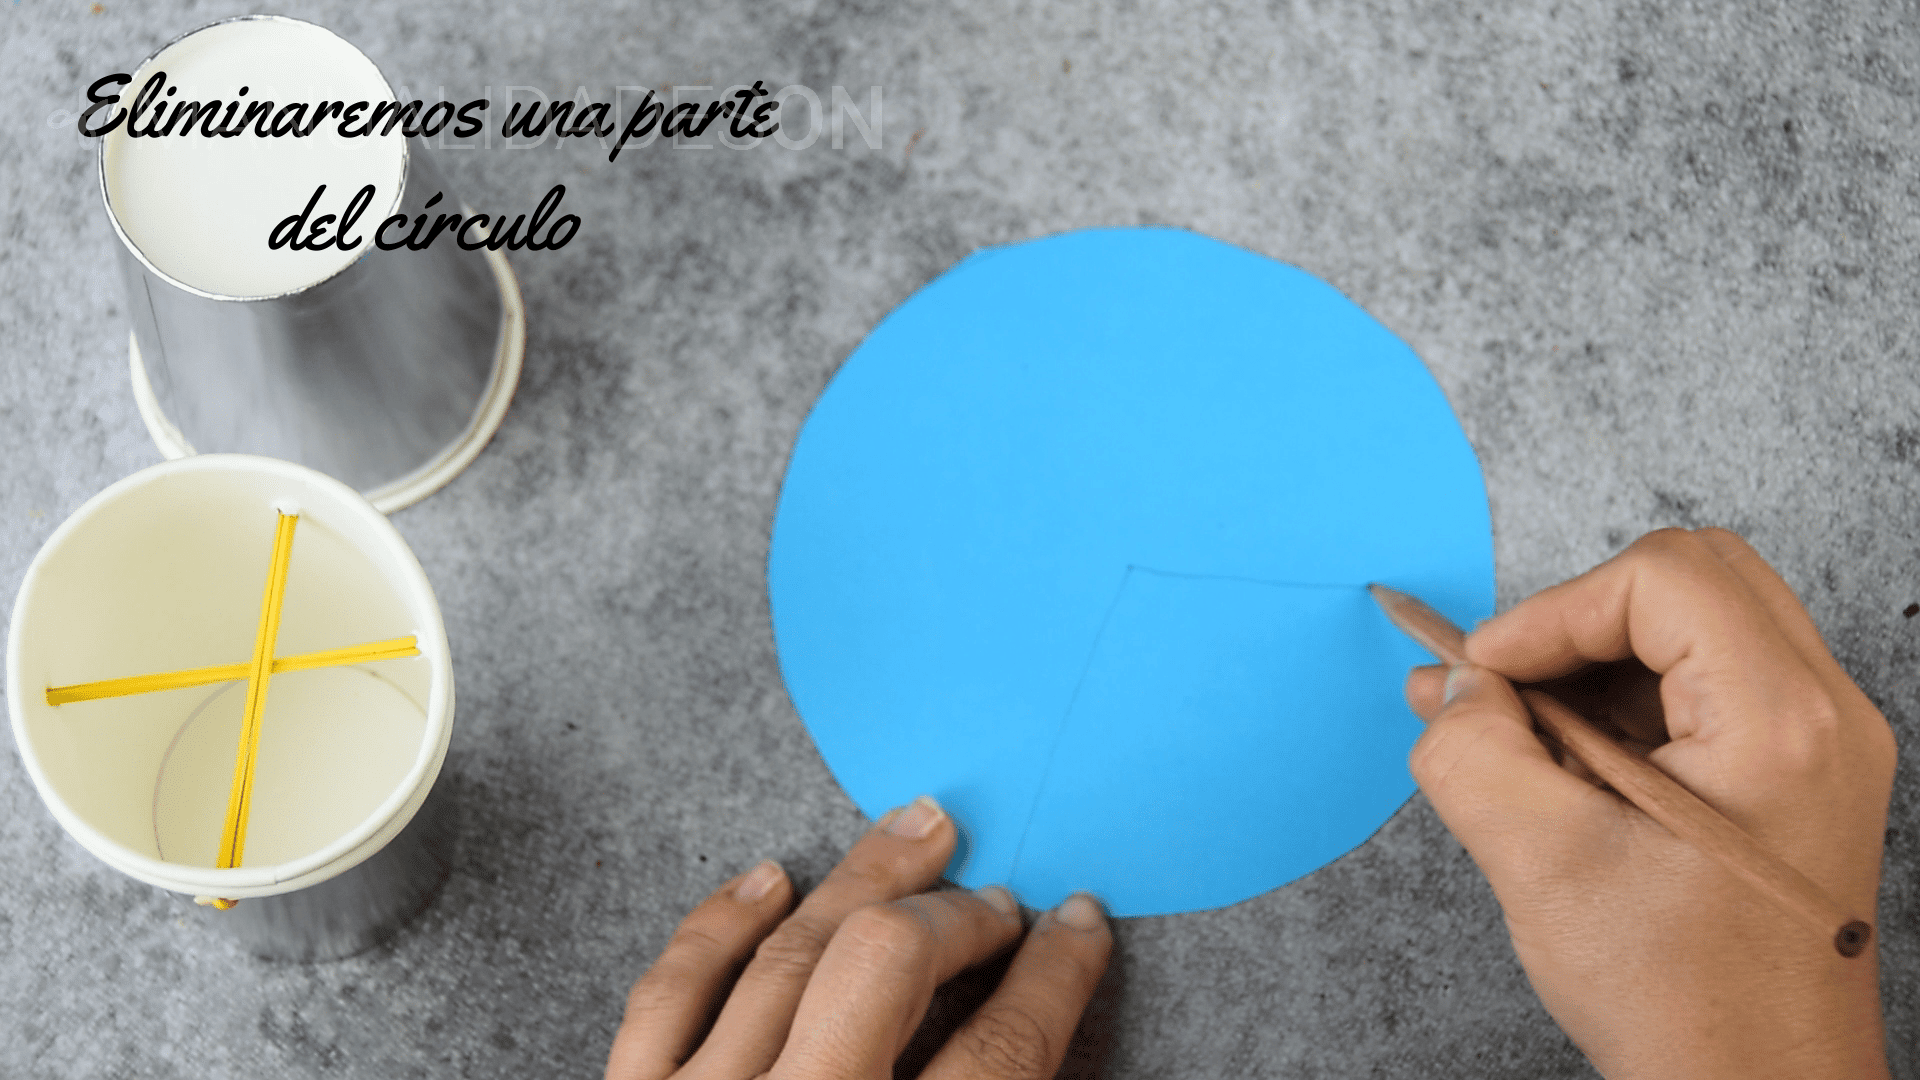
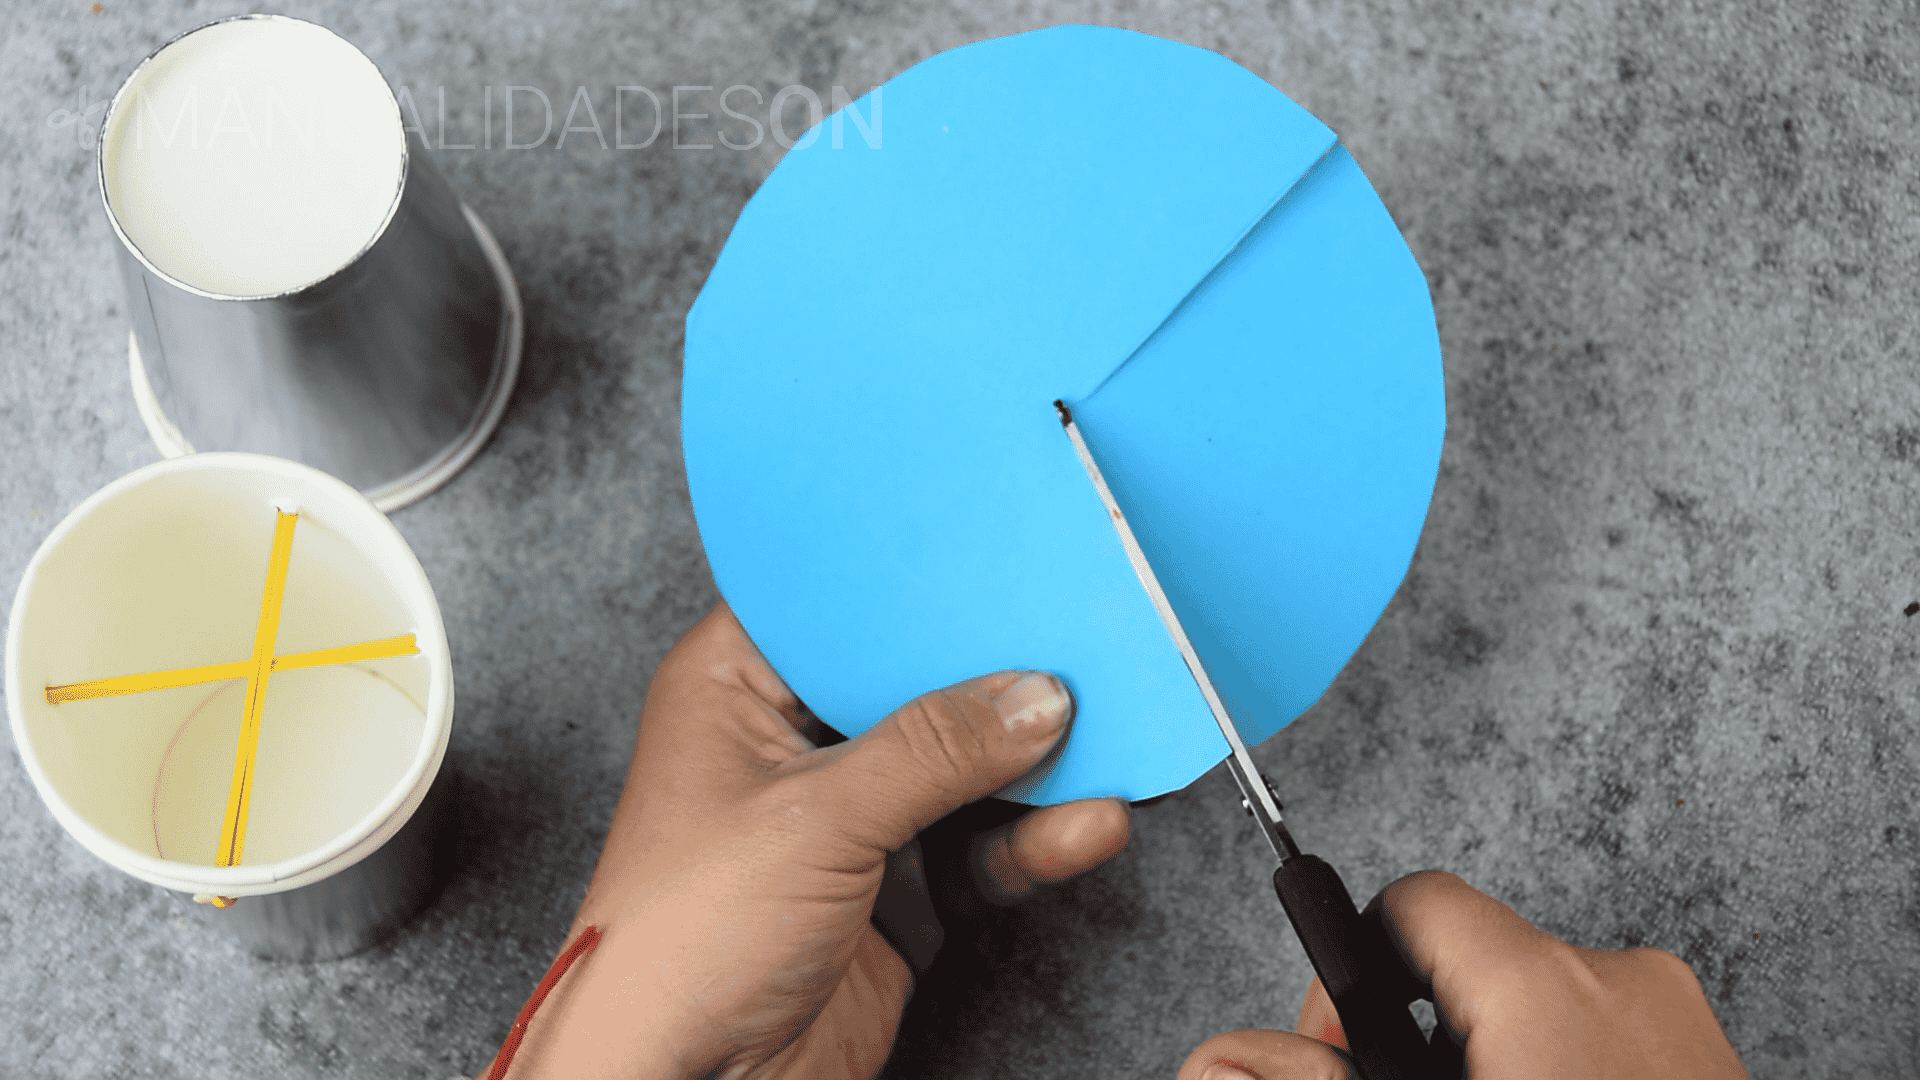
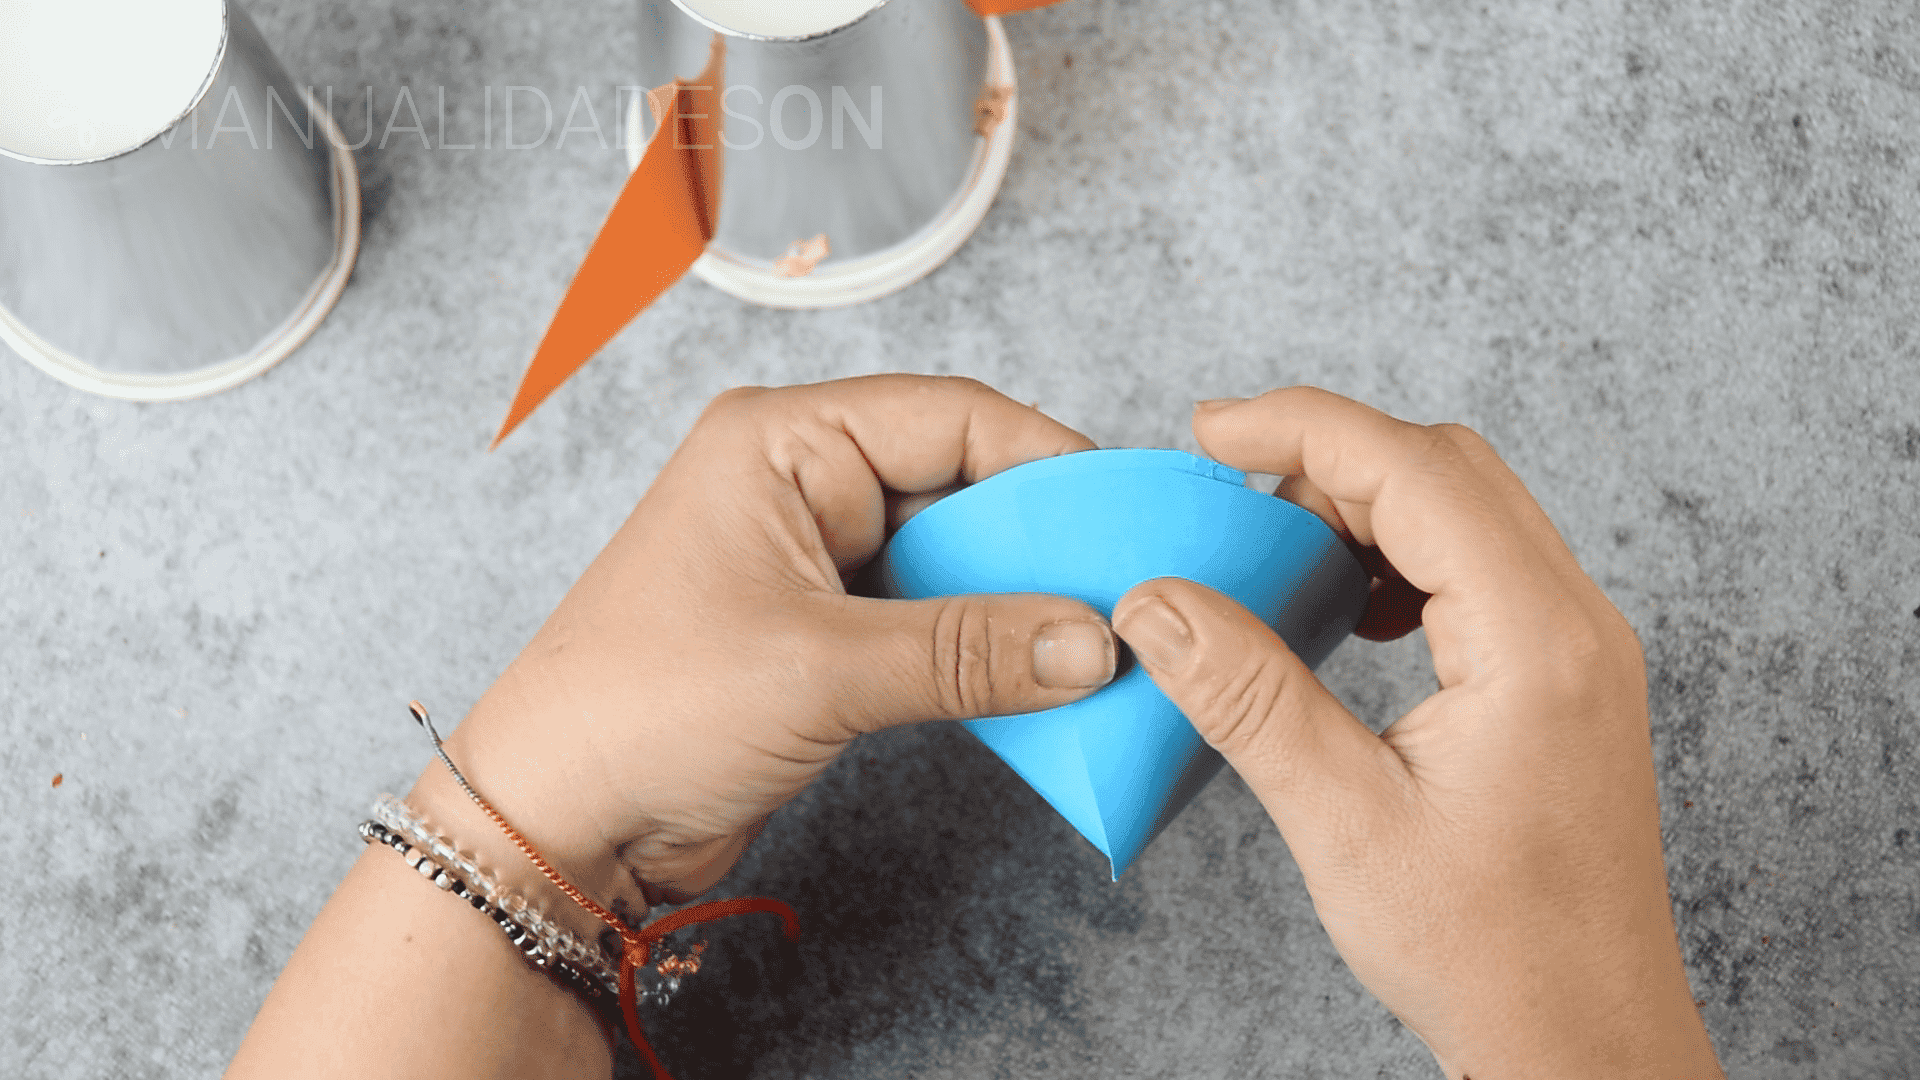
Fourth step:
We cut out one of the parts of the circle, first we draw the part to be cut and then we proceed to remove it. In this way we can create a cone more easily. We will unite and glue the ends of the cone with hot silicone.
Fifth step:
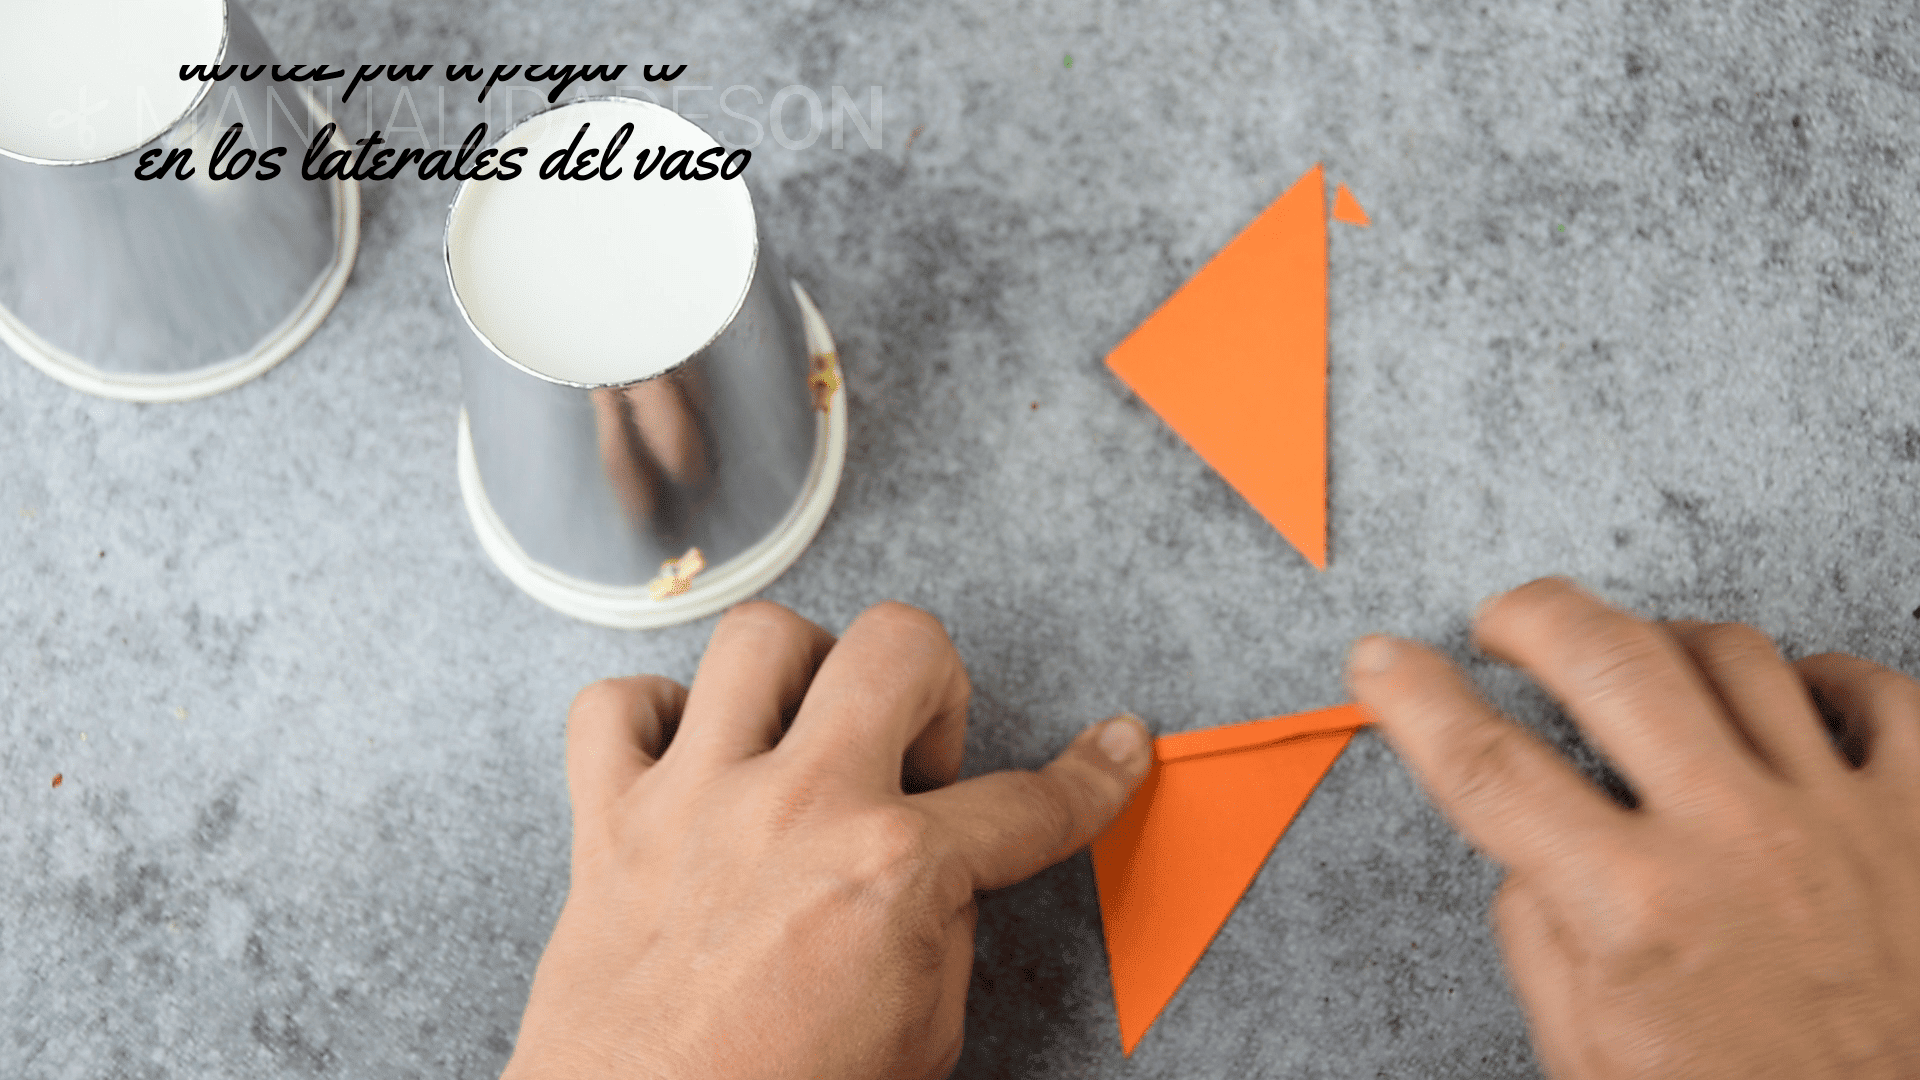
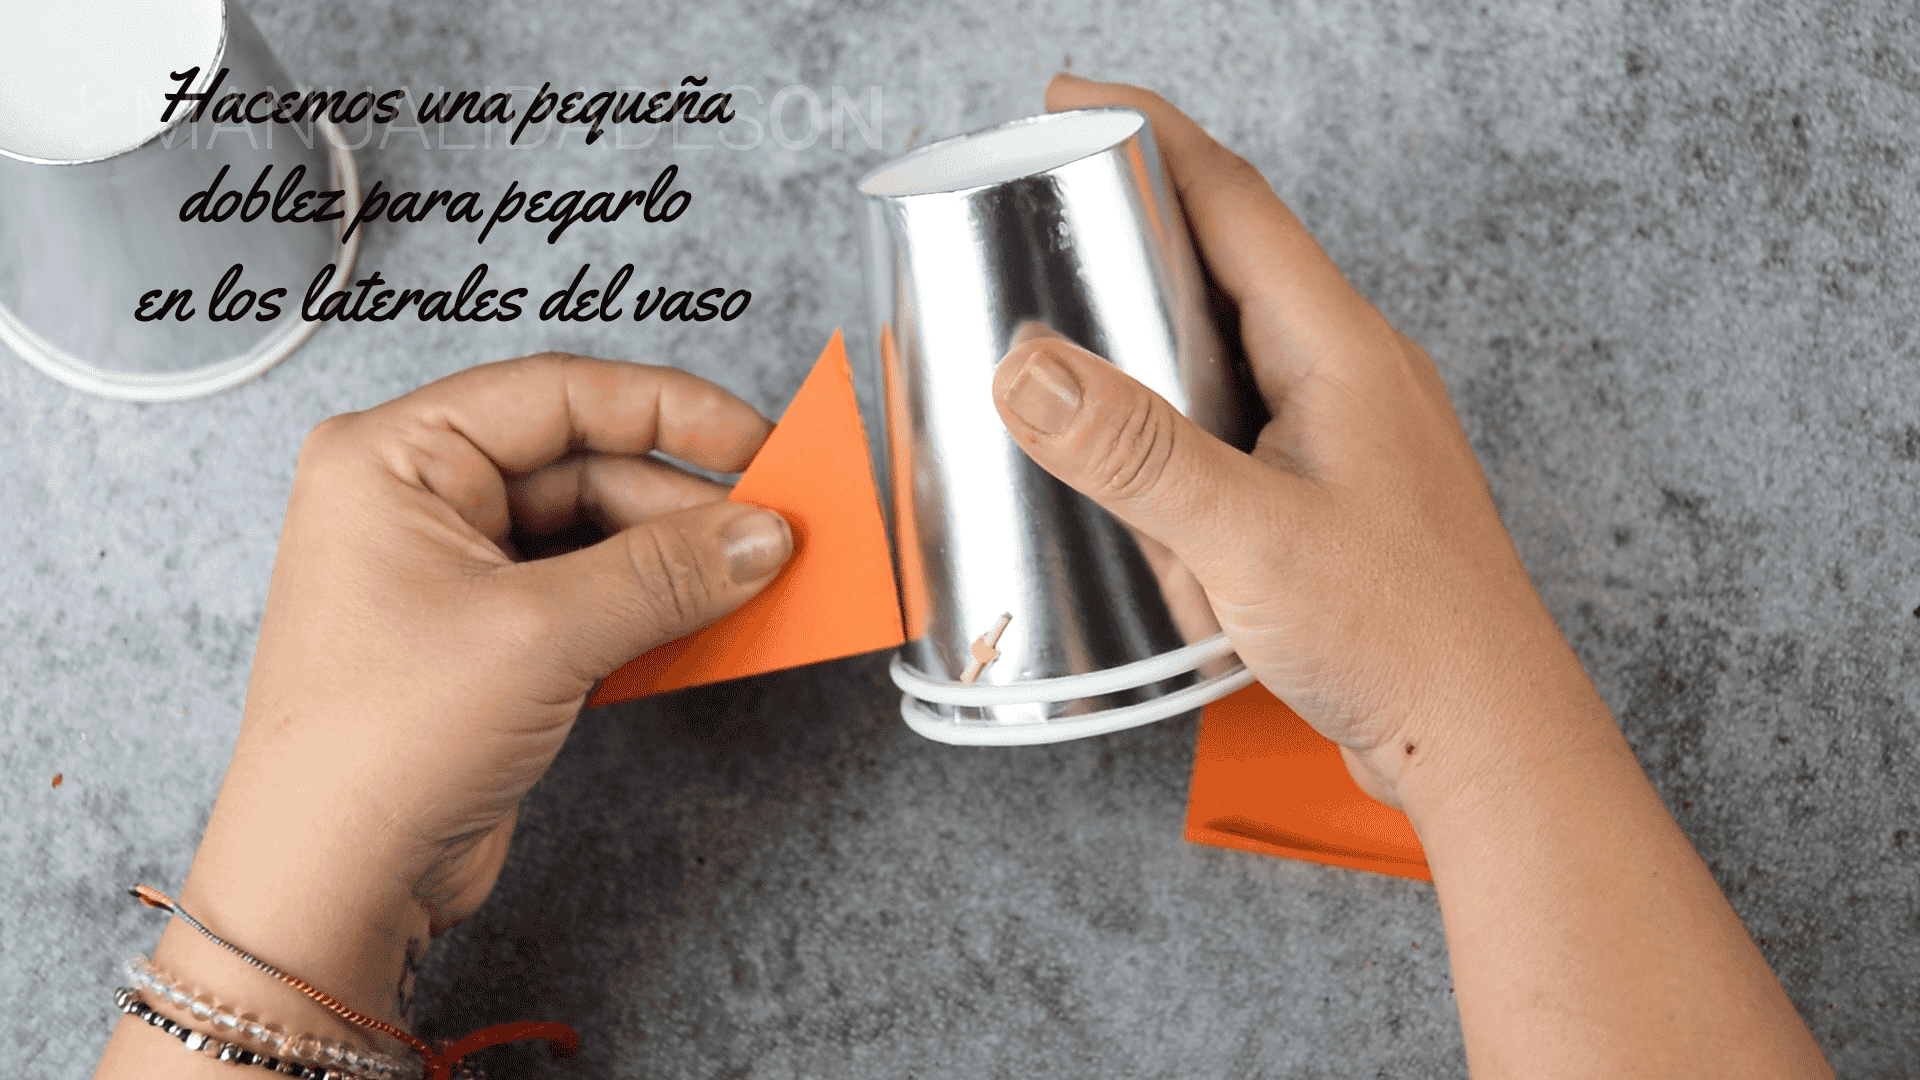
We cut two equal triangles. They are the ones that will make the wings on the sides of the rocket. Then we will fold one of the sides to be able to glue the structures on the sides.
Step Six:
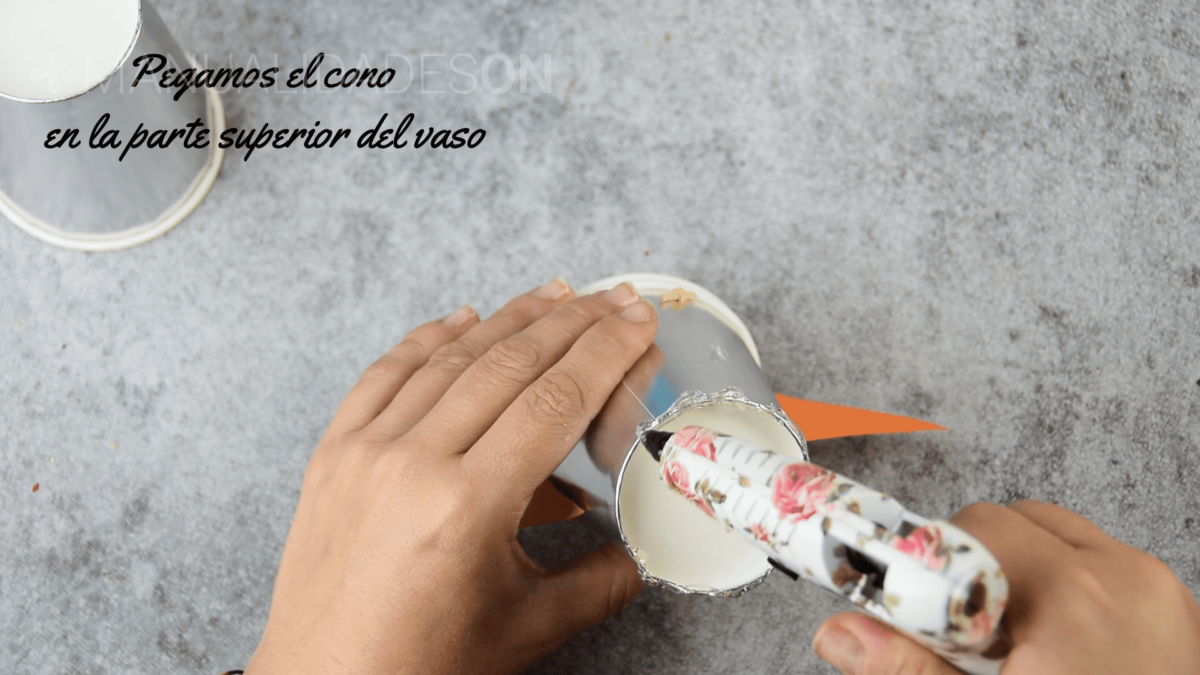
We put hot silicone around the glass top and we will quickly place the cone that we have formed.
Seventh step:
We cut out a red rectangle and glue it to the front of the rocket. Then we will add two star shaped stickers We will place the rocket structure on top of the other glass. By putting pressure on the strings elastic we will be able to observe how the rocket flies.

