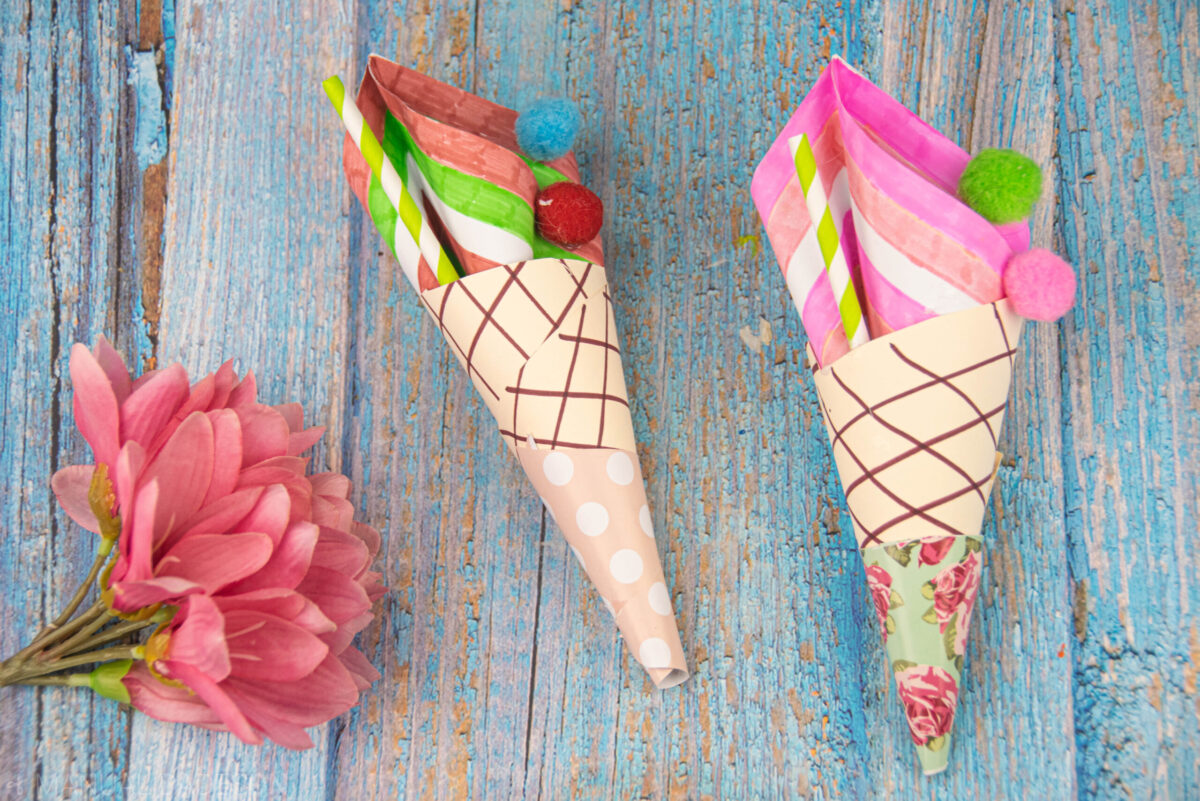
This summer you can recreate a beautiful moment with these fun ice creams made of paper and cardboard. You will love being able to spend a nice moment with the children and be able to do this craft where you also have to draw.
In its steps you can see how hot silicone is used, but it can always be substituted with normal glue so that children do not get hurt with it. Follow our steps and watch our demo videoYou will love how easy it is to make.
If you want to know more about other similar crafts, enter these fun ice cream magnets
The materials that I have used for these two ice creams:
- A beige A4 size cardboard.
- A cardboard with vintage drawings.
- Two white sheets.
- Colored markers: dark brown, light brown, green, dark pink and light pink.
- A decorative cardboard straw.
- 4 large pom poms in different colours.
- Hot silicone and his gun.
- Scissors.
- Ruler.
- Pencil.
- Compass.
You can see this craft step by step in the following video:
First step:
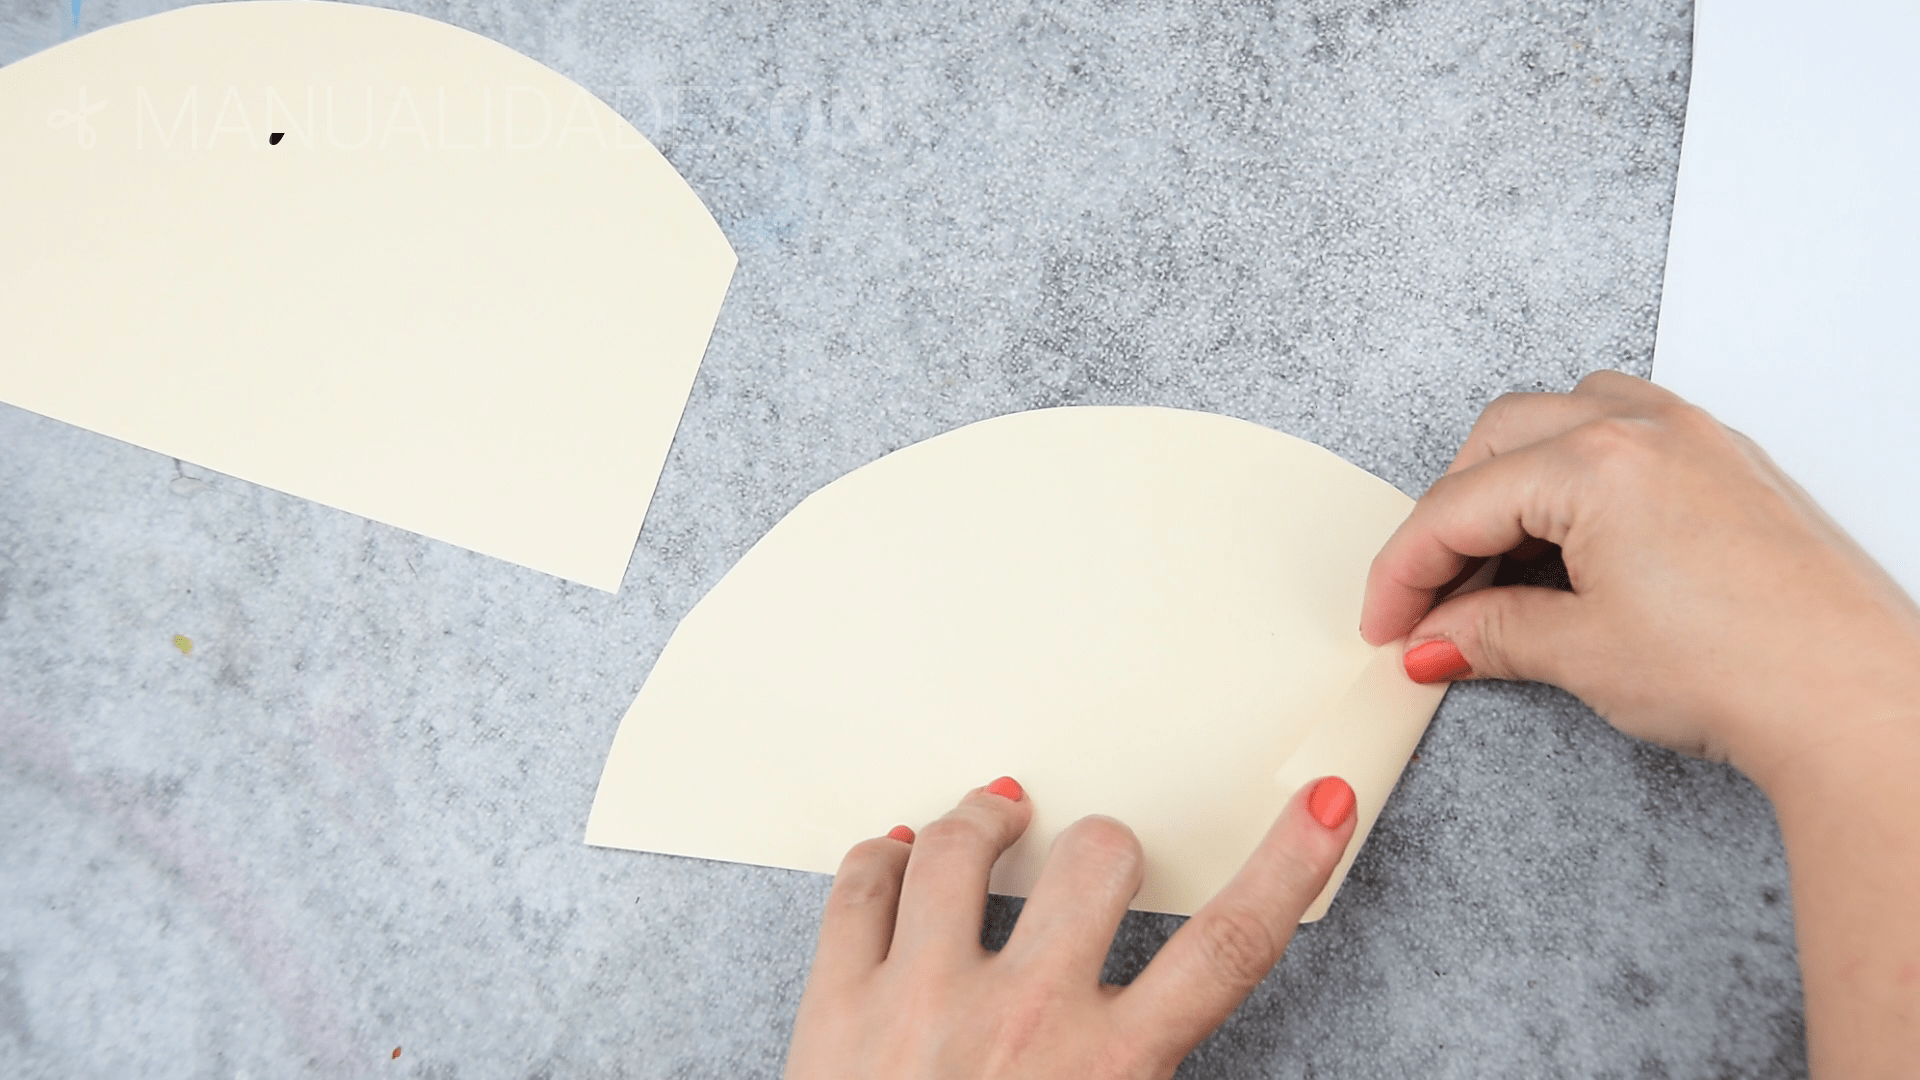
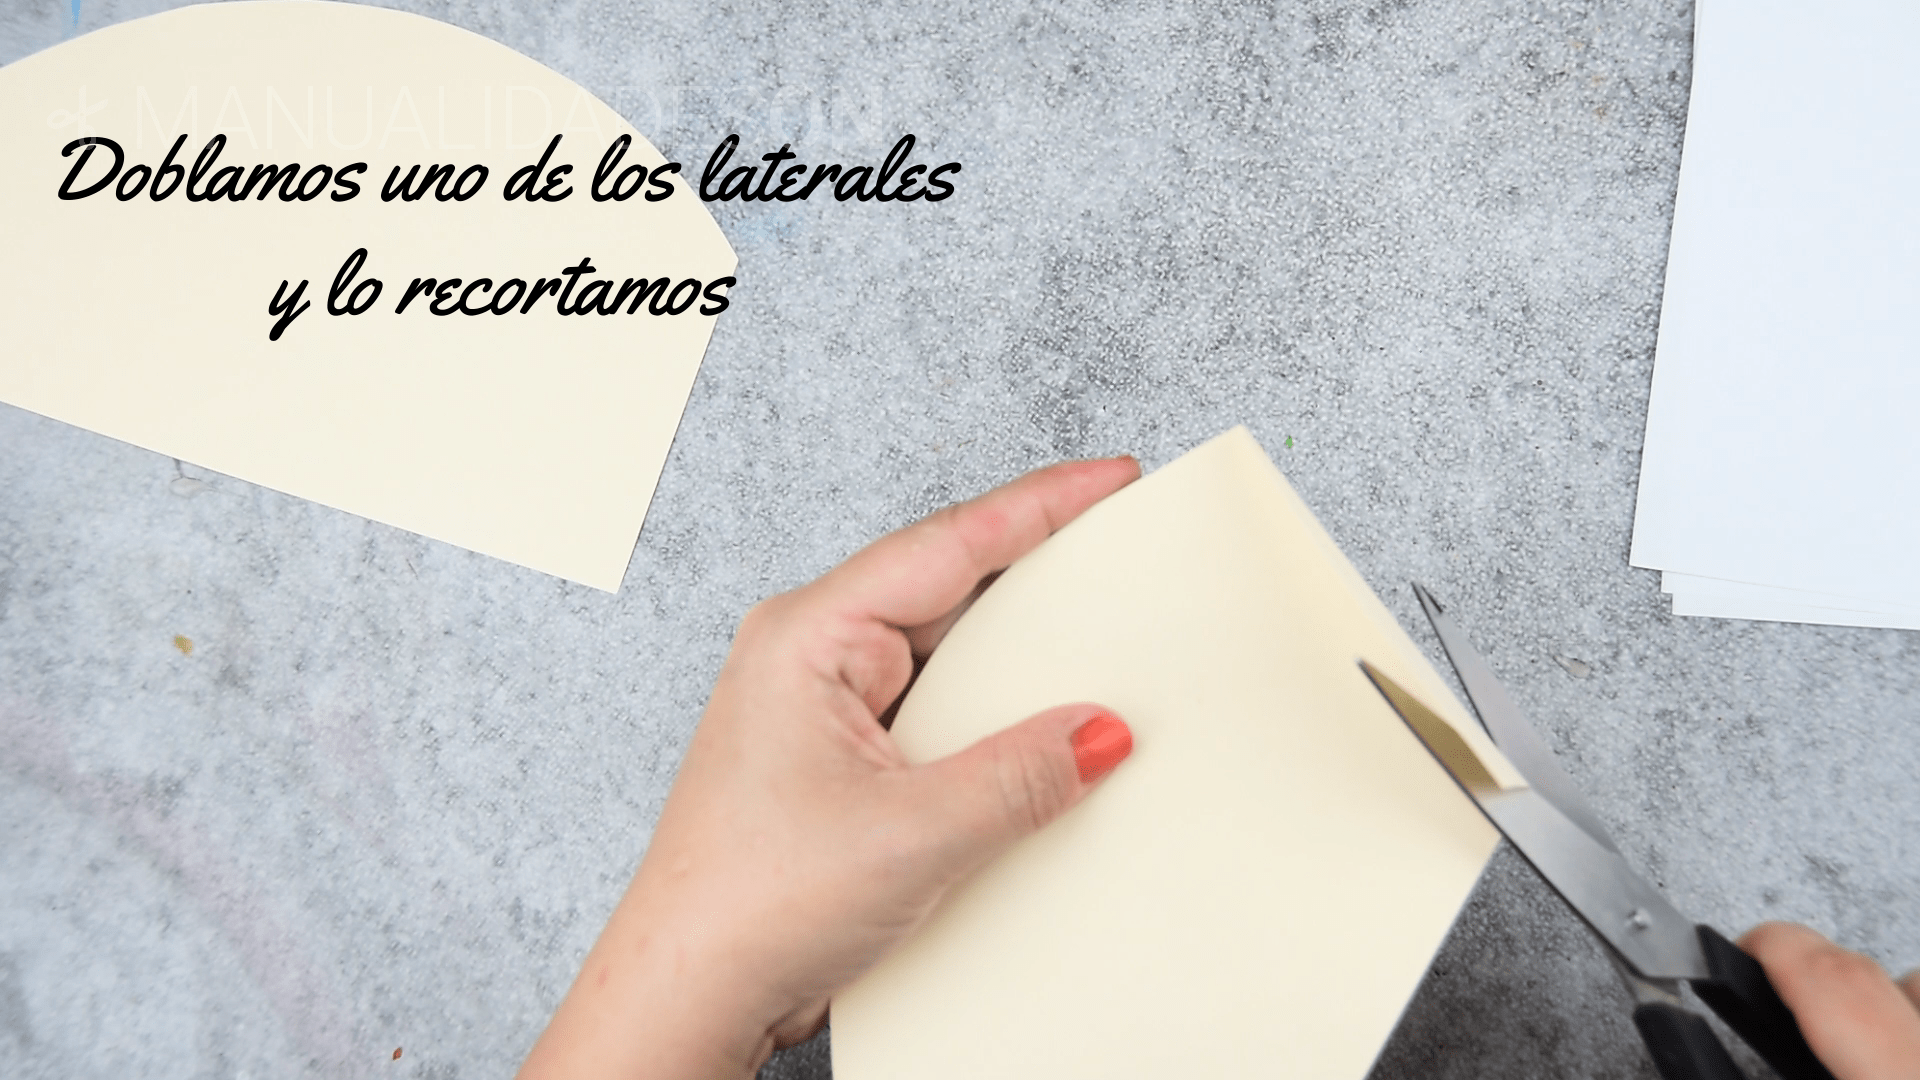
With the compass we make a half circle. You have to make it big and if you don't take all the paper you can choose a part. Then we will fold one side and cut it out so that it adopts the shape of a cone.

Second step:
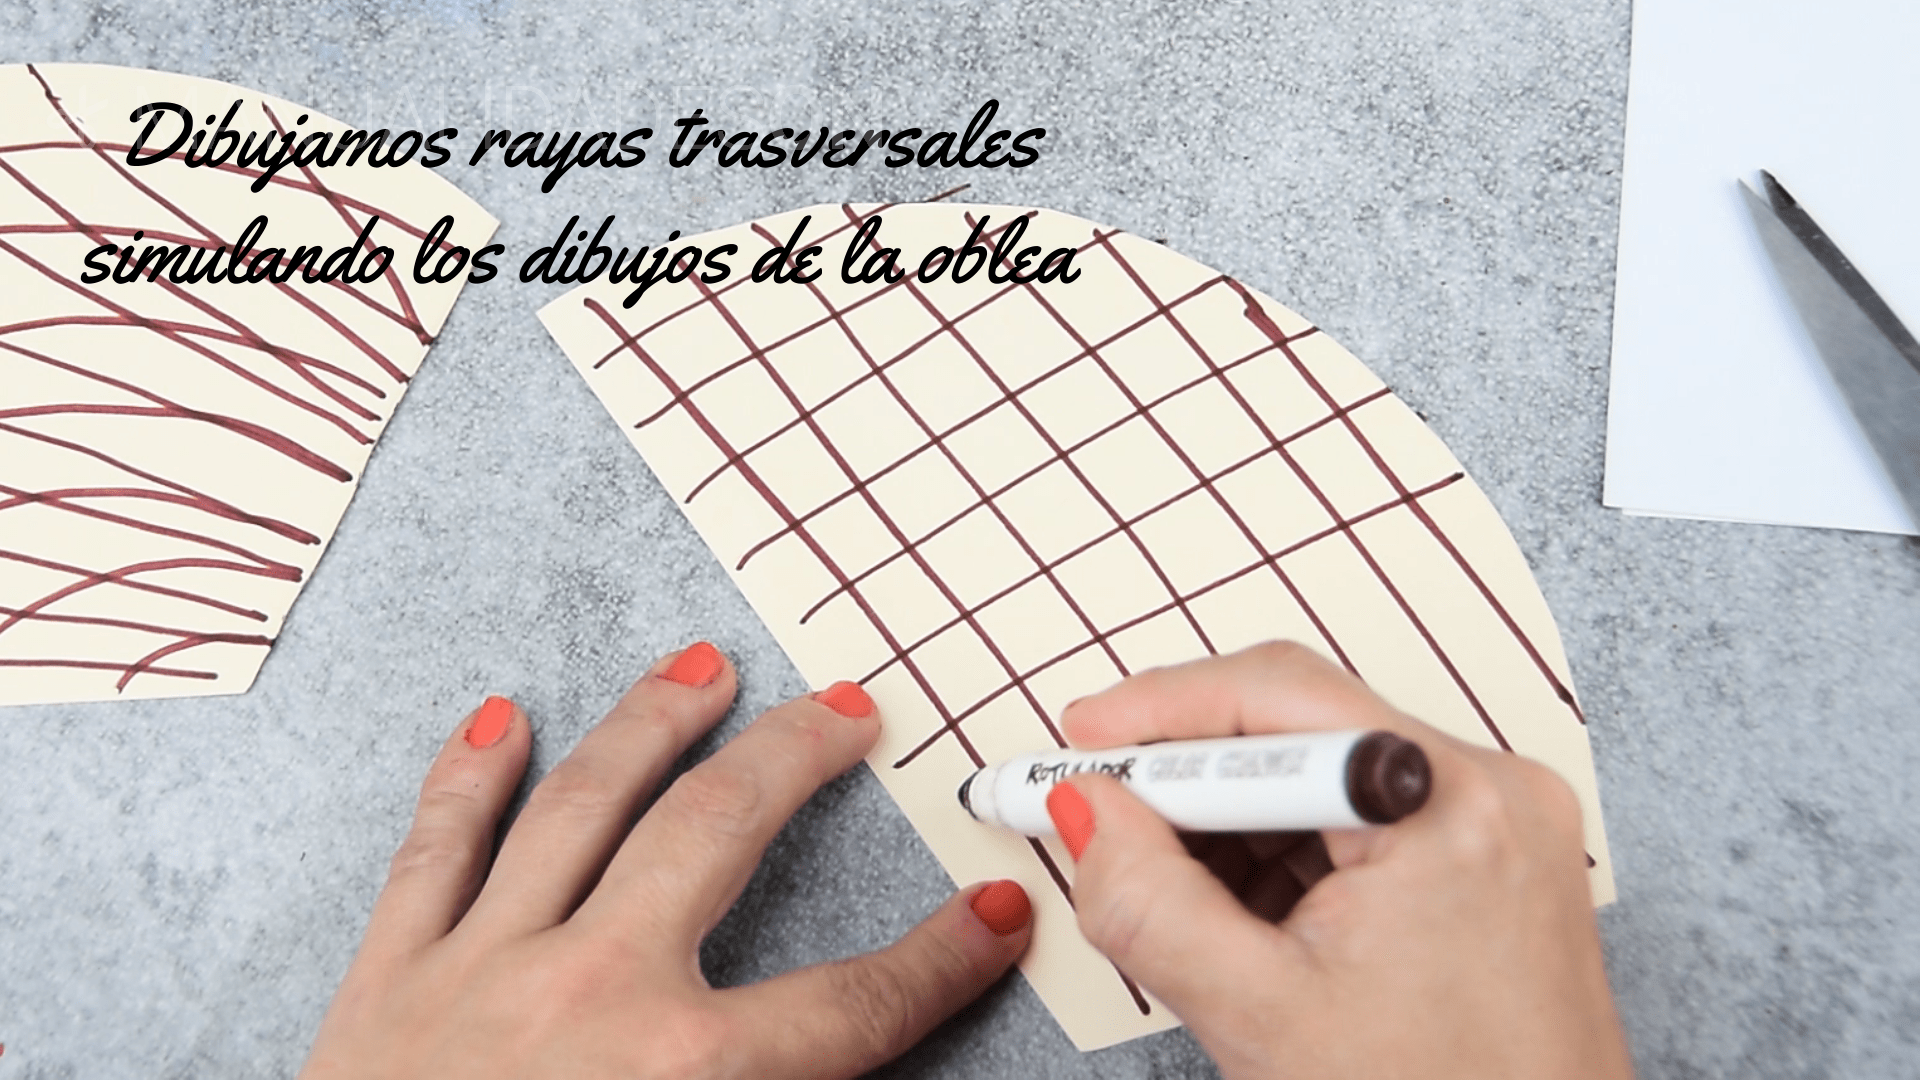
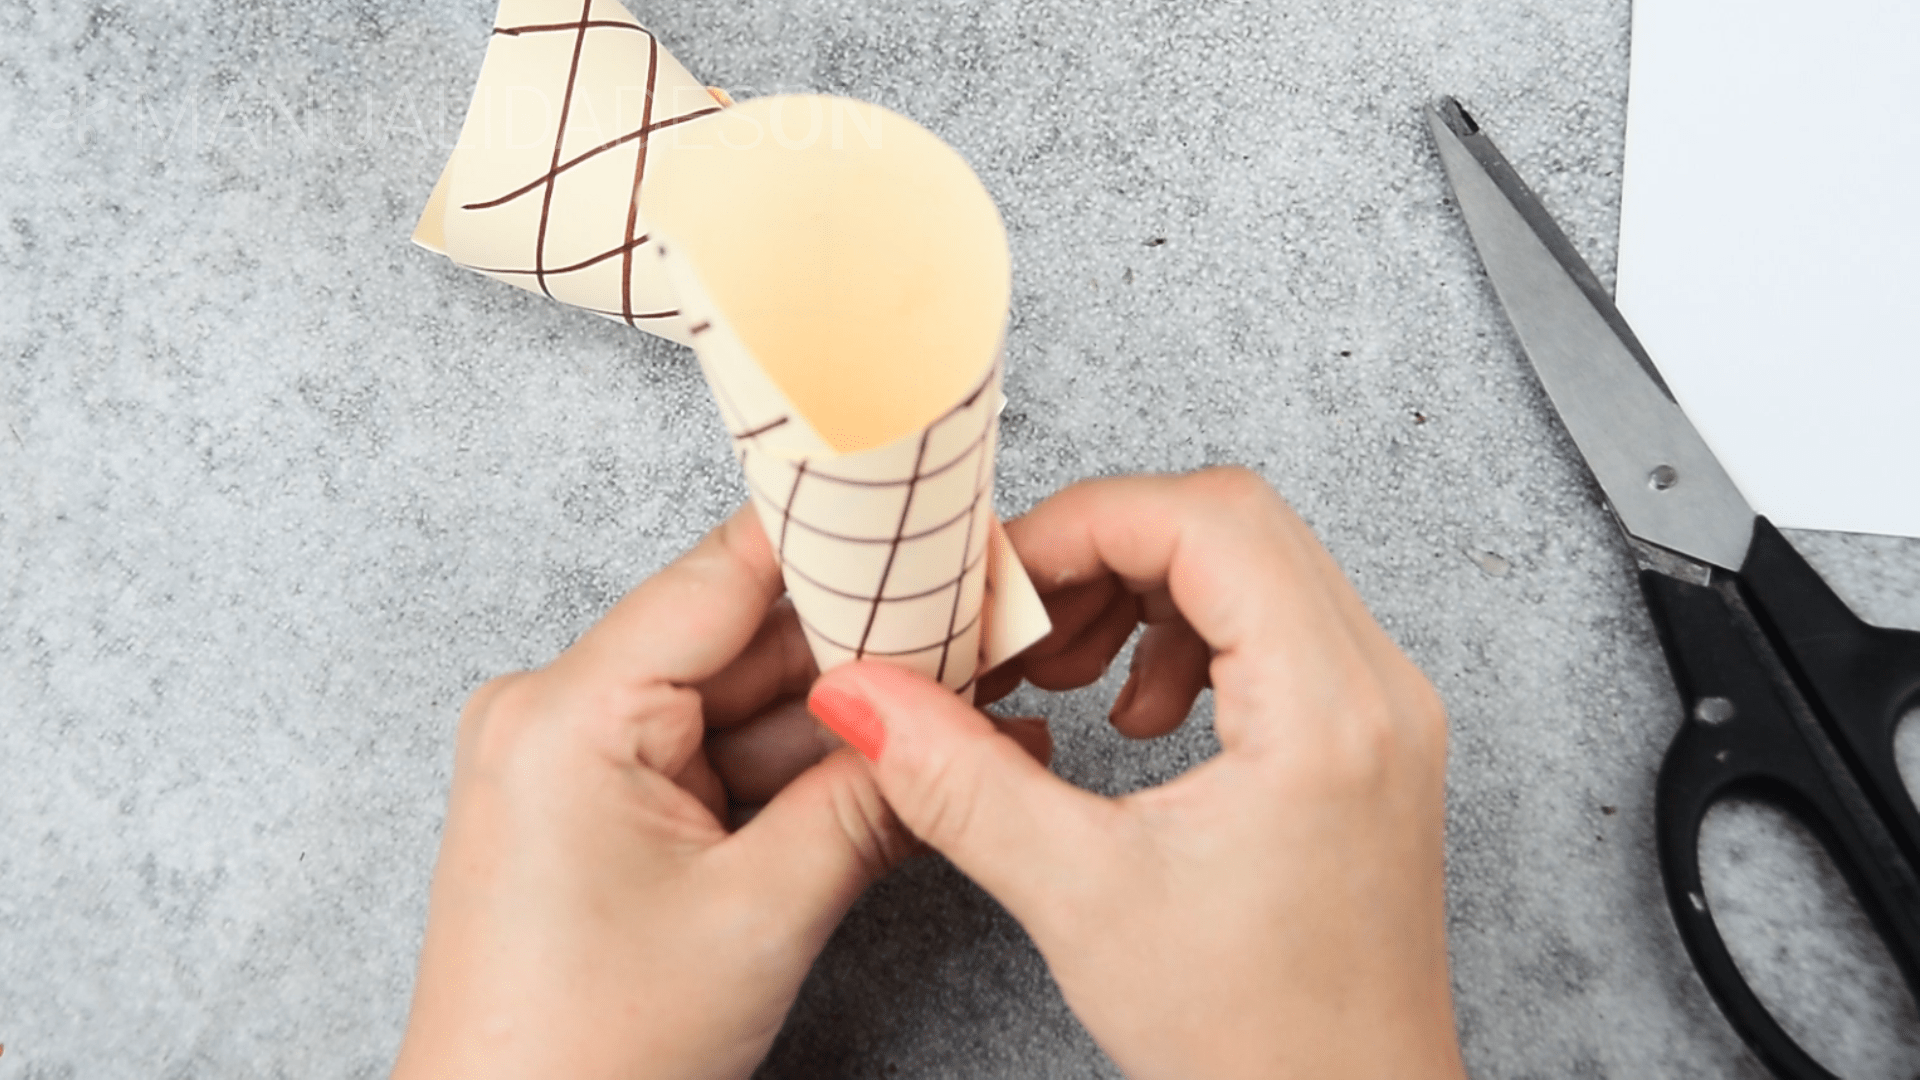
With the dark brown marker we paint transverse lines simulating the squares of the wafer. we will bend doing the shape of the cone of the ice cream wafer and stick it with the hot silicone. If you do it with another glue you will have to hold the structure until it dries. Once the cone is formed, we will see if there is any part left over. If so, we will trim it with scissors.

Third step:
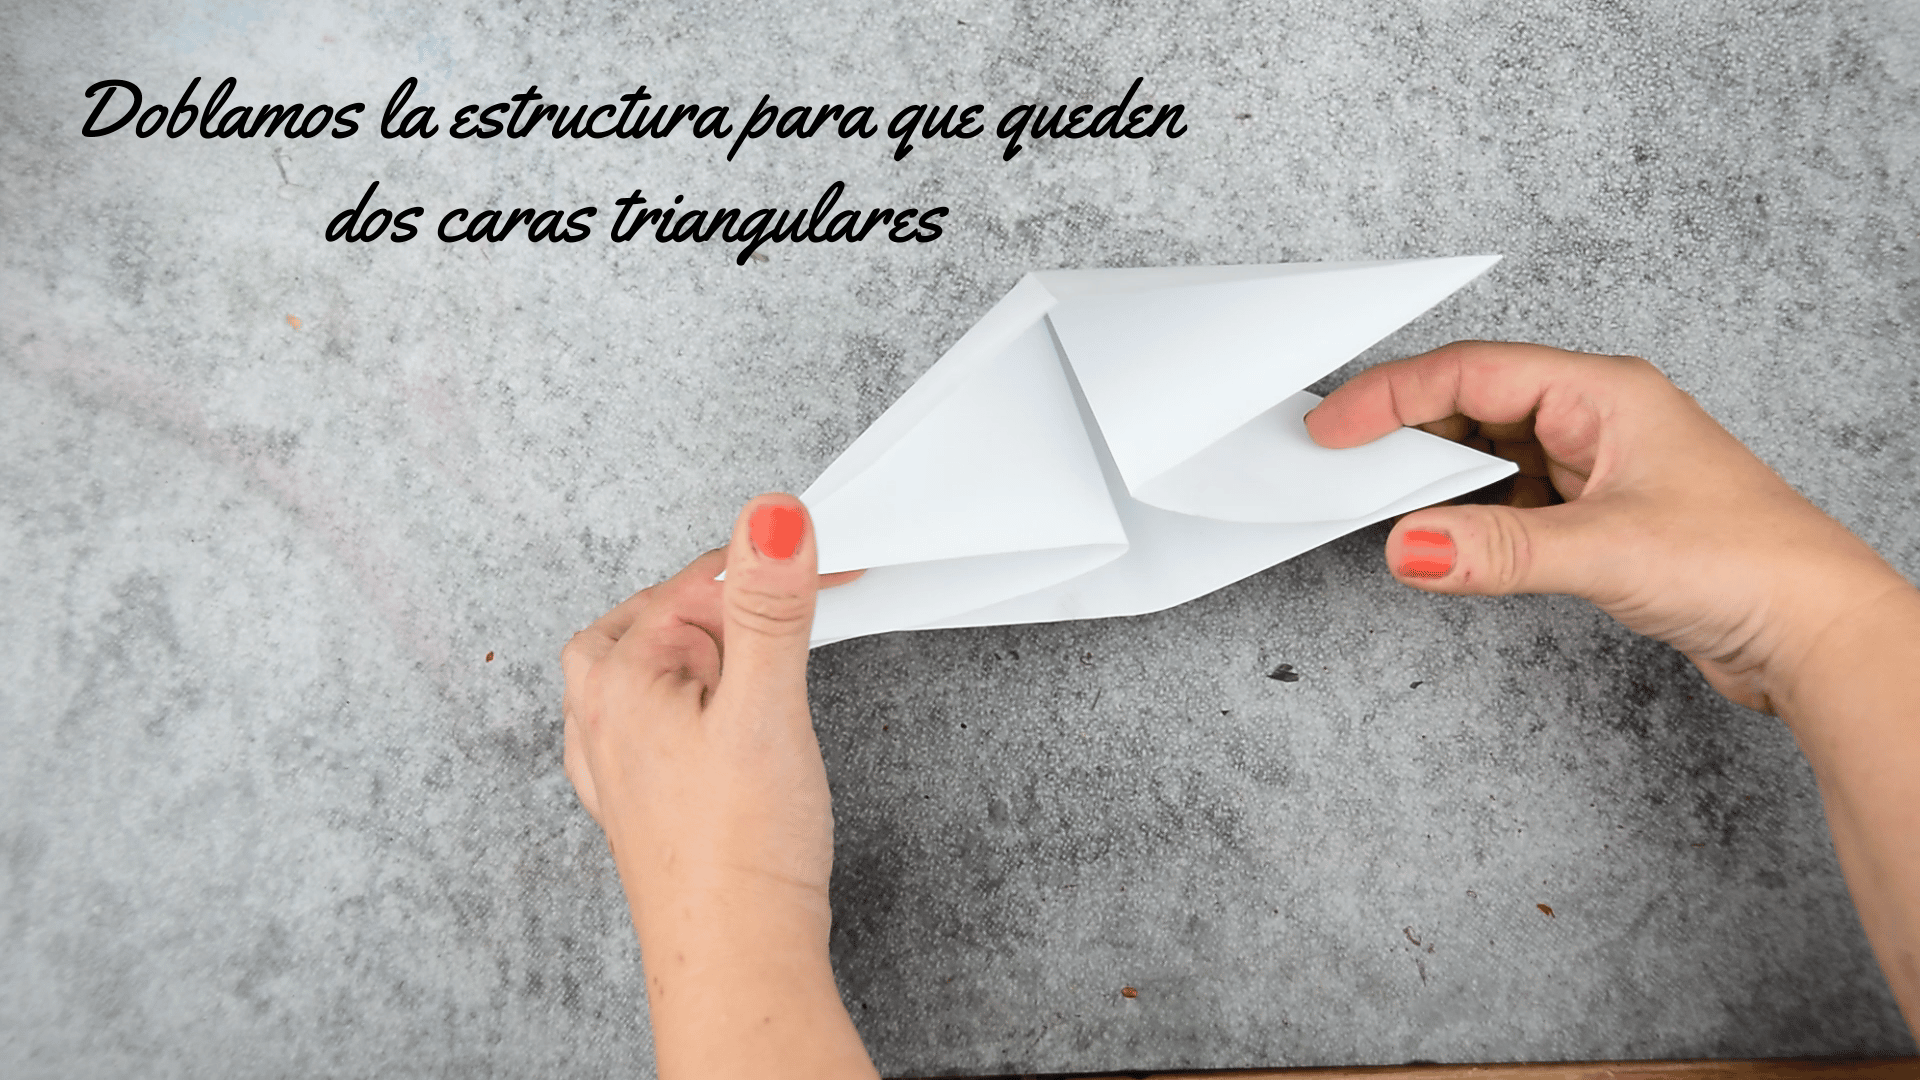
We make a perfect square from a white sheet of paper. We fold in the form of X and in the form of +. Then we will try to fold it so that it adopts a structure where two triangular faces are formed.
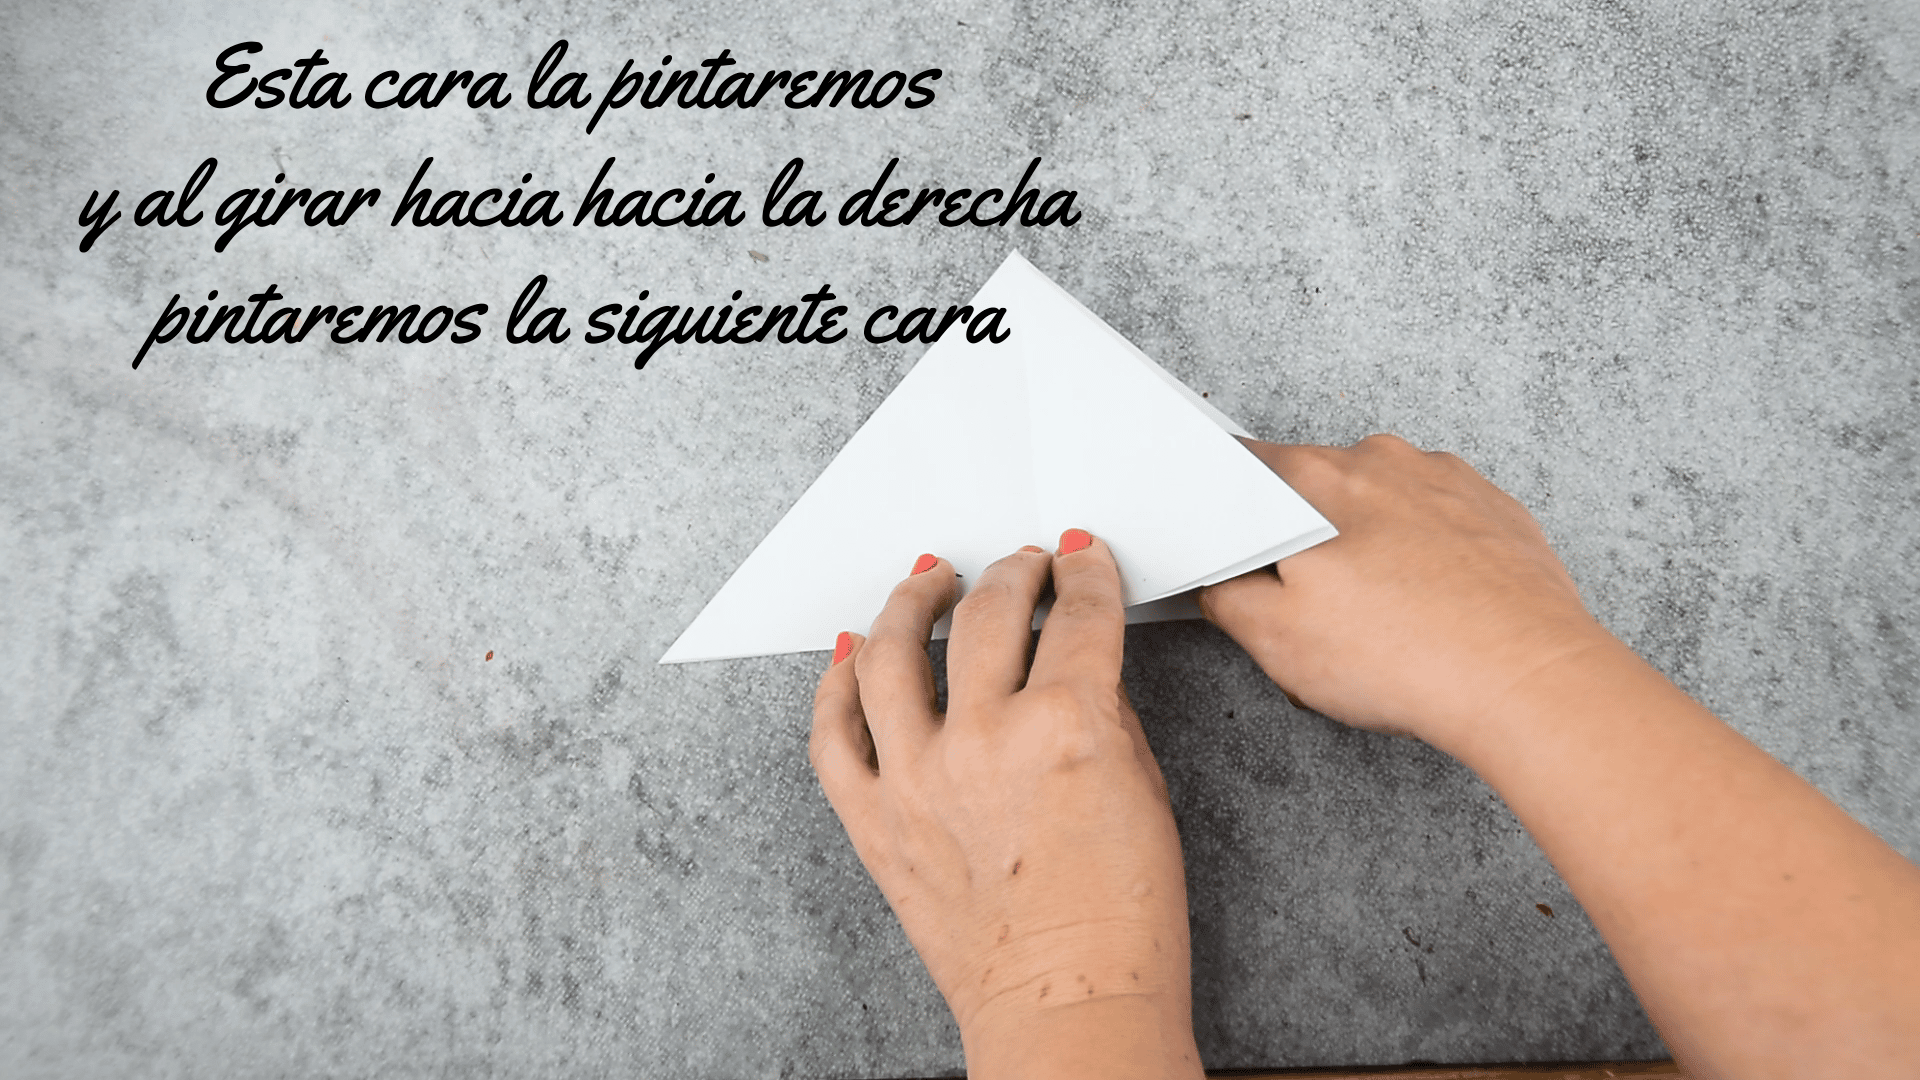
Fourth step:
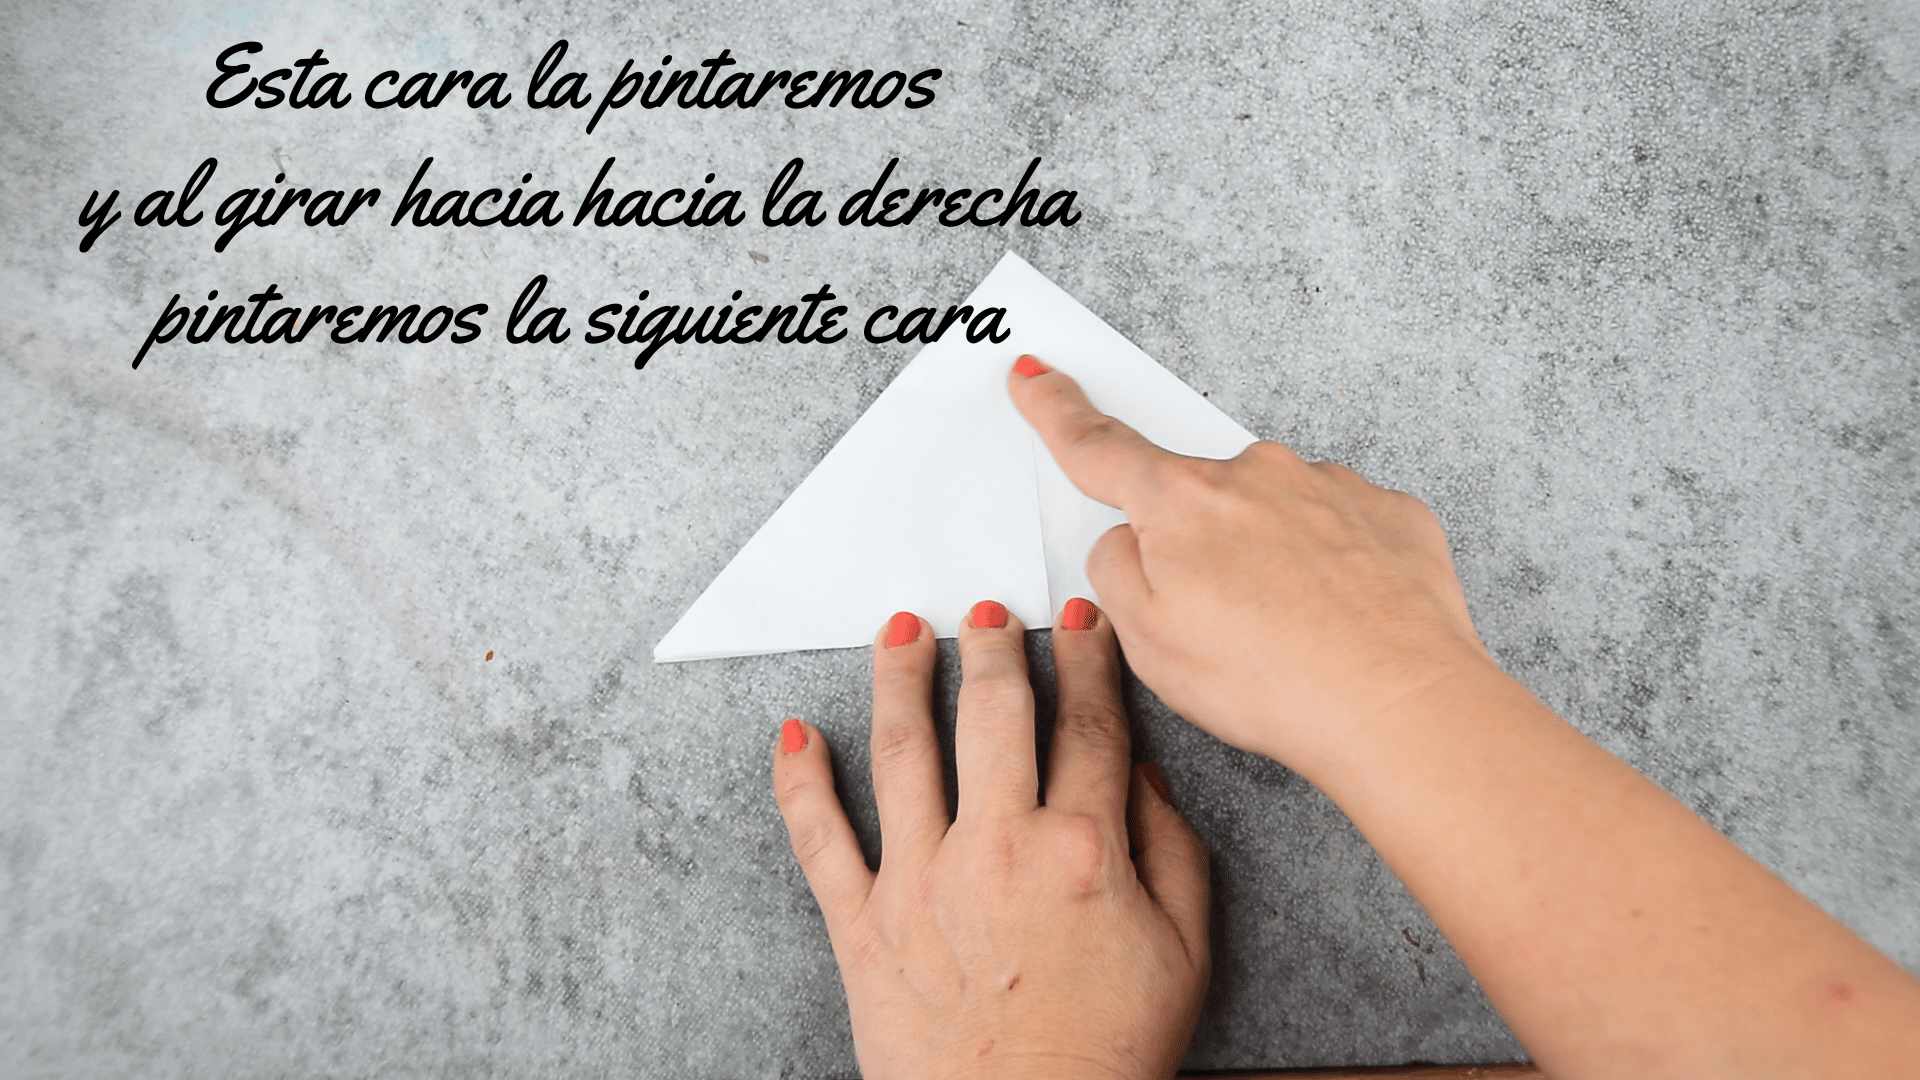
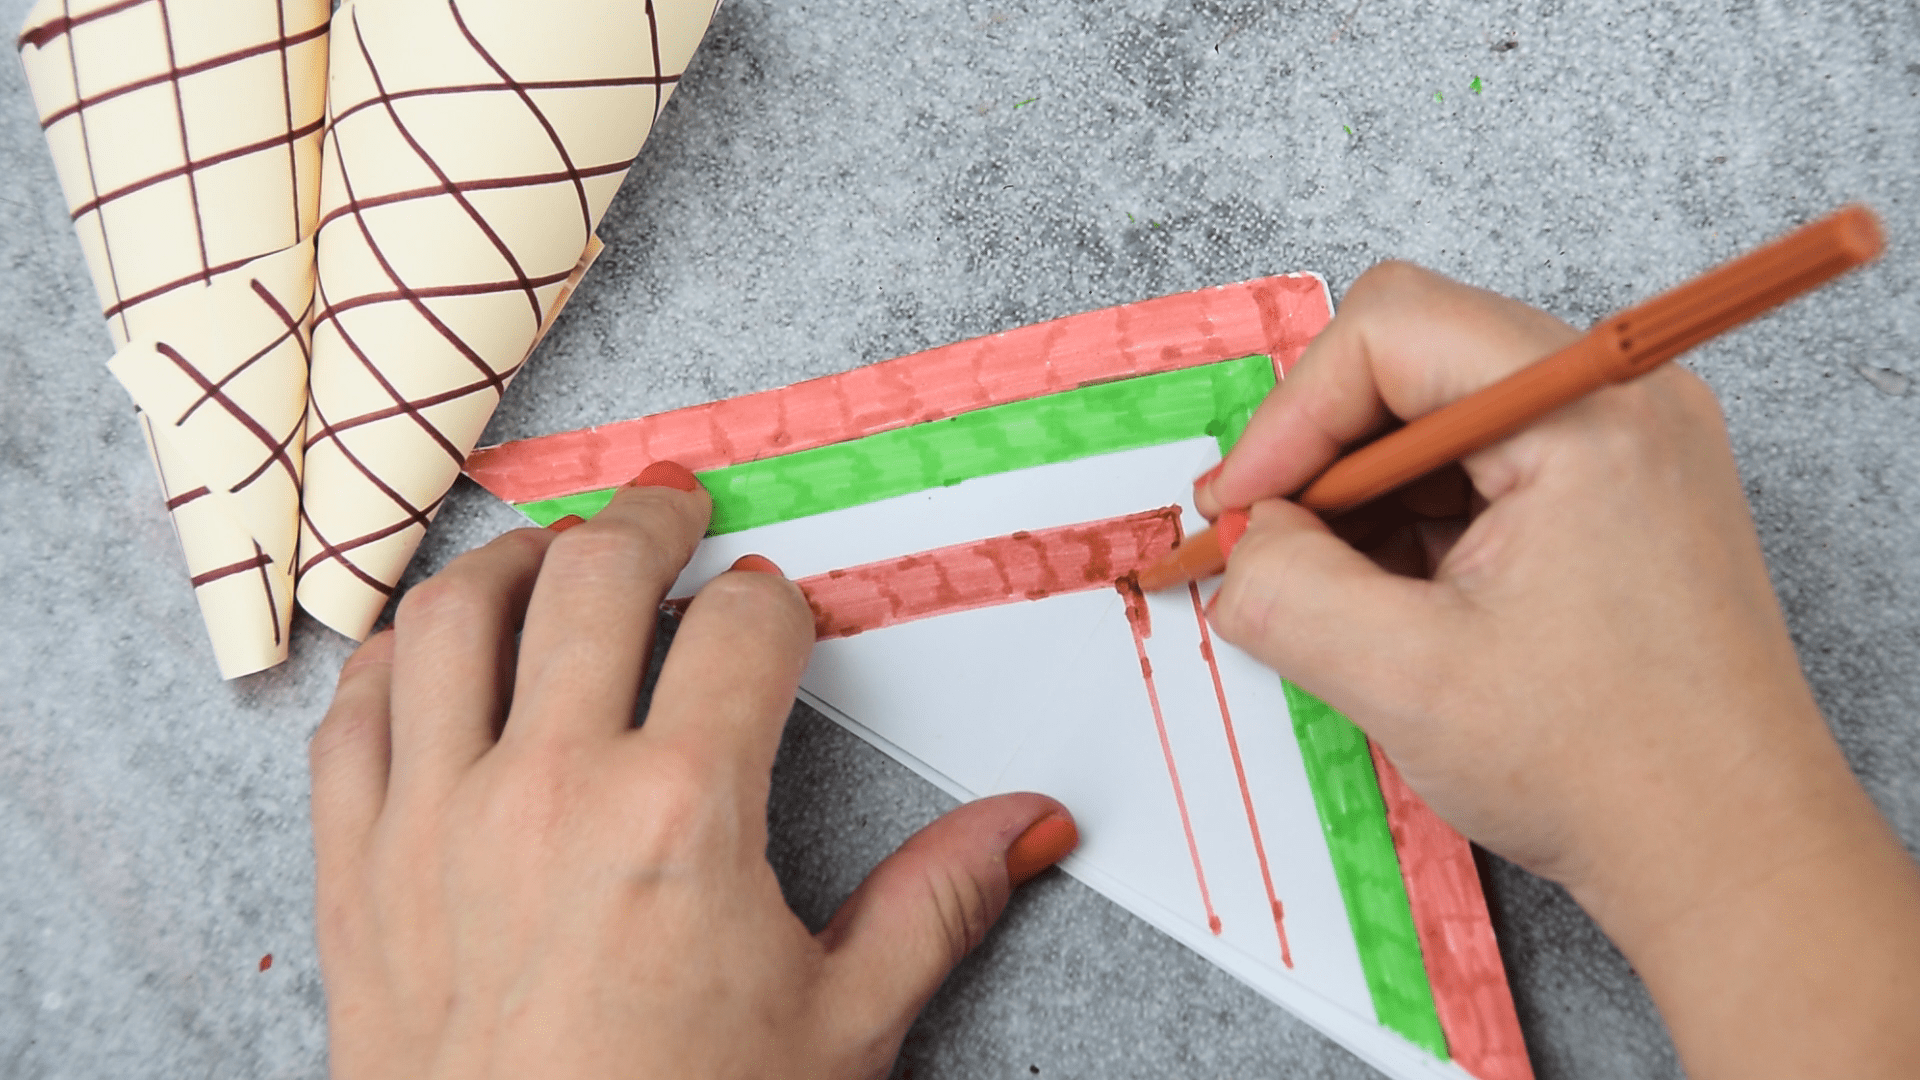
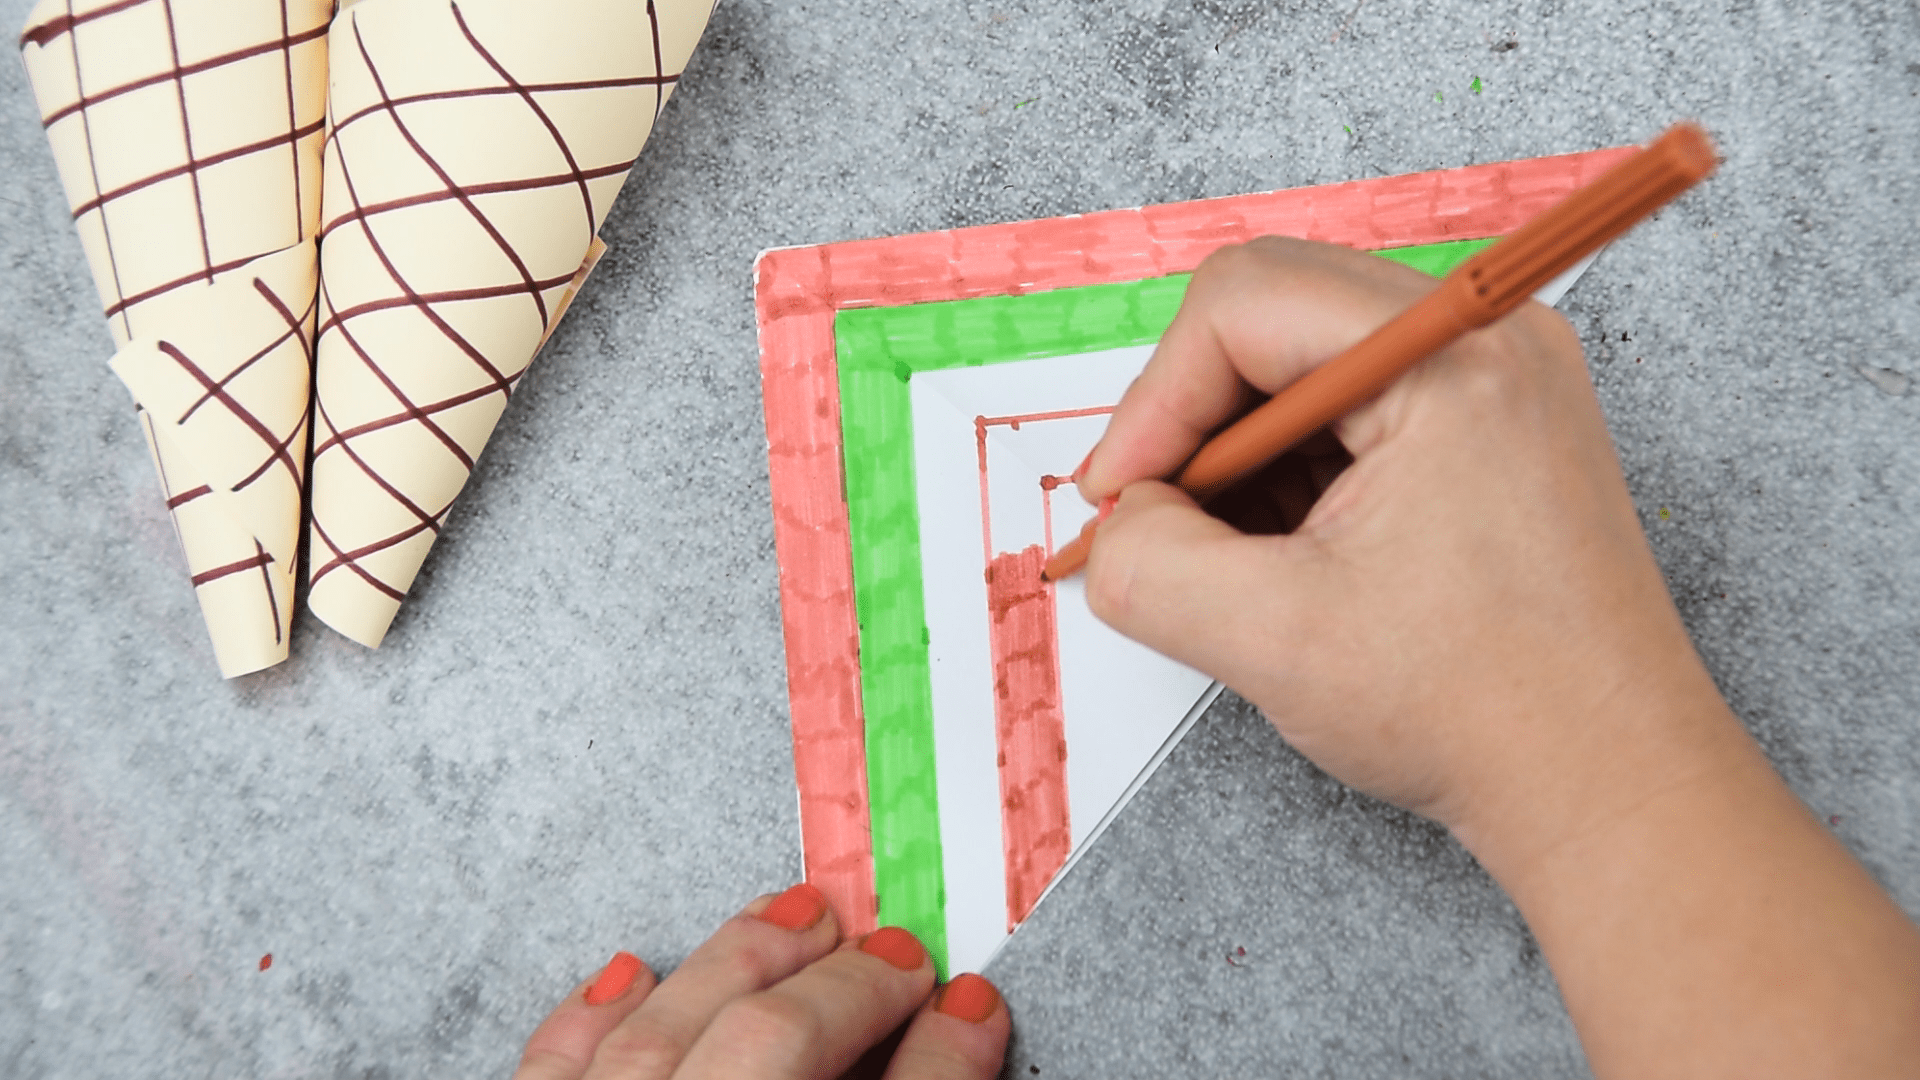
In one of the front faces that have a triangular shape, we color the ice cream shape lines. We have chosen light brown and green. The other of the lines will be white. We will draw each of them with 1 cm wide. We look at the triangular structure from the front and fold it as if we were turning the page, taking the lower left corner and folding it to the right. A new triangular face will be formed that we will also draw with transverse lines, as in the other previous figure.
We will draw the other lines of shades of pink in the other folio structure that we have folded.
Fifth step:
We take with our hands the painted structure and we make some folds in the form of waves so that it takes the form of an ice cream. We put it inside the cone and so that it is subject we can give it a couple of touches with silicone.

Step Six:
Take the straw and cut it in half. we cast some silicone in one of the straws and we put it inside the ice cream. We will also glue the other two colored pompoms.

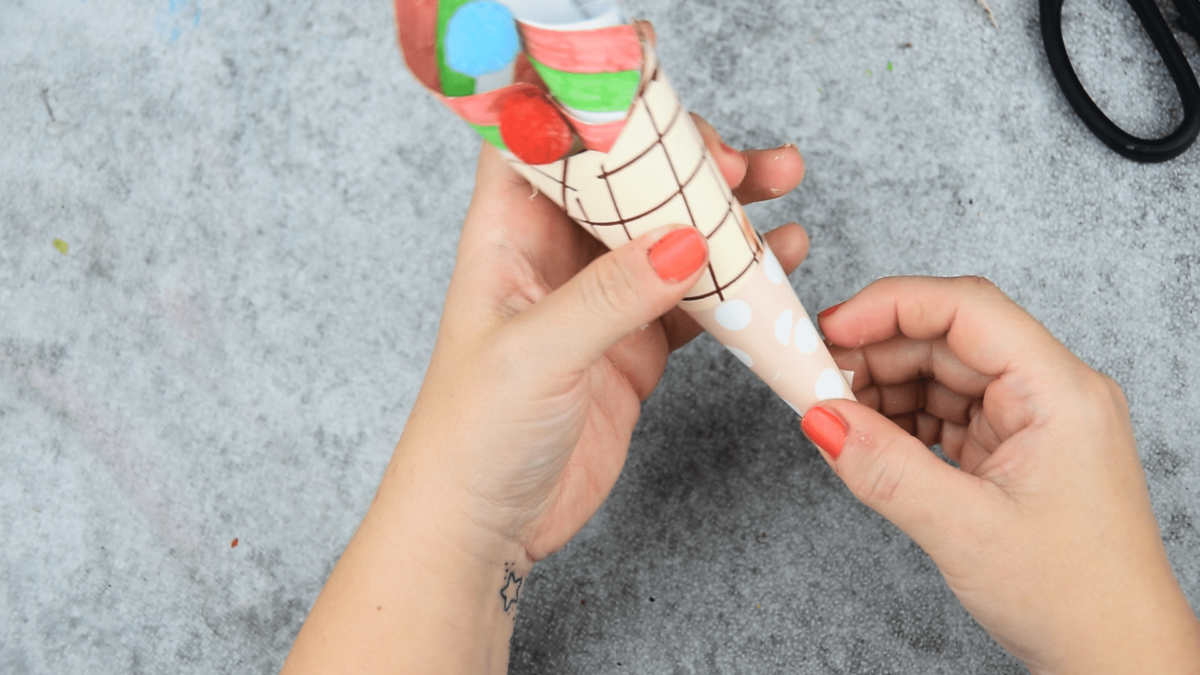
Seventh step:
We cut a piece of decorative paper and we'll fold it into the shape of a small cone. We place it above the large cone, so that it takes the shape of a cone decorated with paper.