
If you like recycling, you have these charming crafts for this special Valentine's day. With some glass jars and a glass bottle, we have looked for the best accessories to decorate them with originality. With some simple doilies, some red heart-shaped cards and with a little eva rubber we will make these small details. The red and white thread is fashionable for many crafts and for this Valentine's gift it looks great.
The materials that I have used are:
- Glass jars with beautiful shapes
- A small clear glass bottle with a metal cap
- Small round lace or, failing that, a large lace that we will cut
- Thread or cord with two mixed colors: red and white
- A small piece of red eva rubber
- A small piece of fuchsia eva rubber
- Hot silicone and her gun
- Pencil
- Scissors
- Candy or chocolates to fill the bottle
You can see this craft step by step in the following video:
First step:
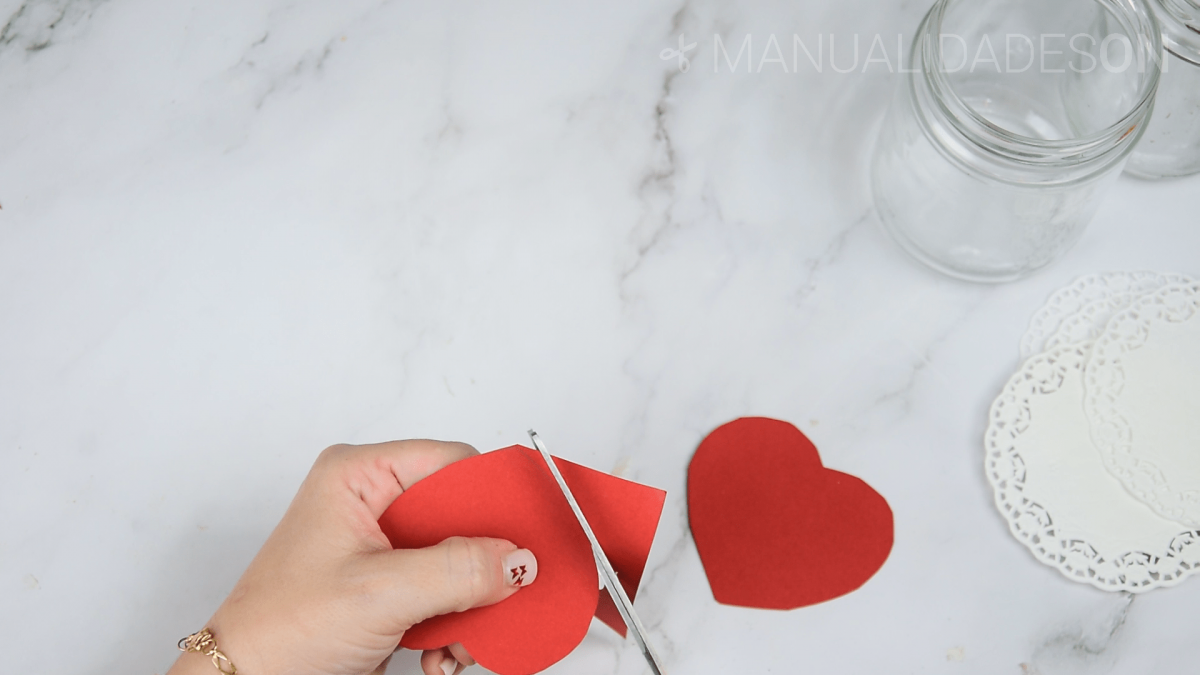
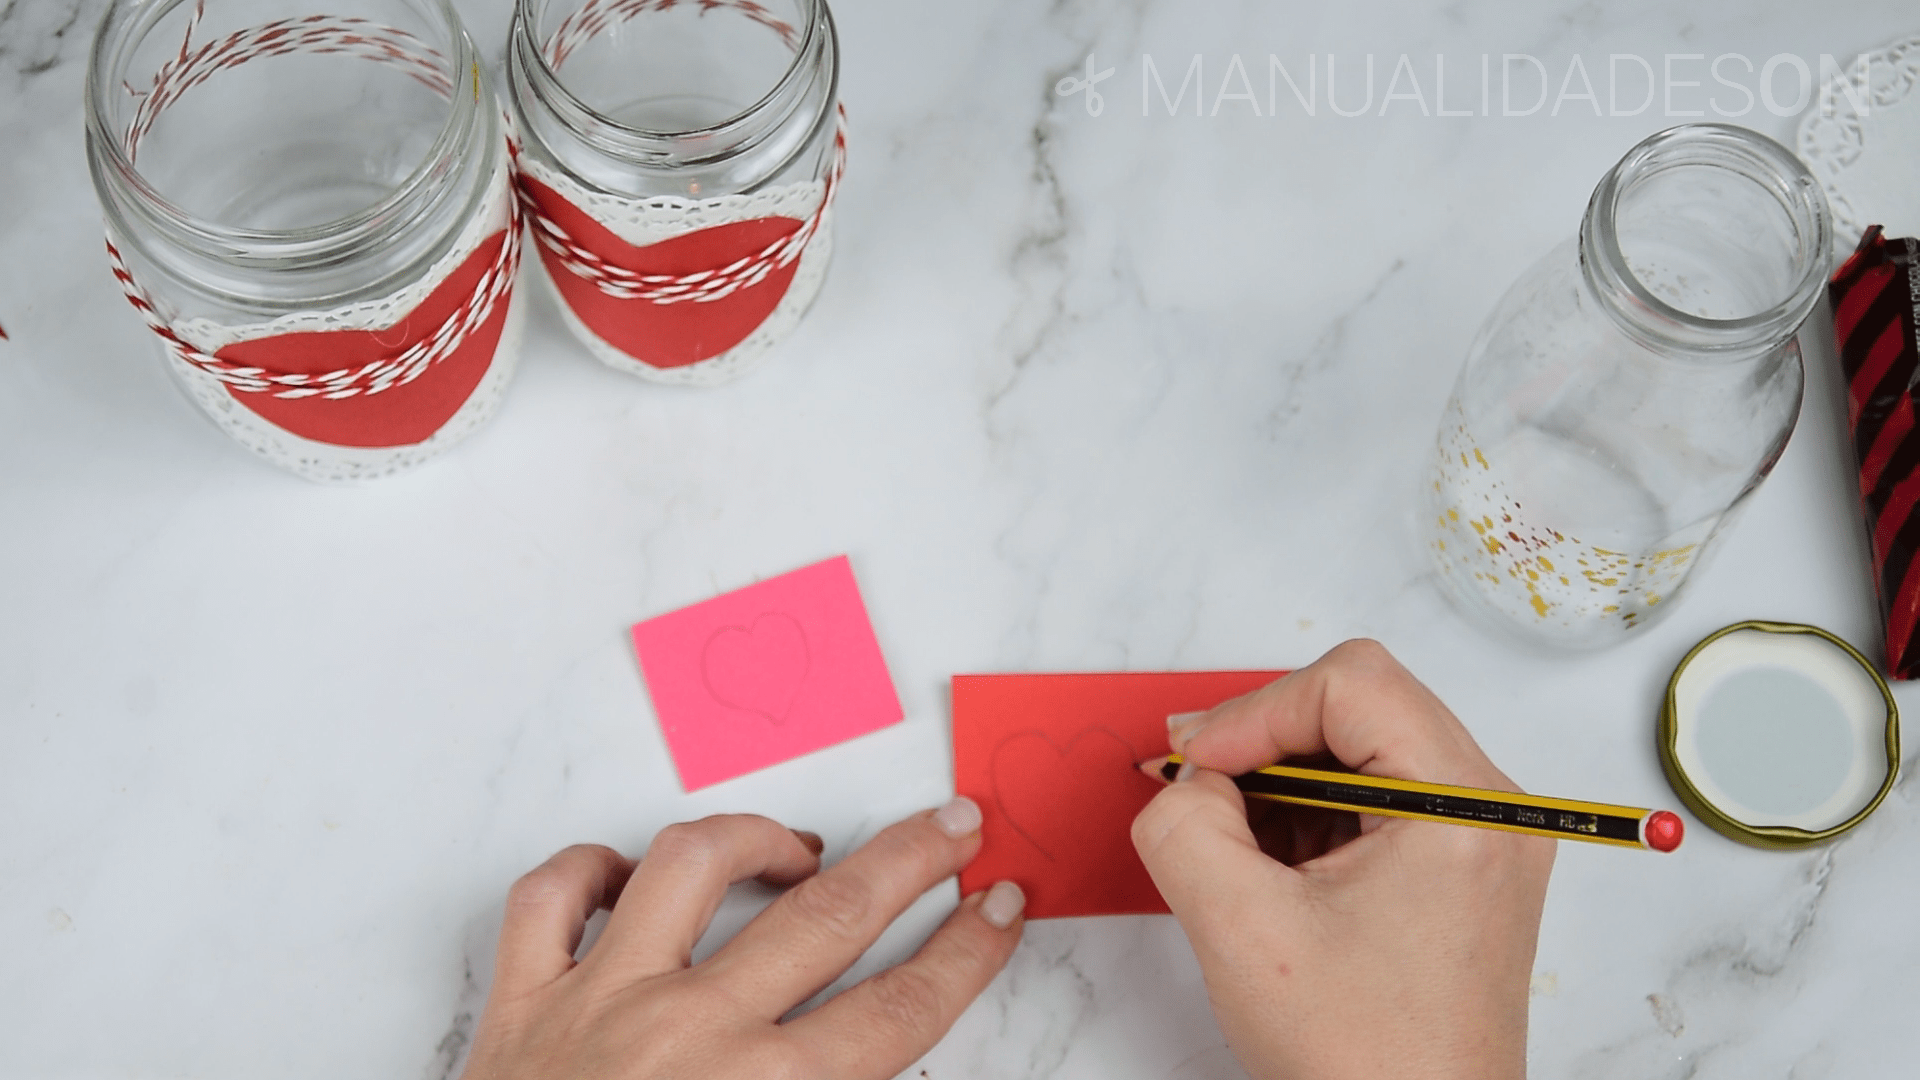
On a red card we draw two big hearts, in proportion to the size of the glass jar. It will need to be large enough to fit the heart in the front of the jar. We cut out the hearts.
Second step:
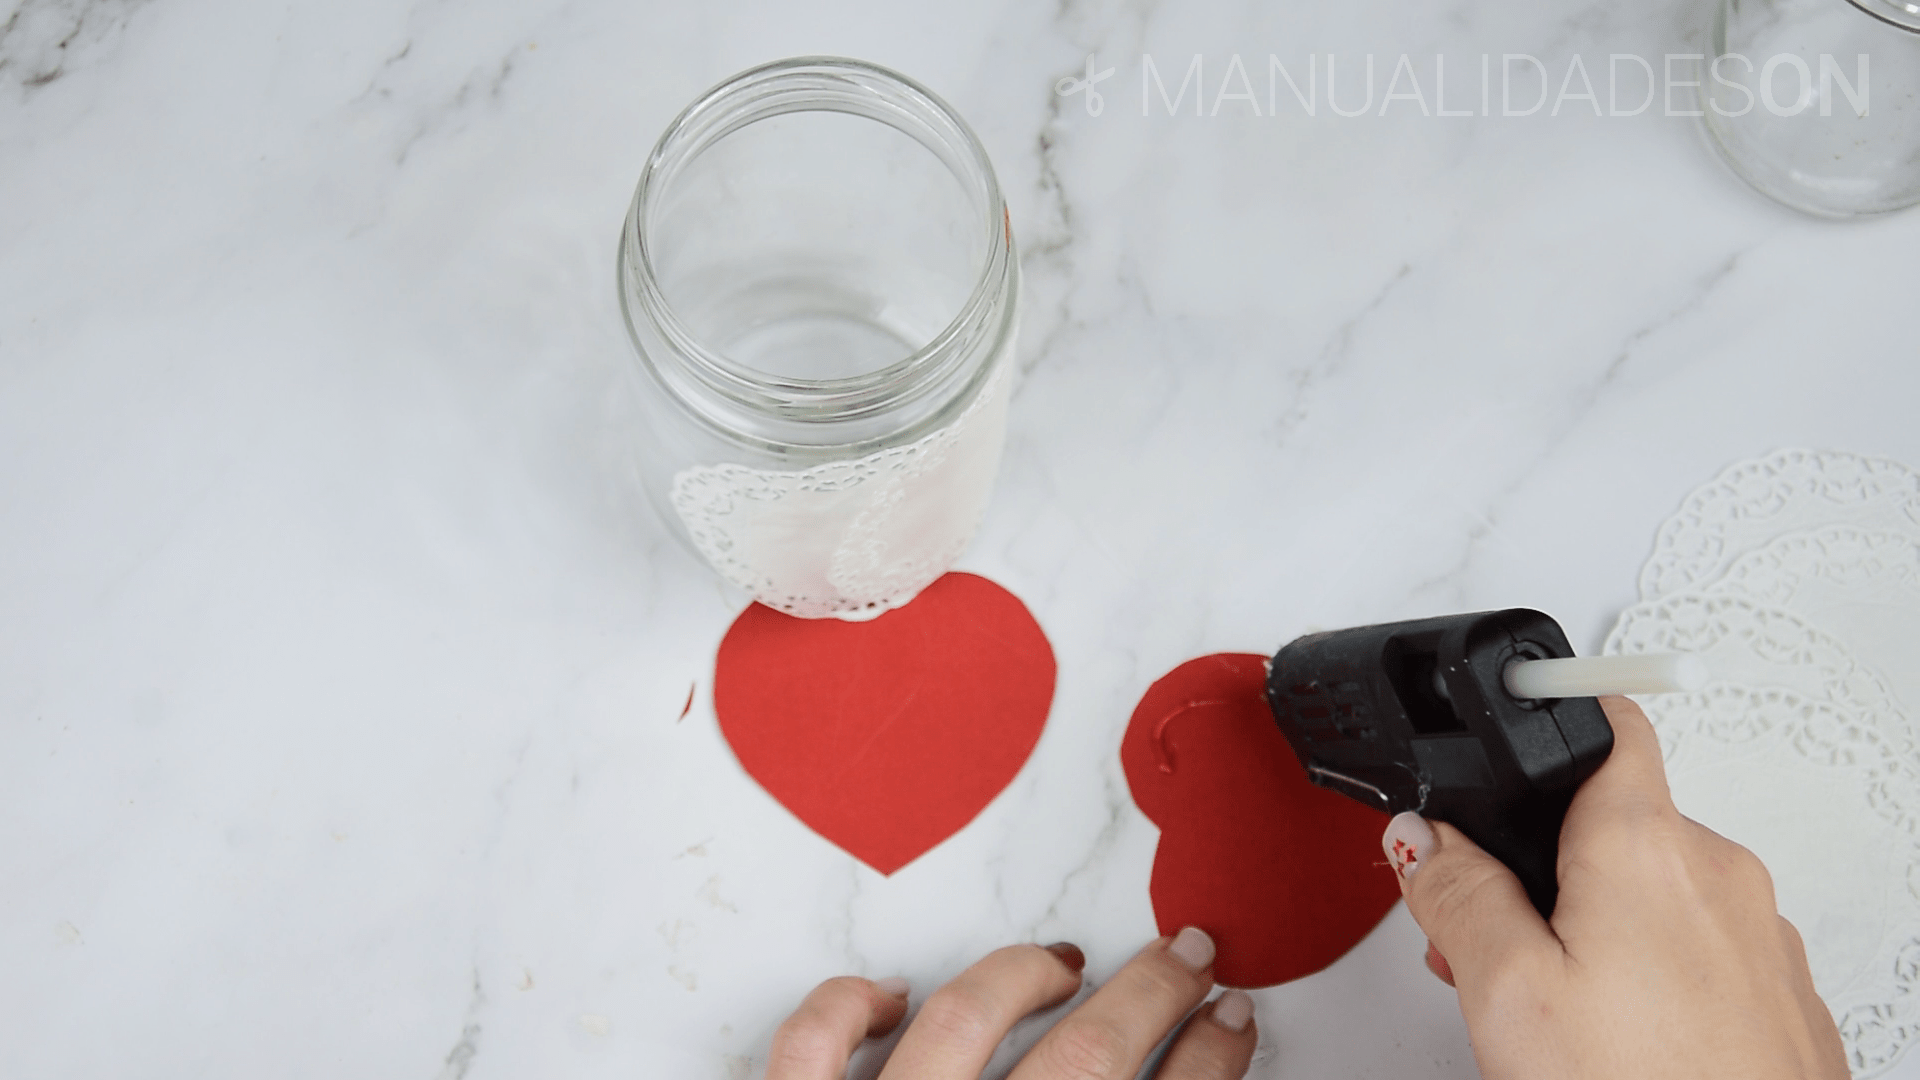
We take the doilies and stick them with the silicone on the front of the glass jar, If we can, we will place two if space allows it, otherwise we will only paste one.

Third step:
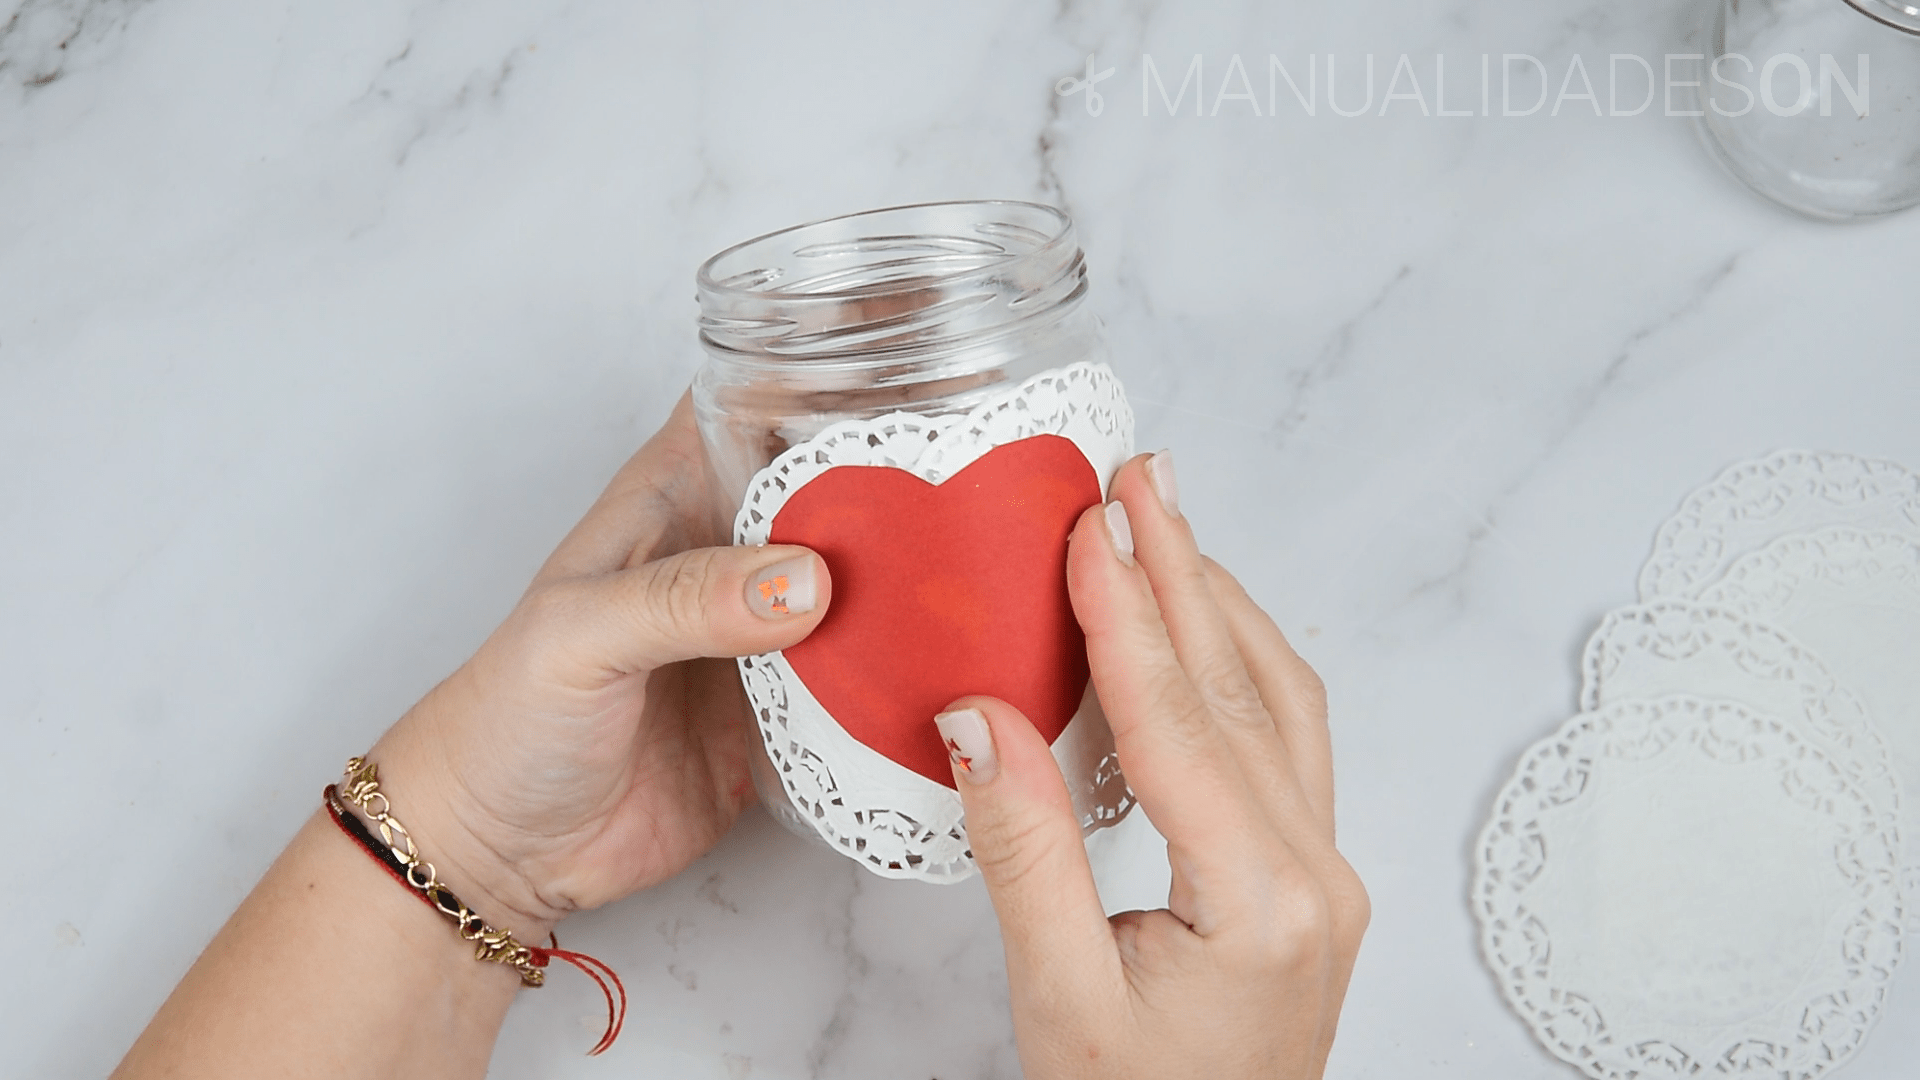
We glued a red heart in the middle of the doilies. First we will apply the hot silicone on the heart and then we will glue it on top of the lace.
Fourth step:
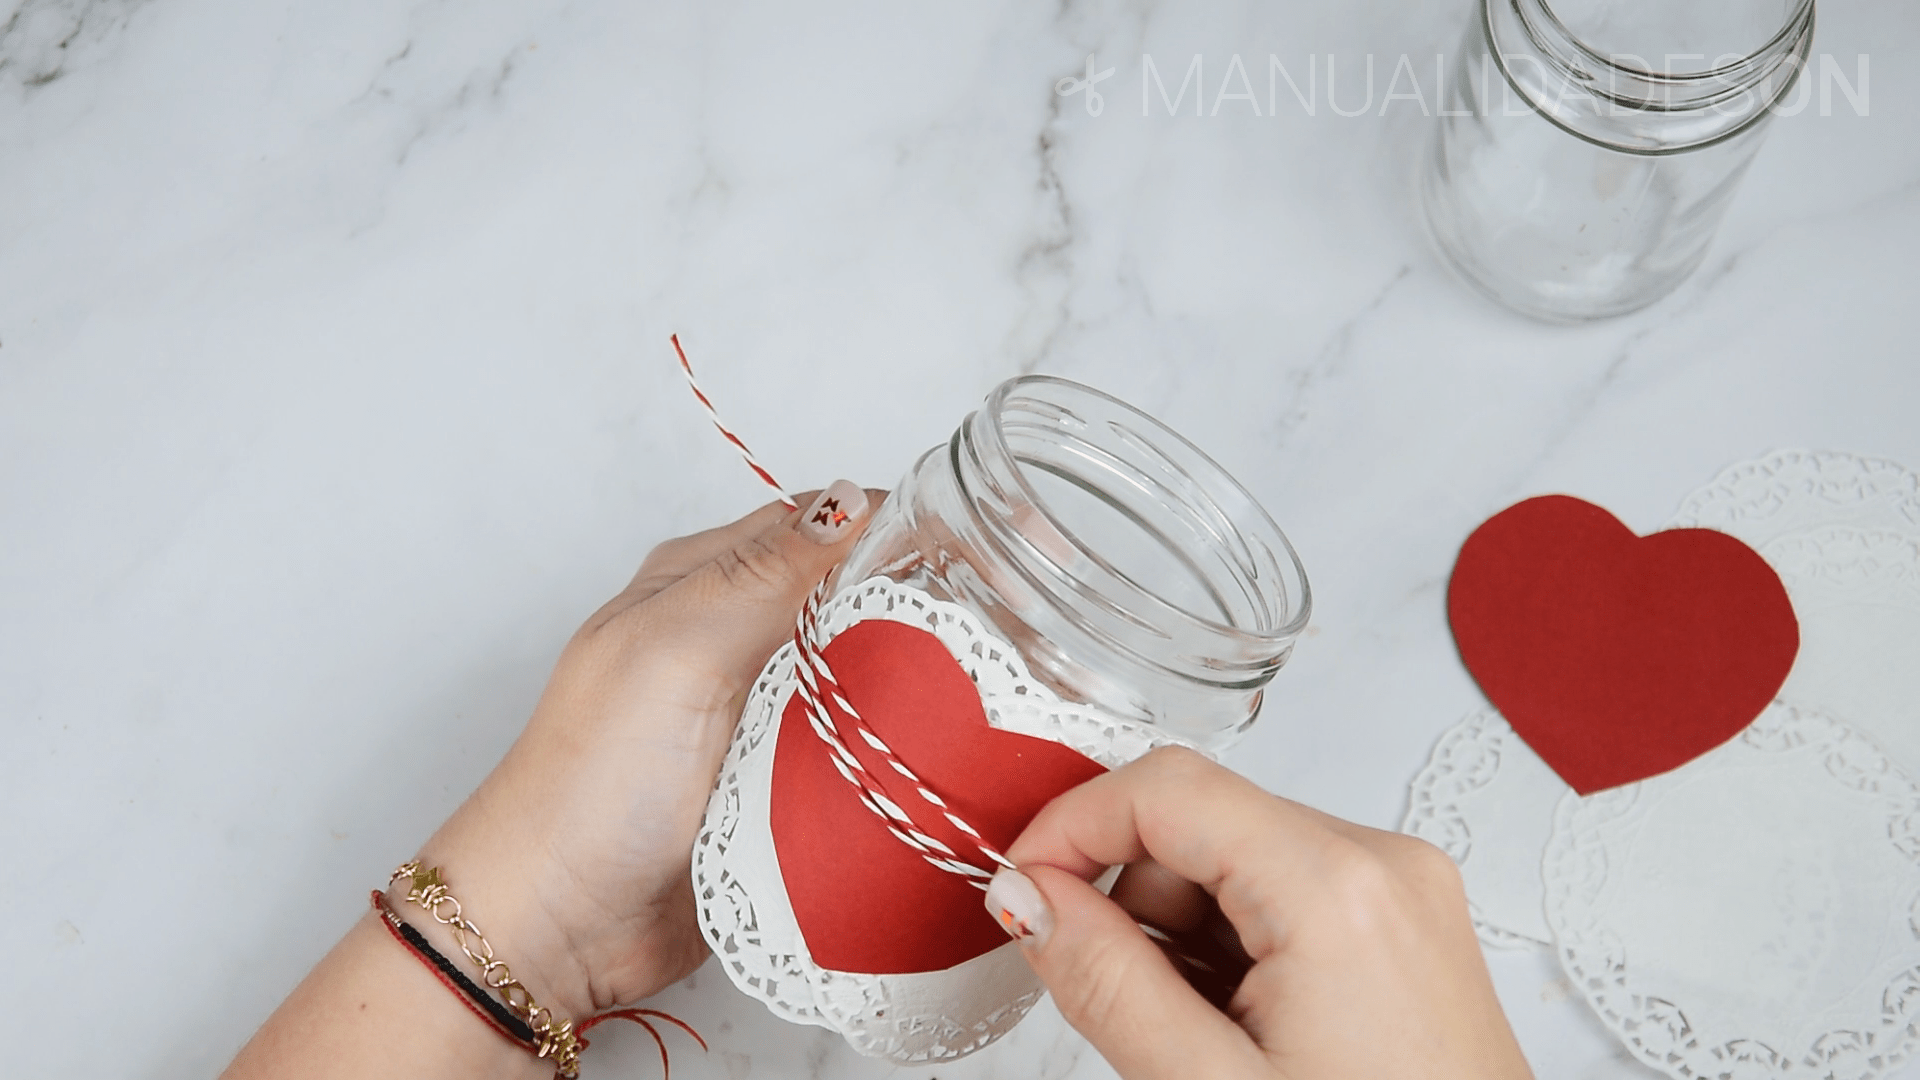
We surround the mason jars with the red and white thread. We will do about 4 or 5 laps around it and in the central part. We will close the thin cord in the back with a knot.

Fifth step:
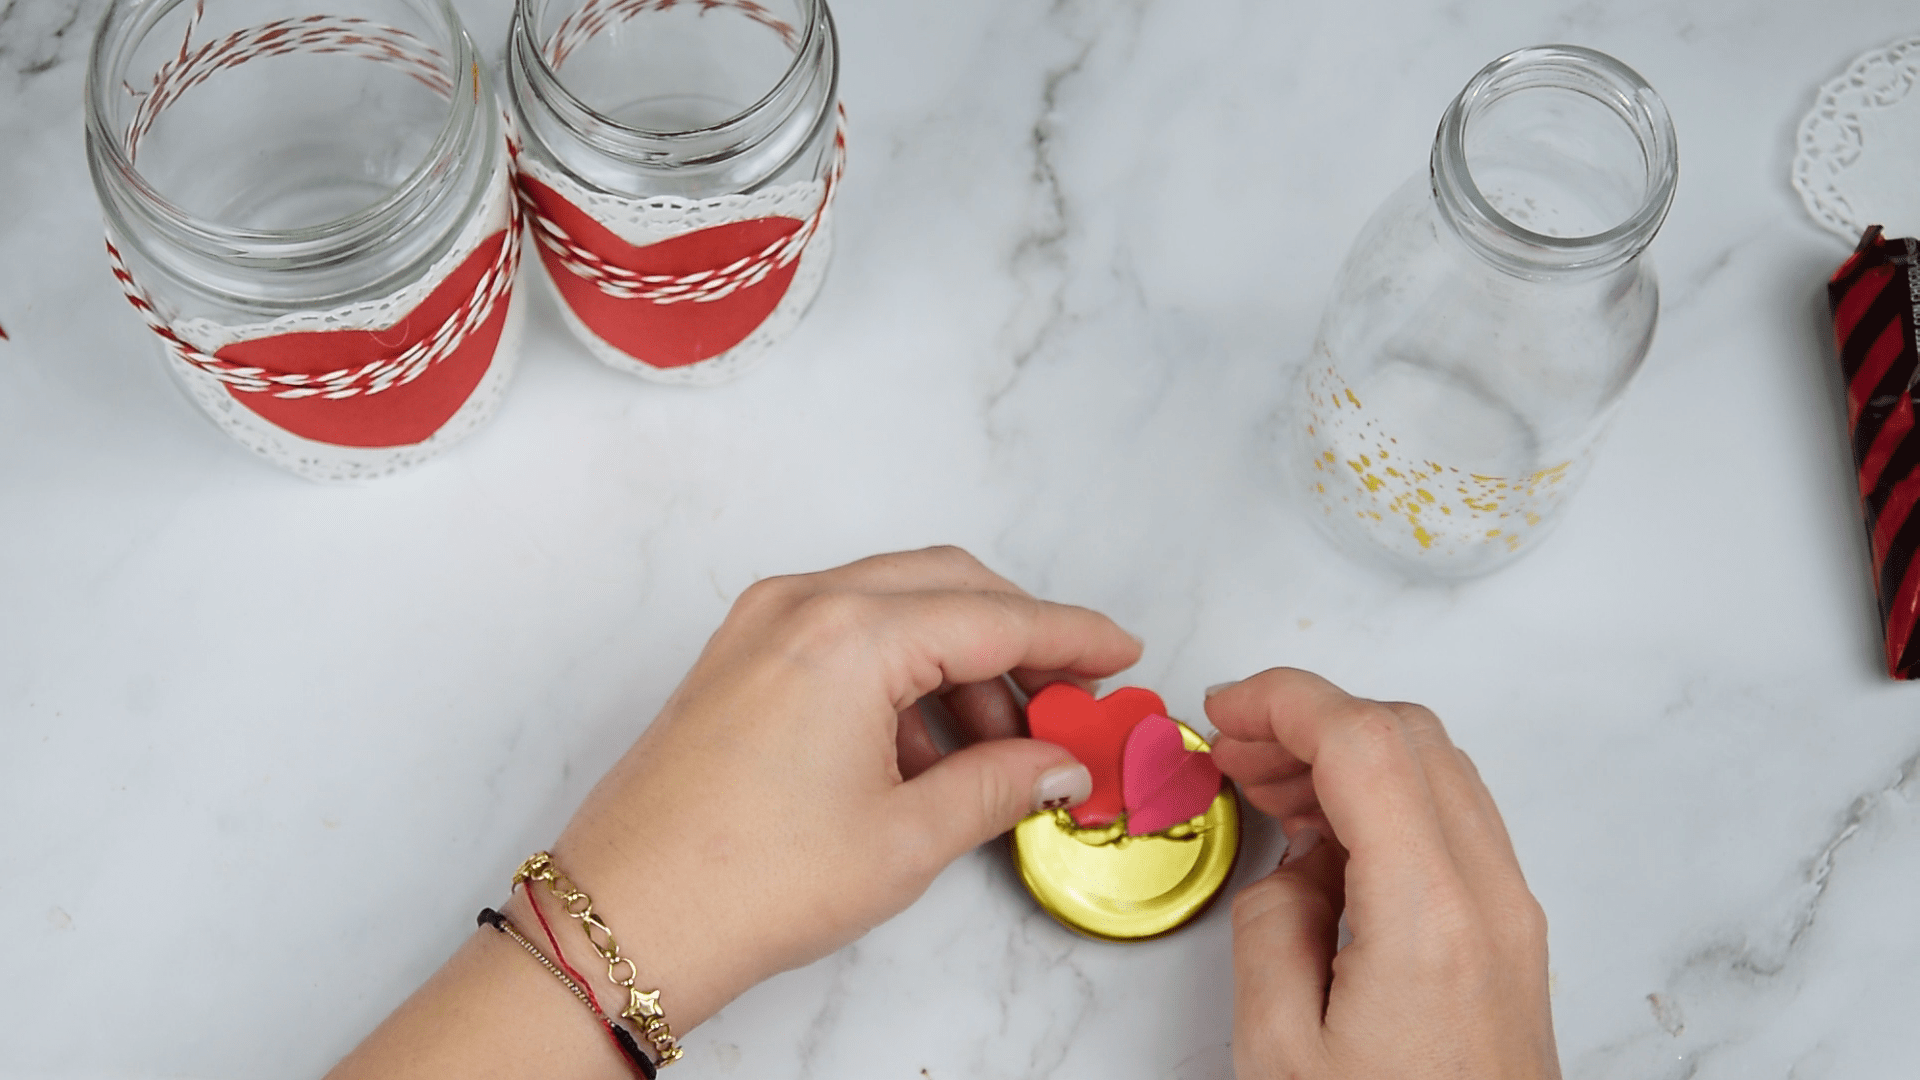
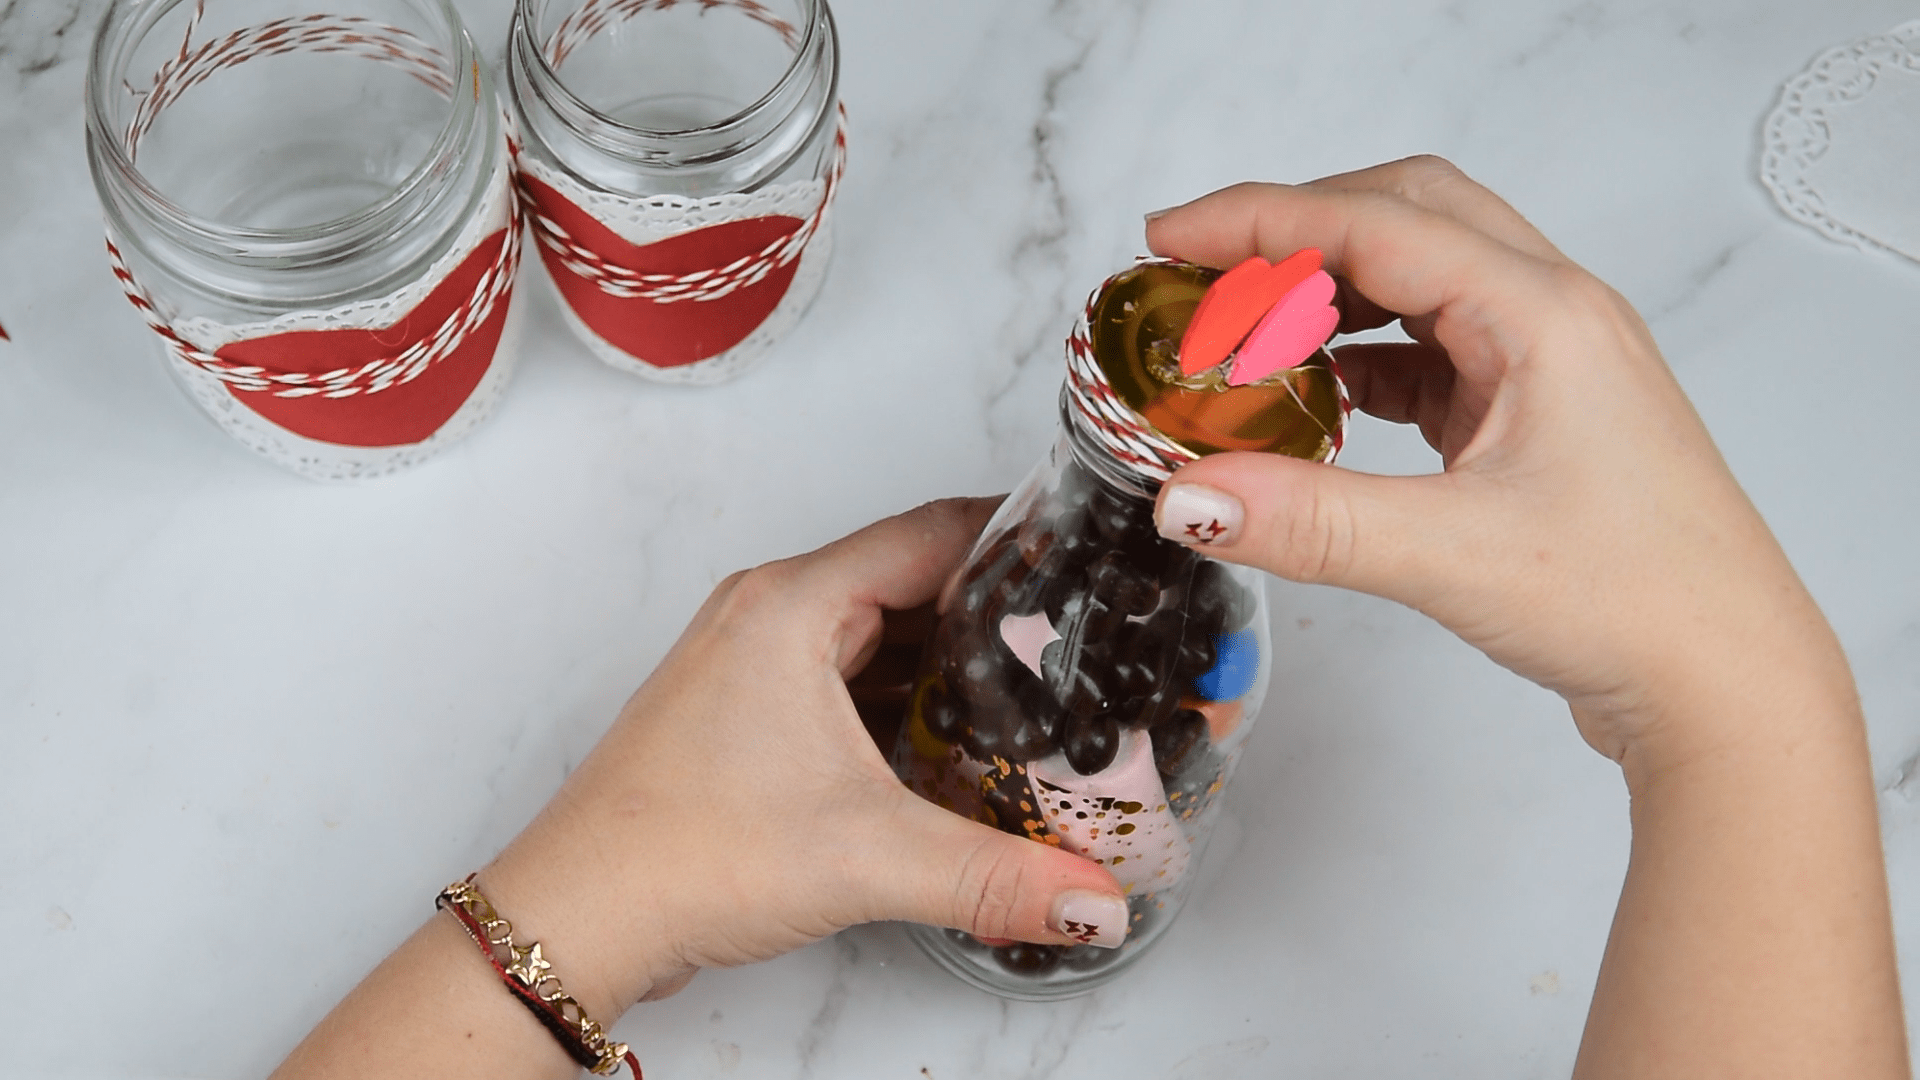
In another of the jars that we have chosen in the shape of a bottle, we will make other details. On a small piece of fuchsia eva rubber we will make a small heart to be able to stick it on the top of the bottle. We will make another heart a little bigger than the previous one in a piece of red eva rubber. We will cut them out and glue them together and raised (not lying down) on the lid of the bottle.
Step Six:
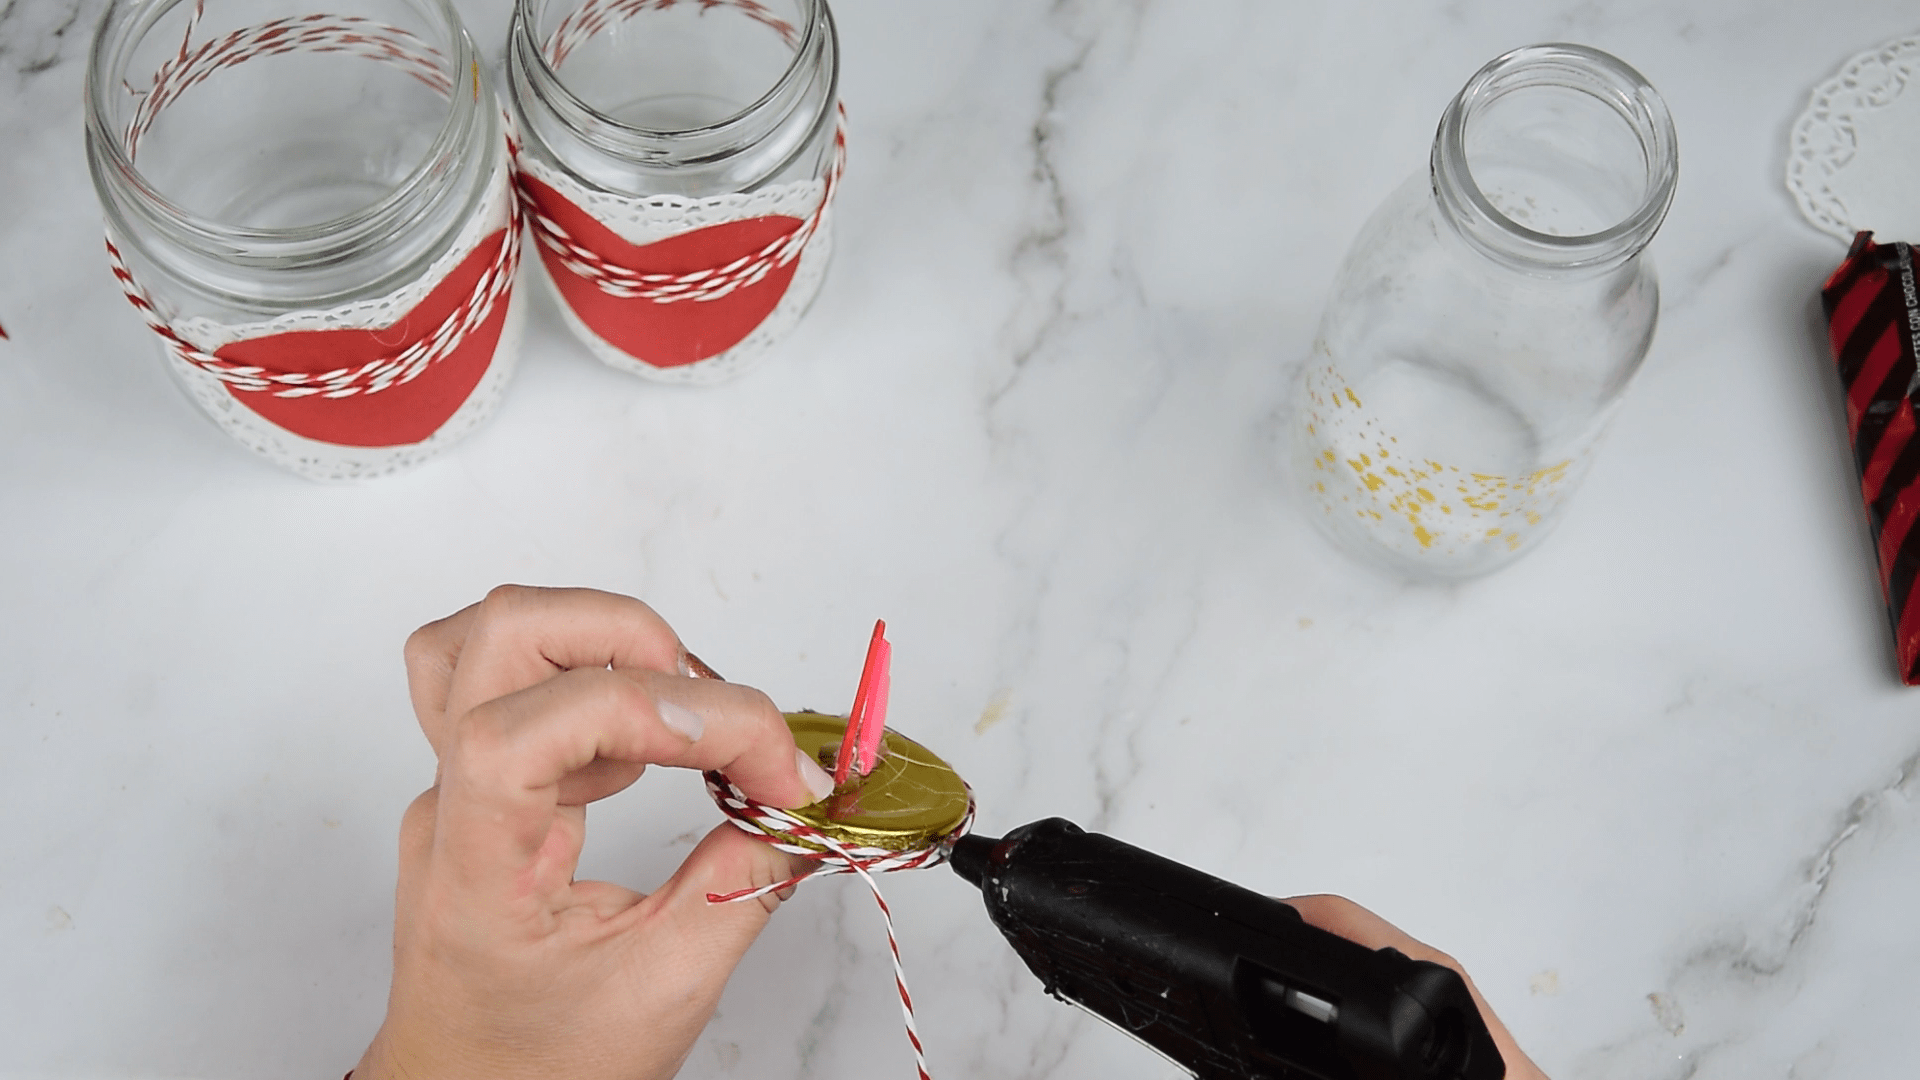
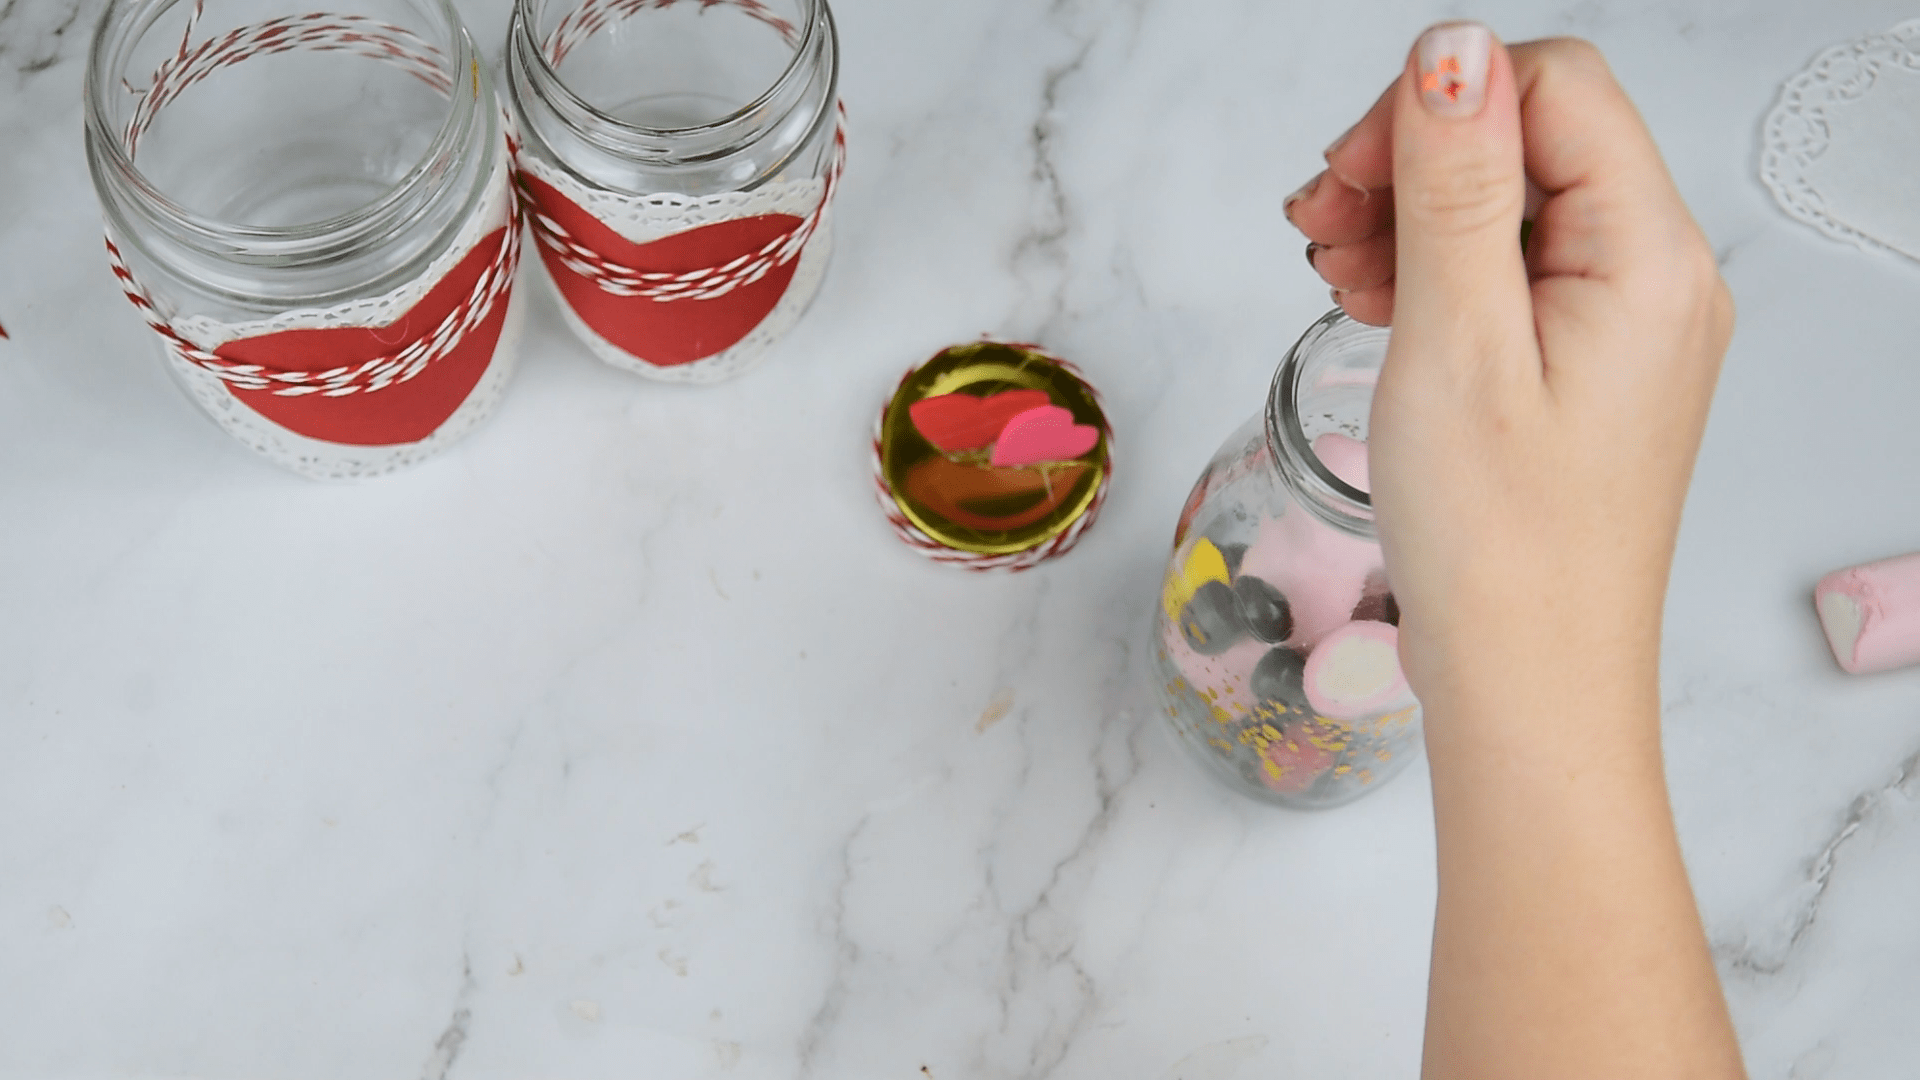
On the edge of the cover we are going to glue the same thin cord with the help of silicone. We will do it little by little, adding the silicone slowly, as it dries quickly. With the details finished we can fill our bottle with the jelly beans or chocolates and close with our pretty cover.
Molaaaaa THANK YOU Ali
Thanks! a huge kiss!