
In this tutorial I teach you to create some clay earrings that can be quite elegant and you can use for yourself, to give away or to sell as part of your crafts. You will see that they are easy and they are done quite quickly. They are also economic. So stay, because next I tell you the materials what do you need and the Step by Step to make them yourself.
Materials
To do the clay earrings you will need the following materials:
- Clay: either air dried or baked.
- Gold paint
- Awl
- Rings
- Slope hitch
- Knife or cutter
- Brush
- Tape
Step by step
To start doing the pending earrings you must take the clay and knead it well so that it becomes soft. Make a ball rolling the clay in the palm of the hand until it is without wrinkles. You should crush it. This can be done by hand or with a flat object. Personally, I like doing it with a flat object because the circle is smoother.
Once you have the ball squashed cut it in half with a knife. The cut should be diagonal instead of horizontal to make the earring more original, but this is all a matter of taste.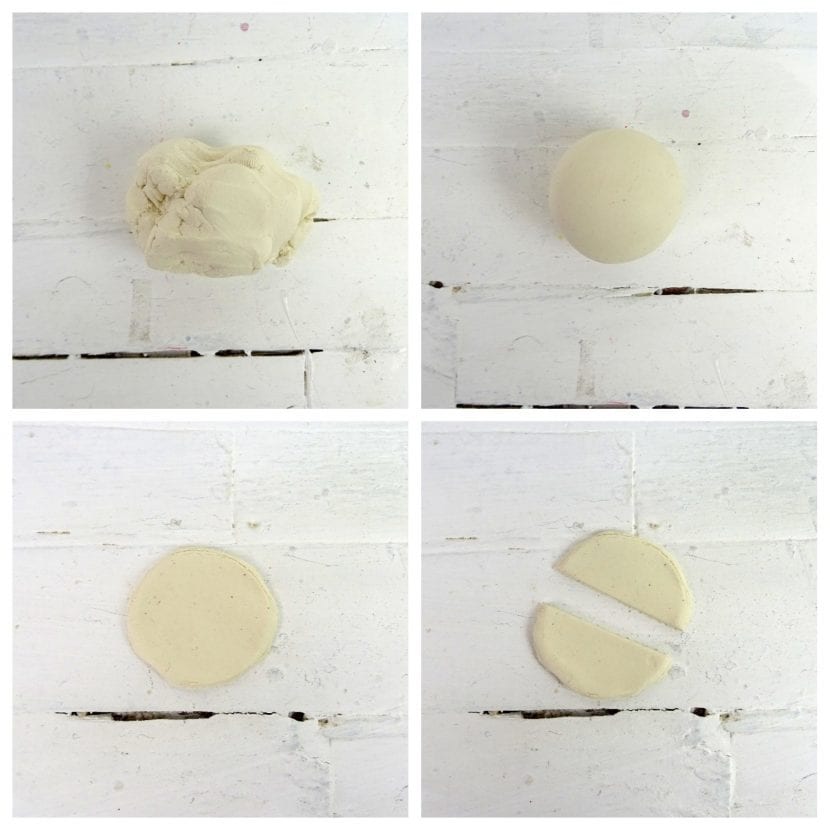
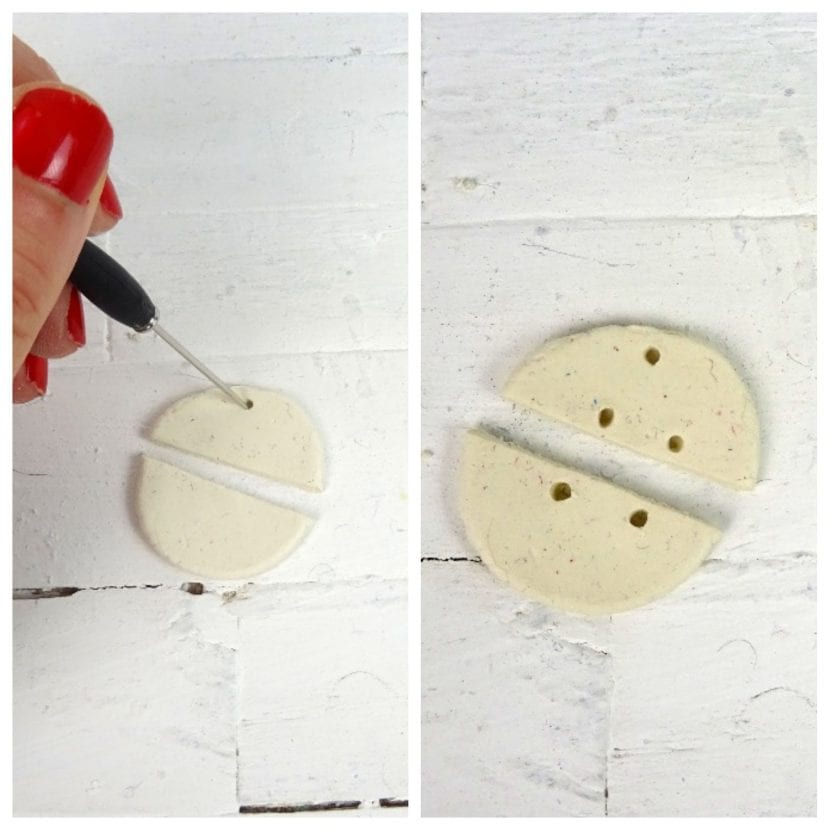
Before the clay dries, we are going to do the holes to the slope, both to join the two parts and to join it to the hook of the same. With a awl Pierce the bottom half of the circle on the straight side. There you must do two holes. Just above, in the lower part of the semicircle above, you must make the same holes at the same height, since the two parts will be hooked through them.
The other hole you have to make is to insert the hitch of the earring, so make it on top of the semicircle above.
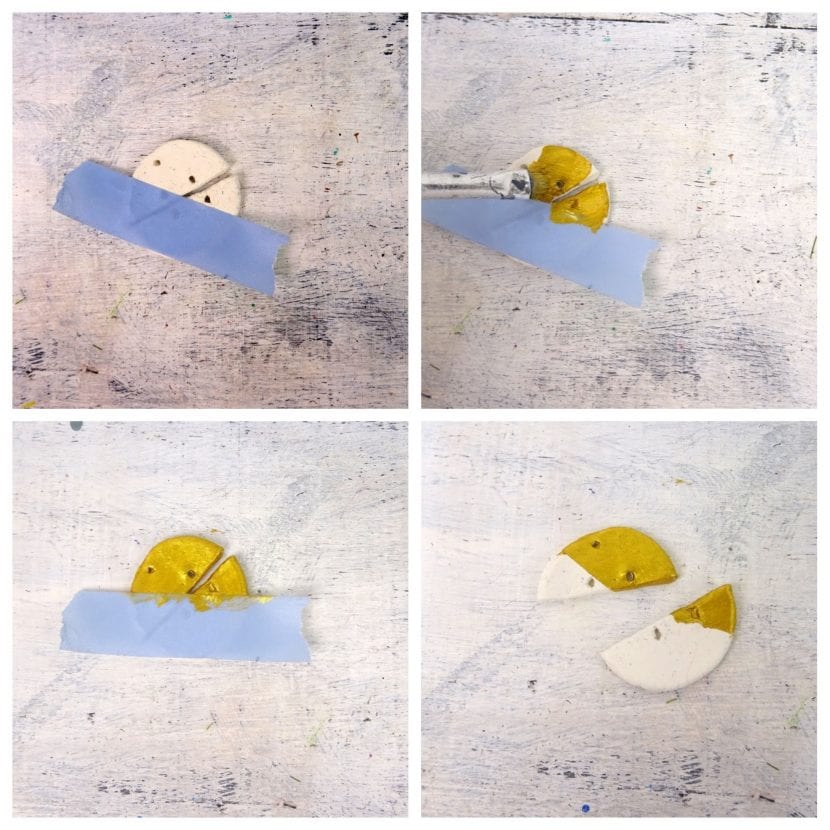
Now you can leave it dry off. It takes about 12-24 hours to fully harden as it is a very thin layer of clay.
When it is dry paste a piece of Scotch tape on a part of the earring. We are going to paint the area that is not covered with metallic gold paint.
Let the paint dry and you can now mount the earring. Enter the rings in the holes of one of the halves, also in the upper hole. Join the two pieces of clay using the two rings in the center, and add the hook on the ring above.
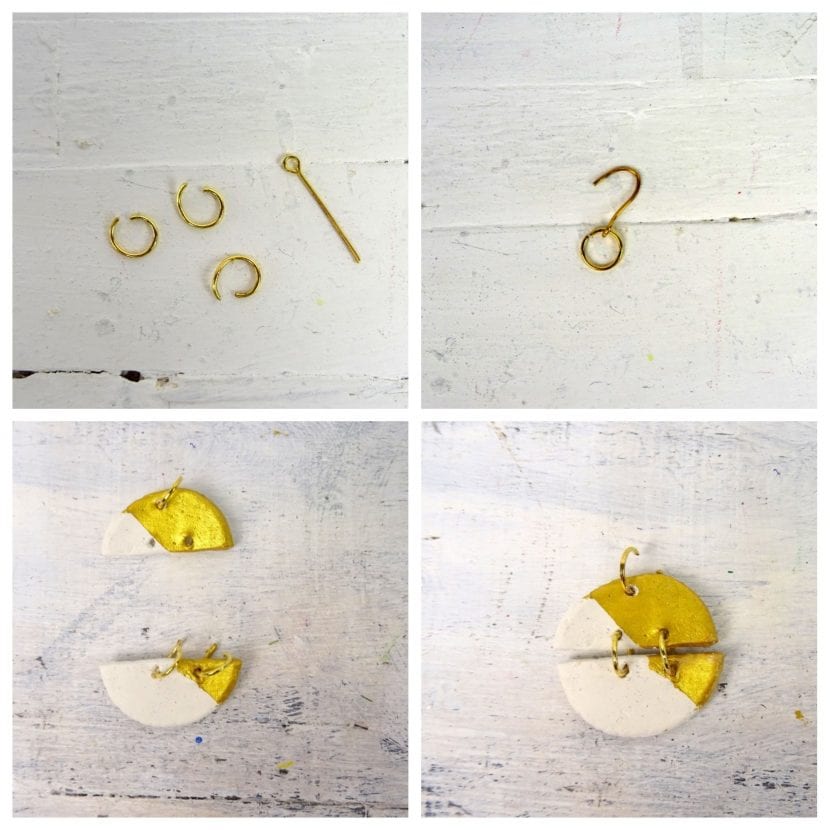
And you will have finished your clay earrings. You have thousands of possibilities, since you can do them in different forms, sizes y colors. So this is an idea for you to start designing your own earrings yourself.
