
Pencils and mechanical pencils usually have erasers on the opposite end to the tip and, it is also common that we do not use them and they are dry and useless. In this tutorial, we want to show you a way to recycle them and give them a new utility.
In the post that follows, We will give you the key details to make a marker with the pencil eraser.
Materials
- Pencil or mechanical pencil with rubber on the back.
- Cutter.
- Marking ink.
Our Process
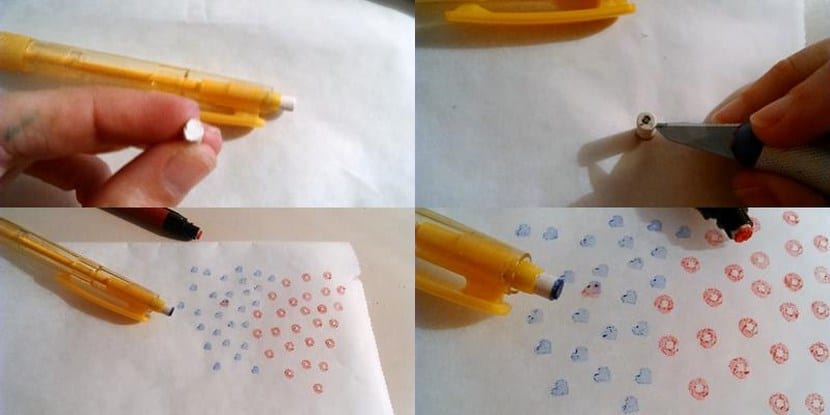
We will take the rubber and hold it between our fingers to be able to work with it. Then with the cutter we will outline the drawing that we want the marker to have. It is important that the drawing we choose is simple since the marker will be very small. In this case, we have made a circle and a heart.
Once the markers are finished, we will place the rubber where it was going and we will stamp the drawing on paper as many times as we want.
This idea can come in handy for stamp wrapping paper and give it an original and personal touch.
Until the next DIY!