
Modeling paste is an ideal material for creating all kinds of crafts and domestic projects. It is an easy to find, inexpensive and very manageable product. So it becomes the perfect option to create pieces as original as this jewelry box.
The colors that I have chosen accompany another piece created for costume jewelery, this beautiful earring display frame. A beautiful, simple and unique set for have your most used rings, earrings and bracelets close at hand. Choose your favorite colors and enjoy this craft, these are the materials and the step by step.
Jewelry box with modeling paste
Before starting to create your jewelry box, I advise you to think carefully about how you want it to be. The shape, size, and container you are going to use as the mold. This is because modeling paste dries fast and the drier the harder it is to work. Now, let's see how this jewelry box is made.
Materials
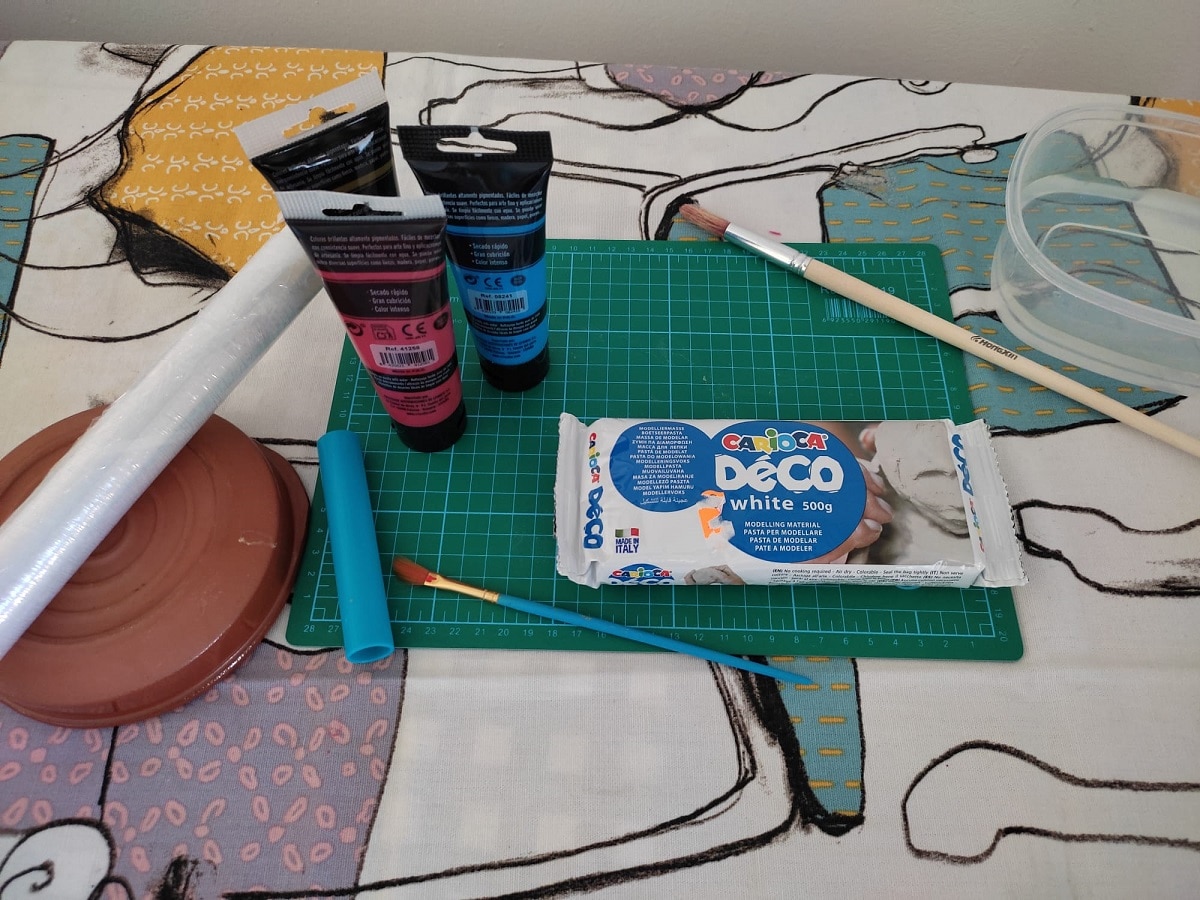
- Pmodeling pole
- Painting multi-colored acrylic
- Film paper
- Brushes
- A container with the shape that we want to imitate for our jeweler
- Plastic roller for modeling paste
- A container with water
Step by step
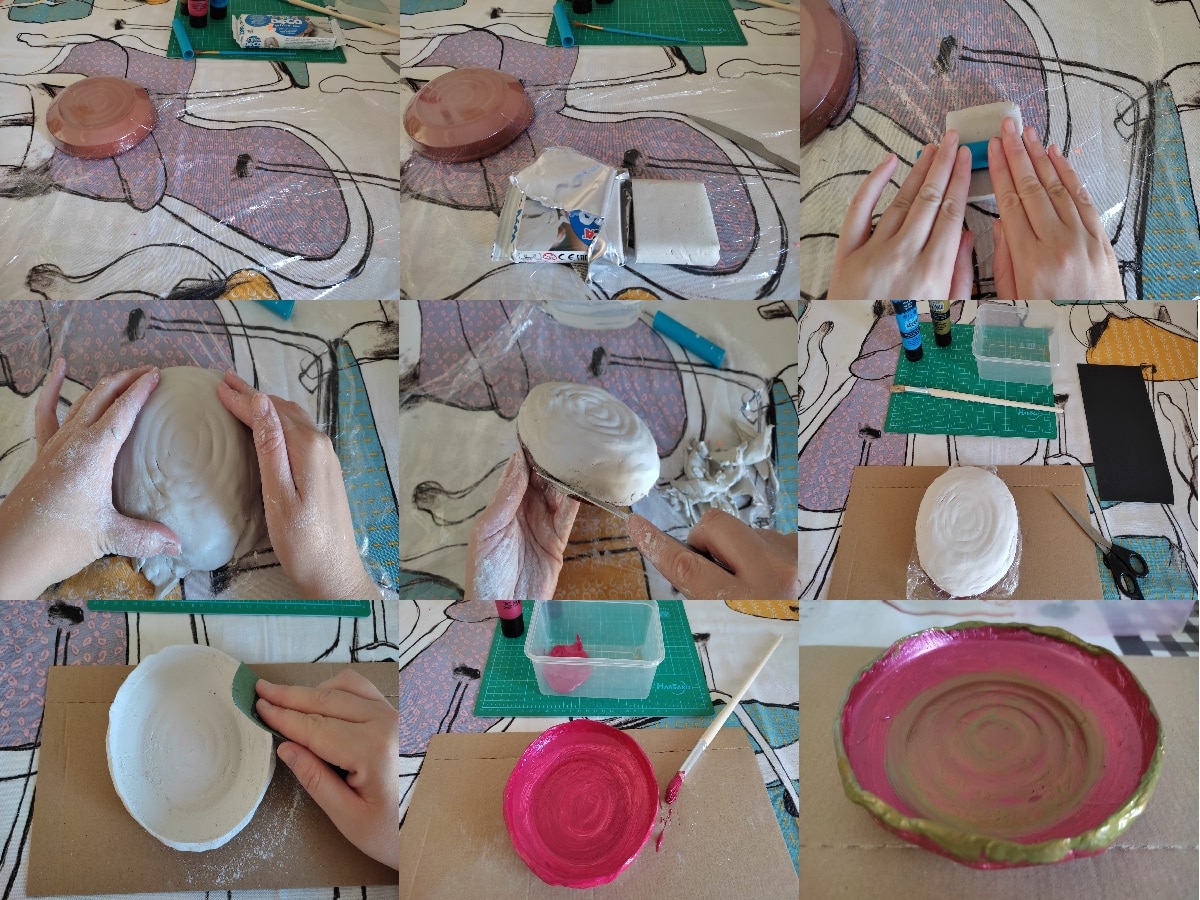
- First we are going to prepare the surface, we place a sheet of plastic wrap on the work table. We also cover the container that we are going to use, in this case a clay pot.
- With a knife we cut a portion of modeling paste.
- We begin to stretch and work the pasta, we use the roller and a little water to smooth the material.
- Once we have the modeling paste stretched, we are going to place it on the base of the clay pot. With our hands we mold it well.
- With a knife we are going to remove the excess of modeling paste, until the desired shape is obtained.
- We let it dry at least 24 hours before going on to paint the jewelry box.
- Once it is dry, remove it from the clay pot and remove the plastic wrap. With a soft sandpaper we are going to file the edges and areas that require it.
- We paint the entire jewelry box with the chosen color, in this case it is metallic pink.
- In conclusion, we add a few touches with another color, a gold for the edges and create depth in the base of the jewelry box.
And voila, in this simple and fun way you can create a jewelry box with modeling paste with your own hands. A unique and exclusive piece with which to decorate your personal space at home.