Dare to make this special boat. It's a great idea so you can store your stationery and keep them well organized. It is made with cardboard and has enough stability and design so that you can do it with great personality.
You have to do a series of folds to form a structure. Then another 5 more will be made and then they will join to form this original boat. It is a very fun way for you to have on your work table or so you can make a very special gift.
The materials that I have used for the material organizer pot:
- 6 A4 size cards. It is important that they are all the same size.
- A loose cardboard to serve as a base.
- Hot silicone and his gun.
- Scissors.
You can see this craft step by step in the following video:
First step:
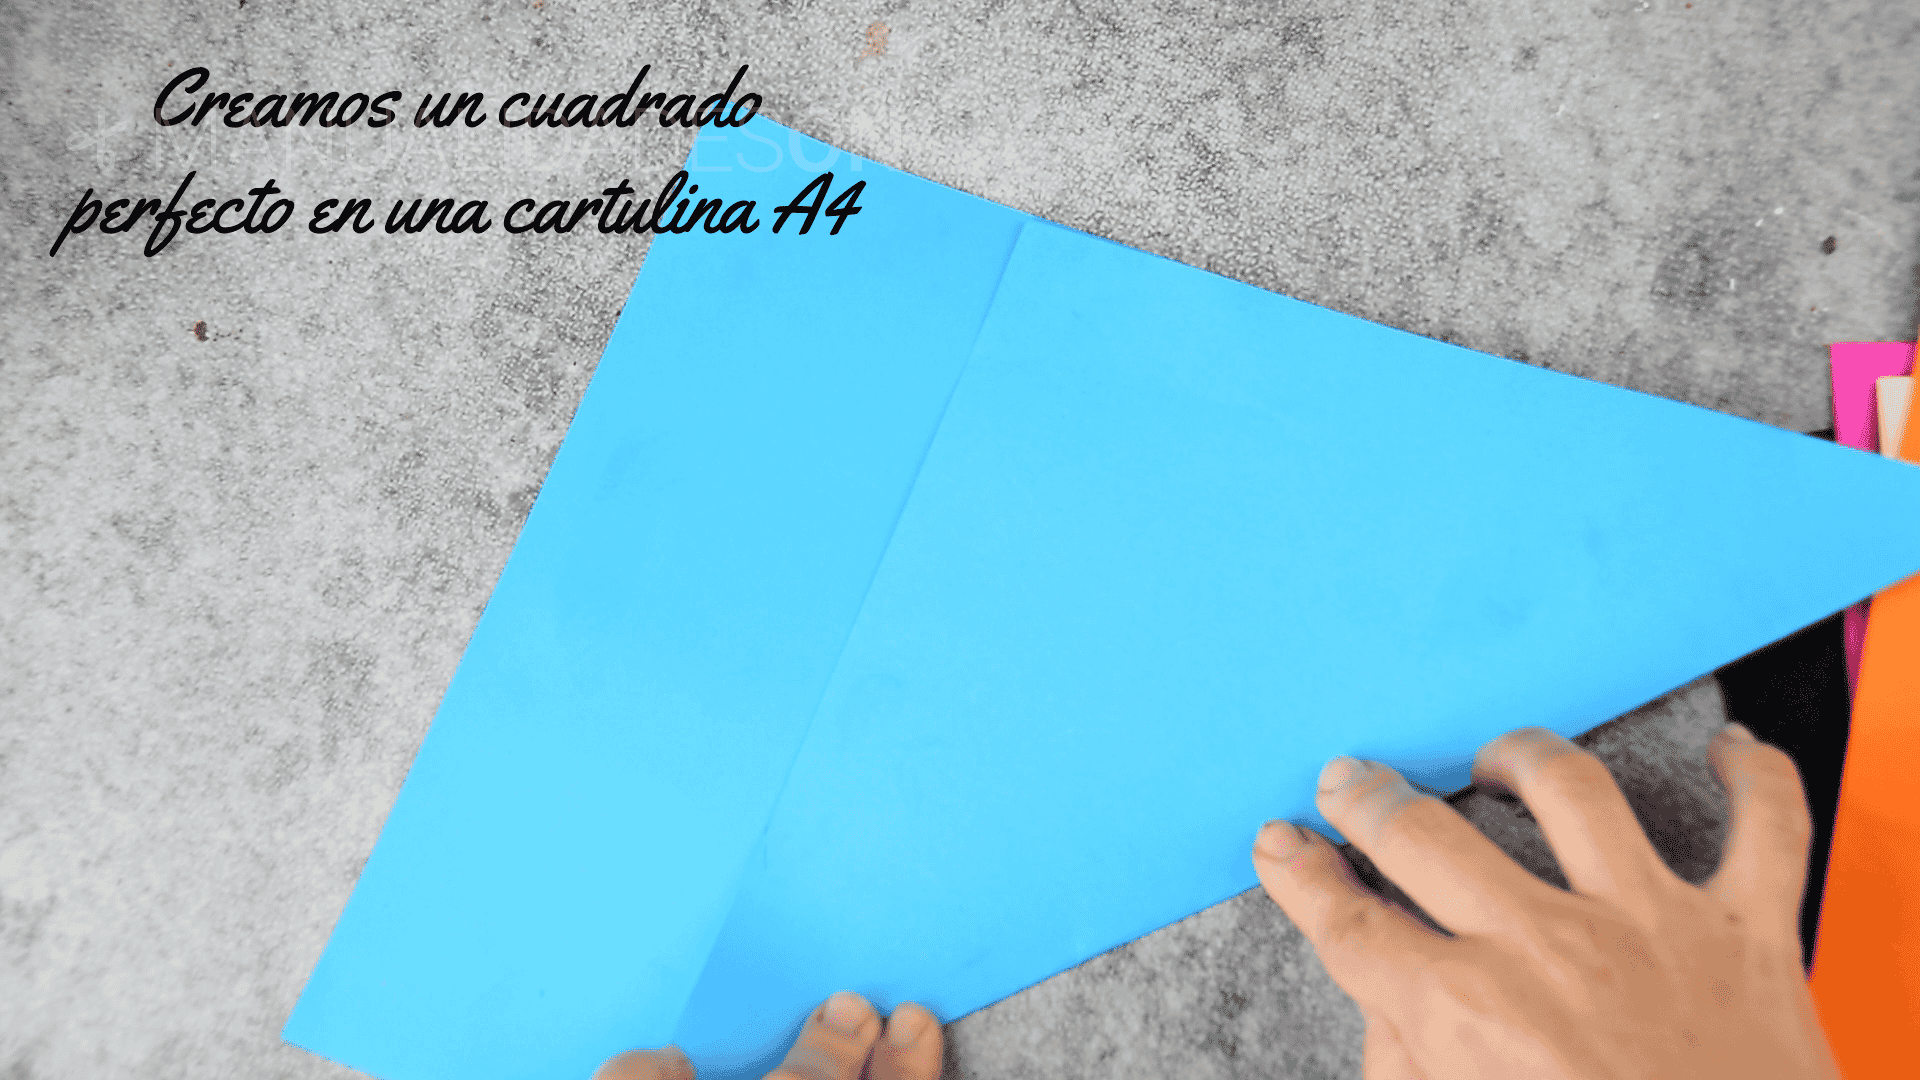
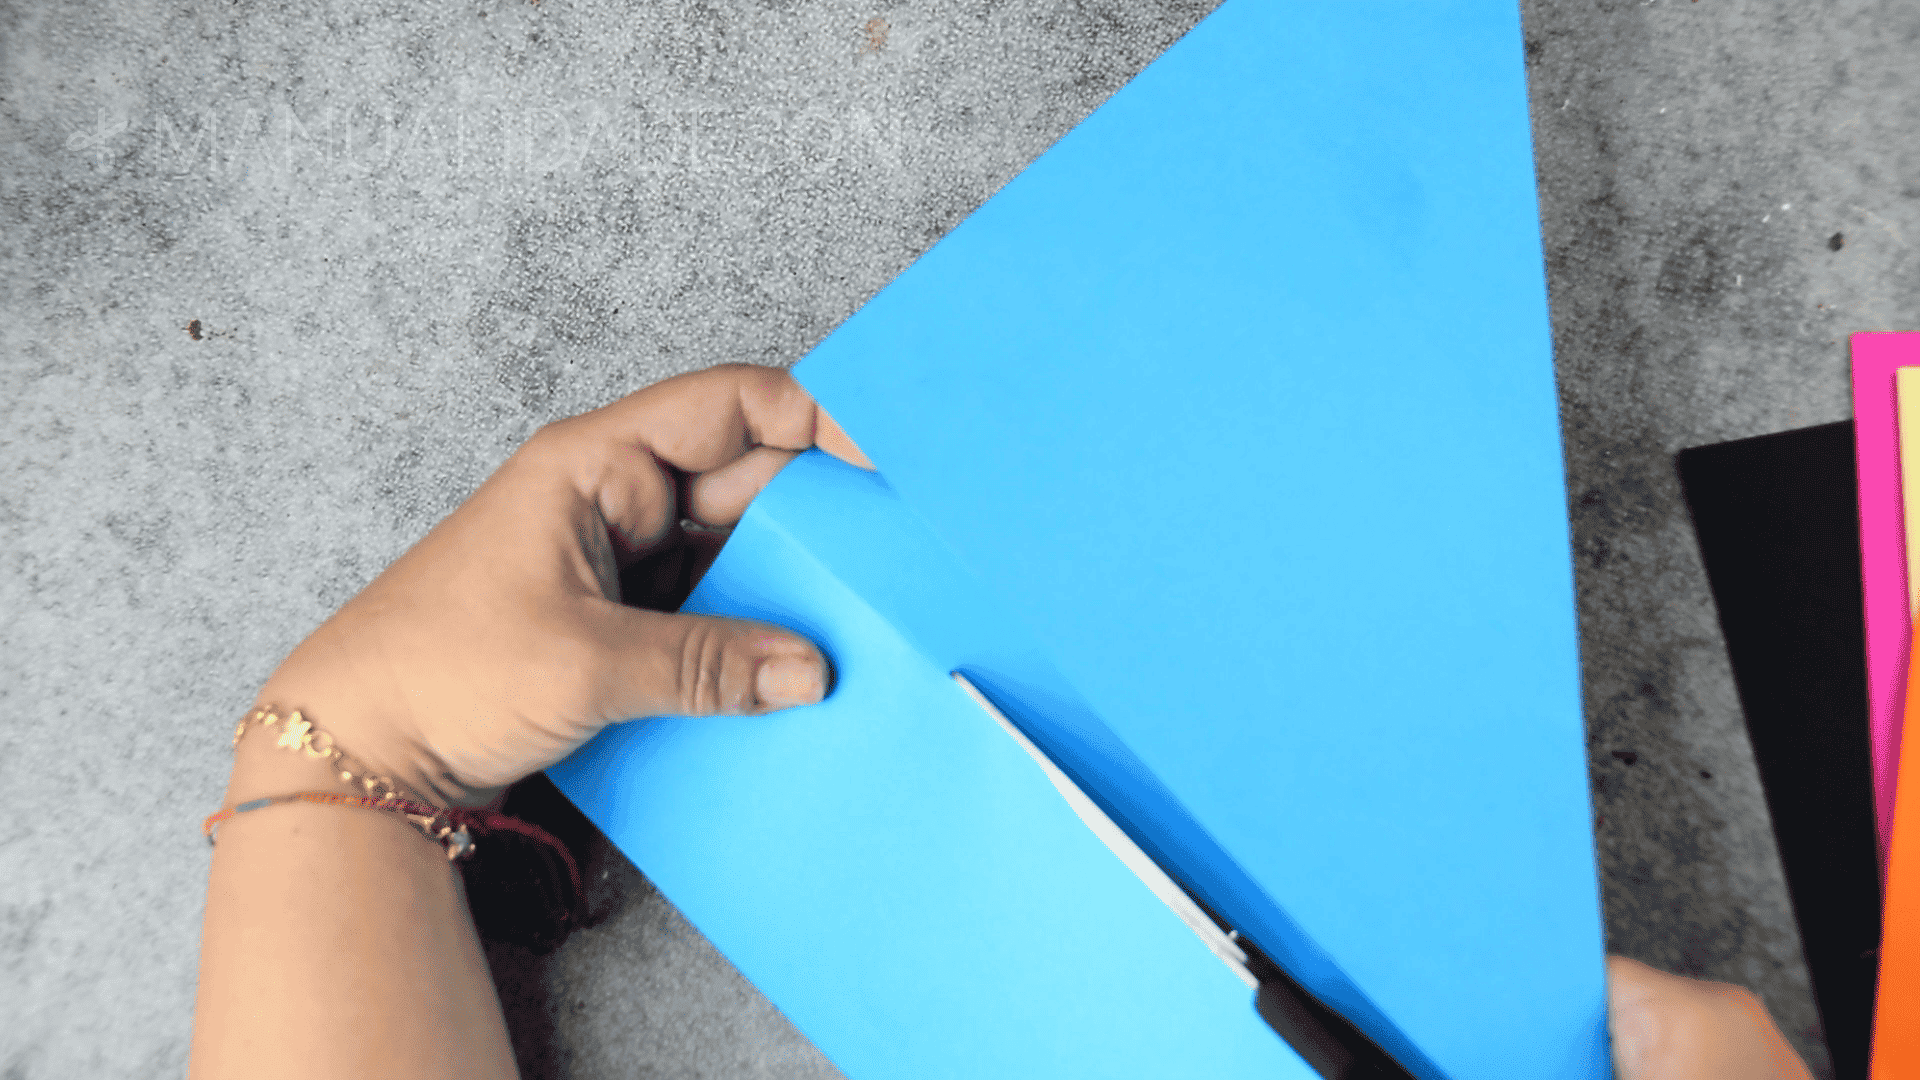
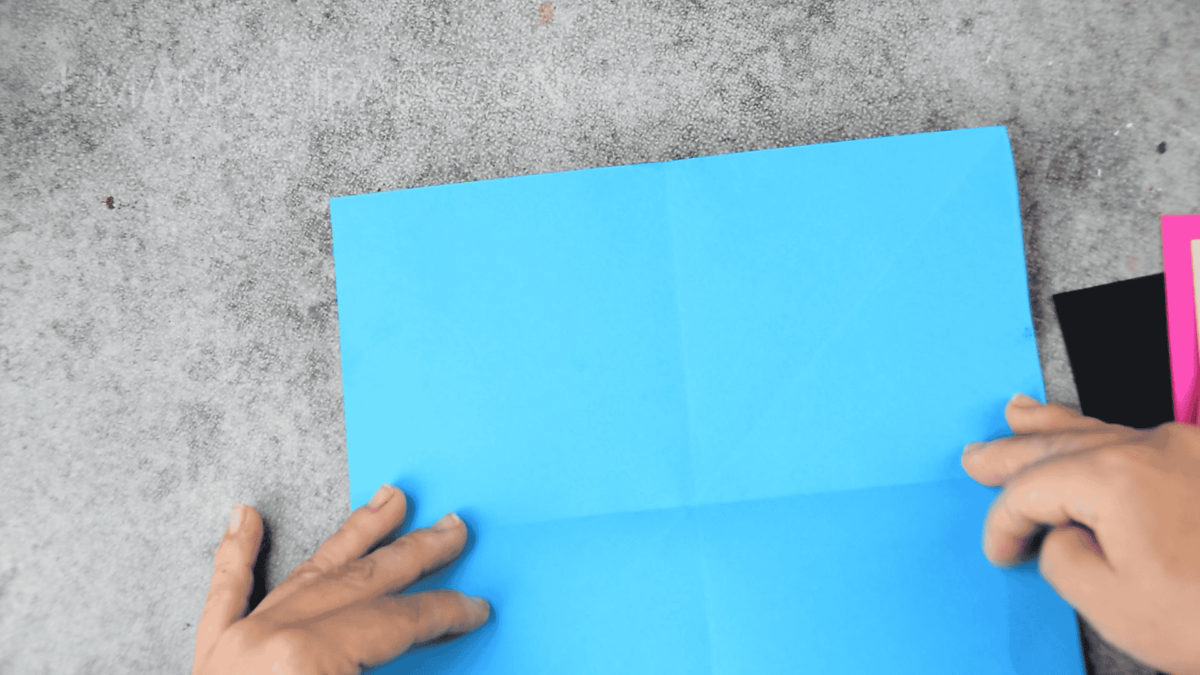
We take the cardboard and we are going to cut it so that a perfect square is formed. We will fold one of the corners down and forming a folded square. The rectangular part that remains at the bottom will be cut.
Second step:
We unfold the square and we fold it in the form of a cross, not x-shaped around the corners.
Third step:
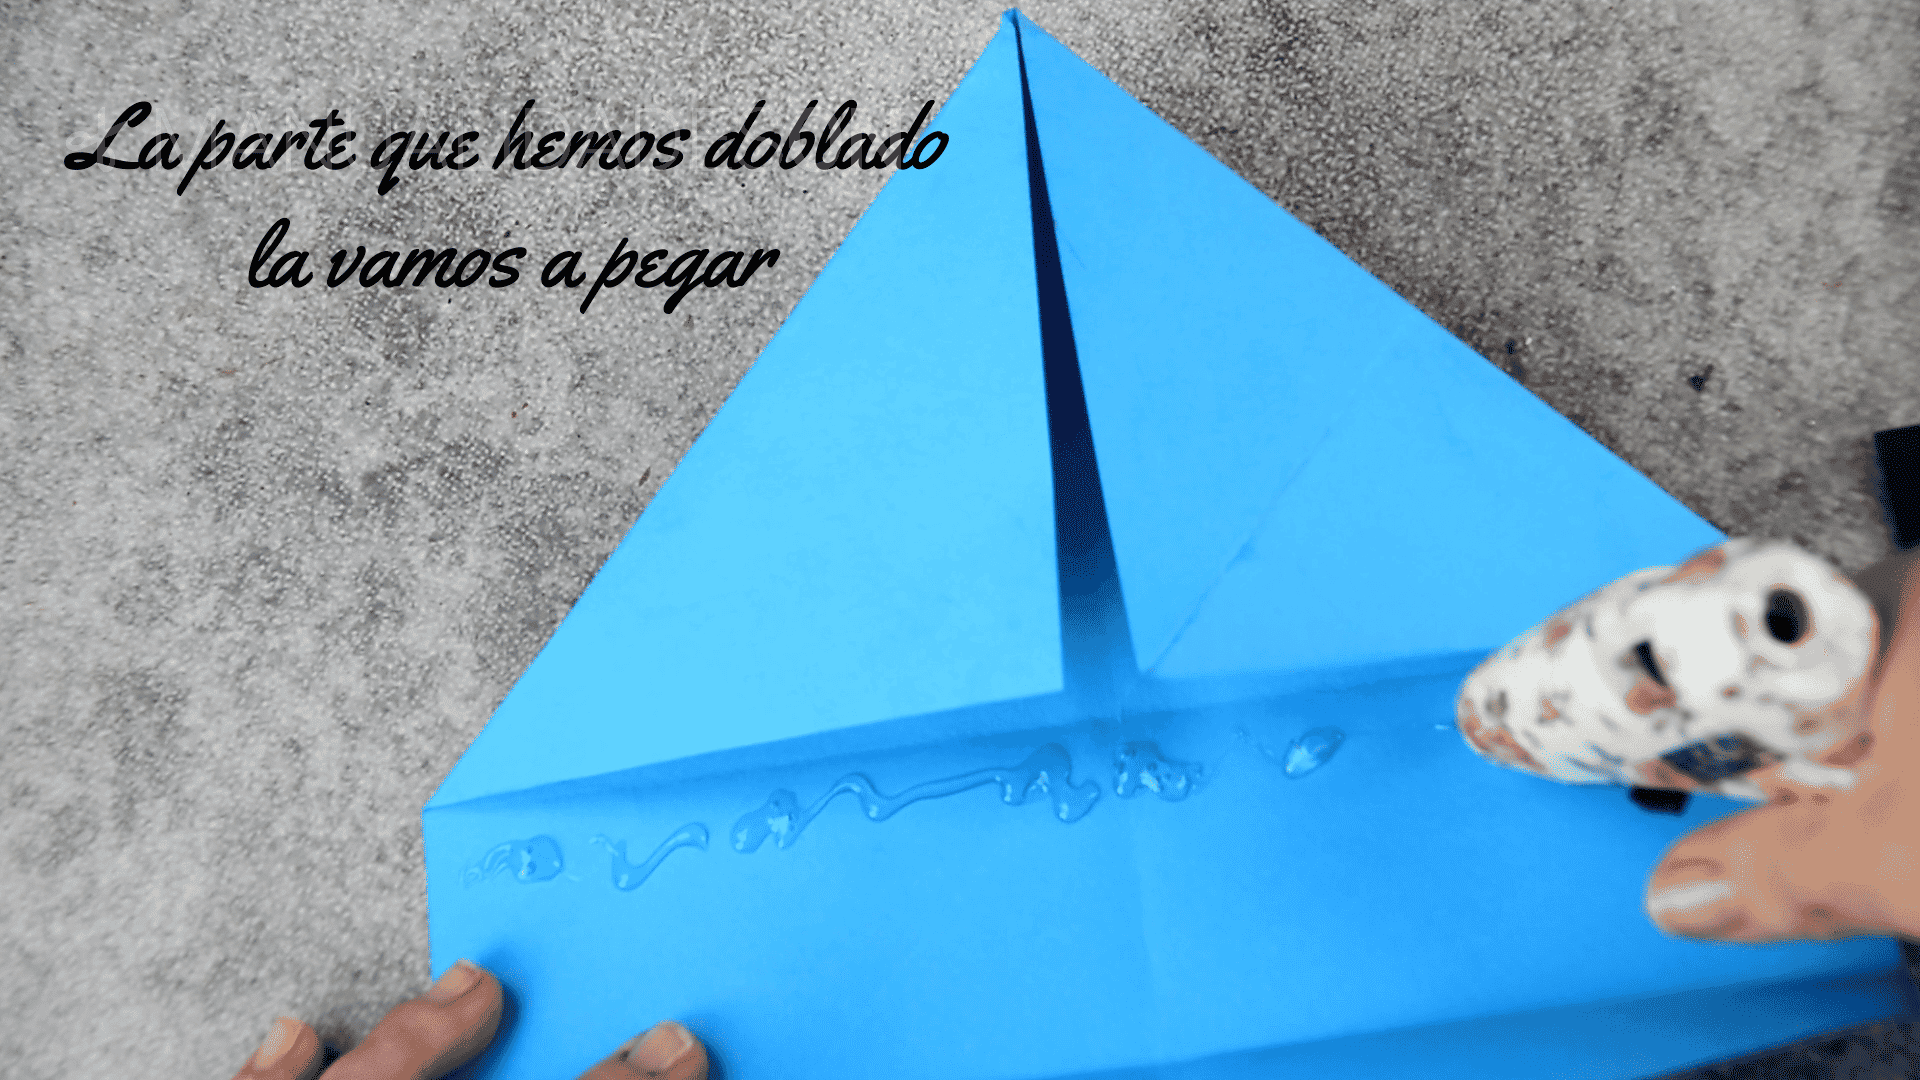
We take the two upper corners and fold them inwards and in the middle. The rest below We'll turn up. We unfold this part, pour hot silicone and fold it again so that stay stuck.

Fourth step:
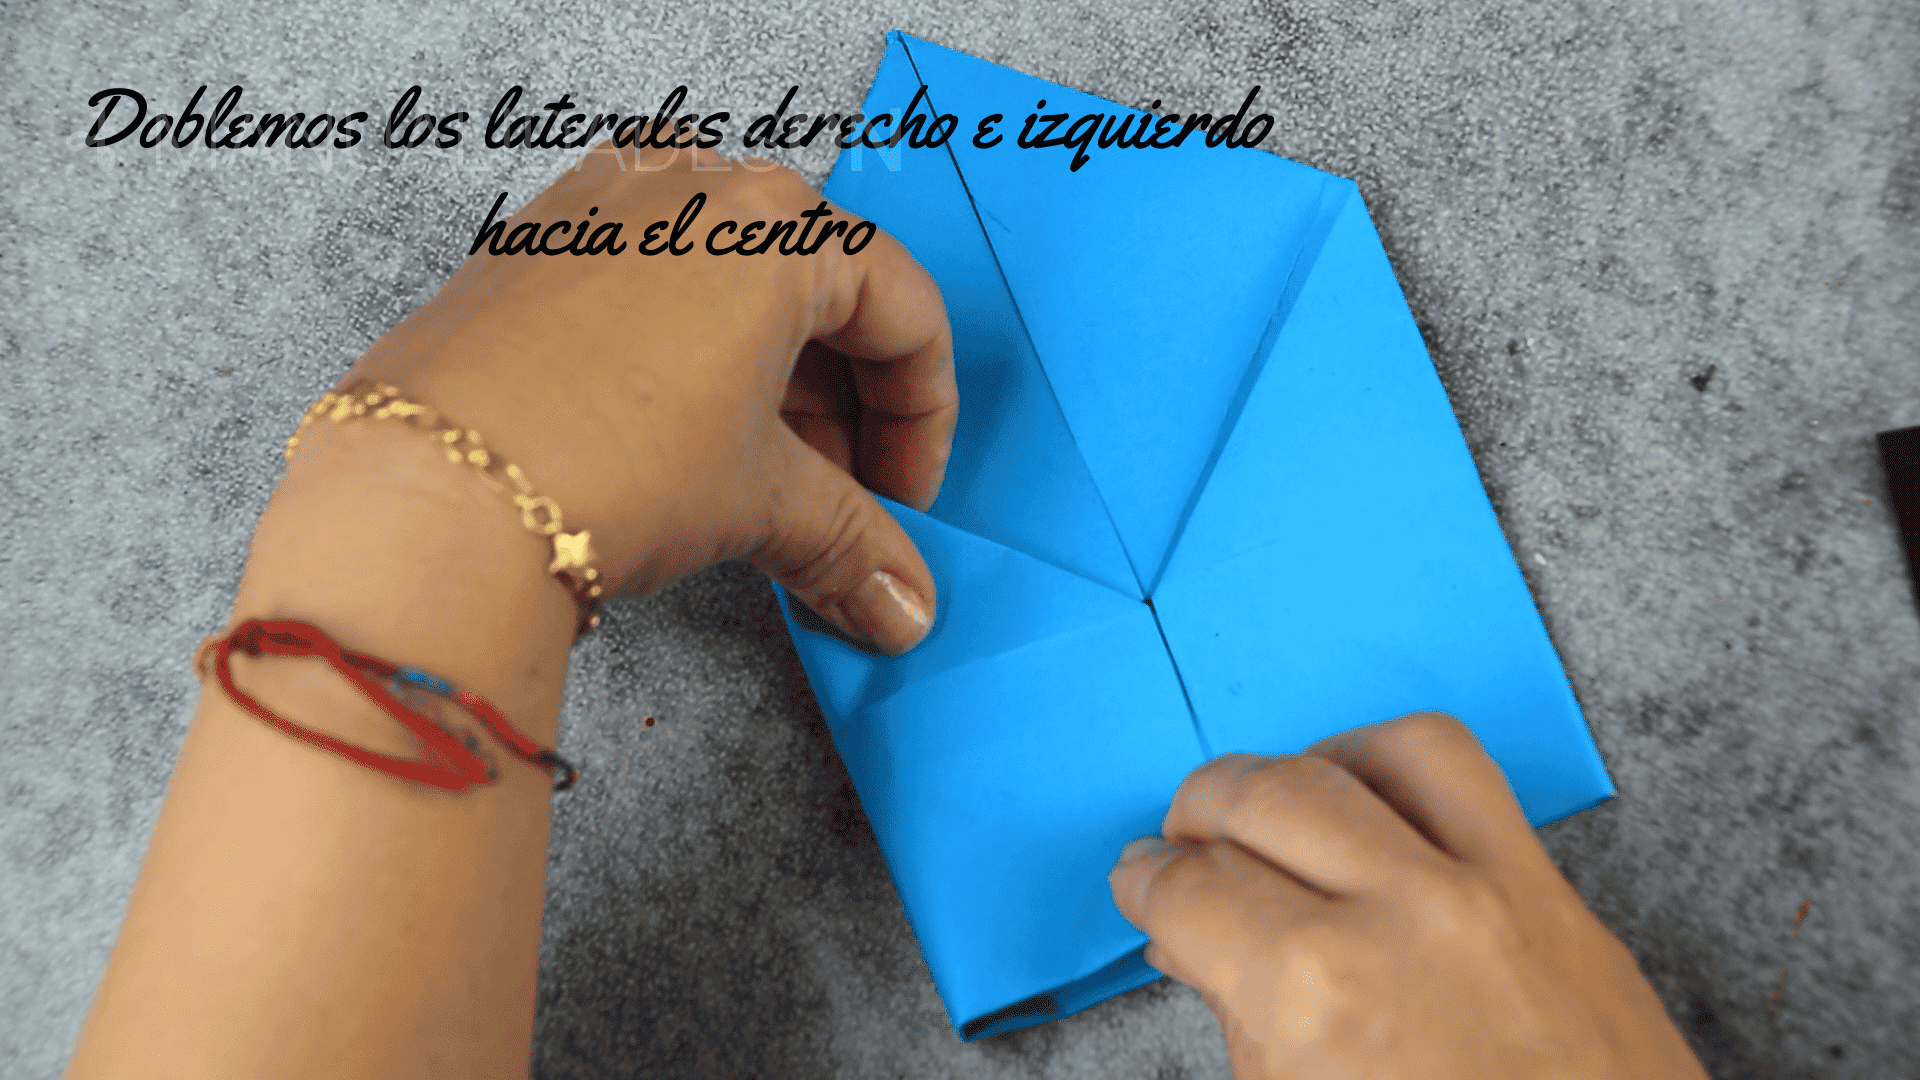
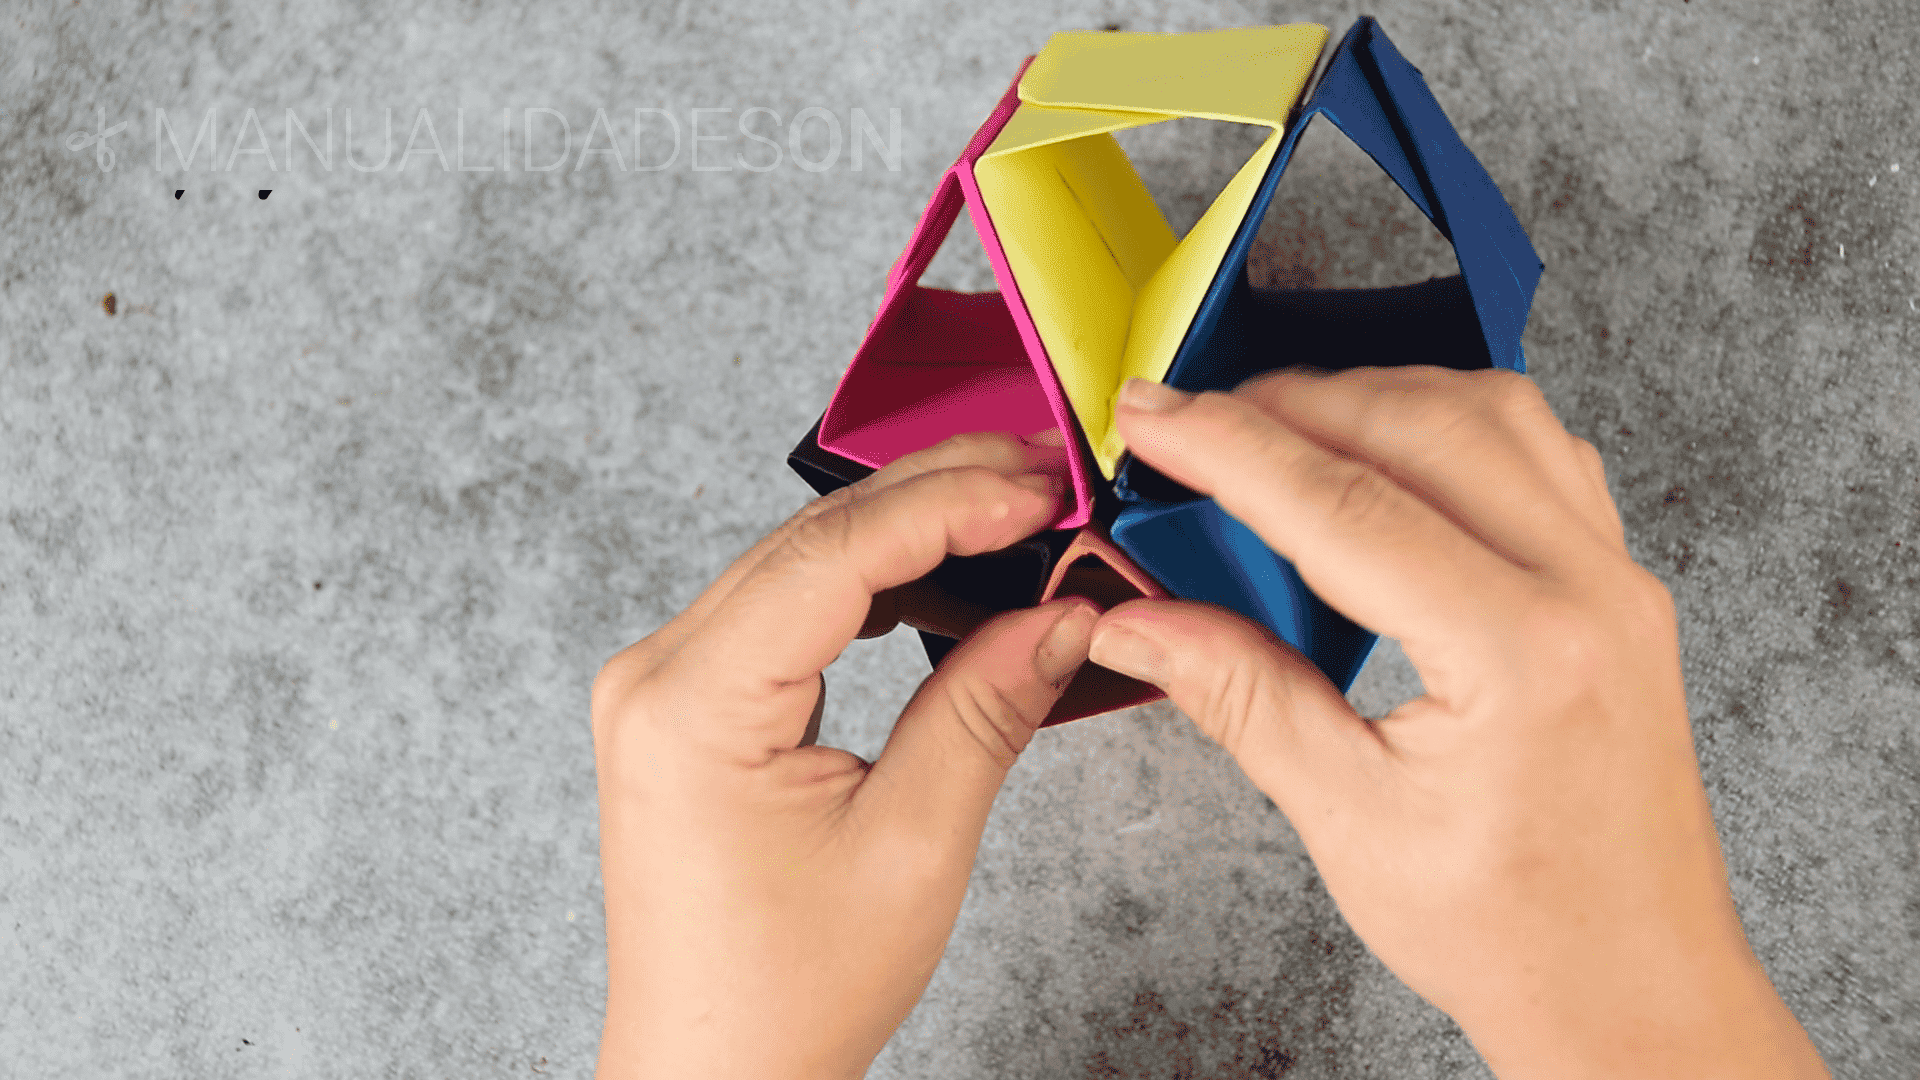
With the structure that we have formed and in front, we will fold the left and right sides to the center. These two flaps that we have folded, we unfold them and try superimpose one on top of the other. We will glue them forming one of the cavities that will form part of the boat. We take the other pieces of cardboard and form the same structure again, then they will have to be joined.


Fifth step:
once placed we will glue them so that they remain firm. We will finish all the holes well with the silicone so that it is well composed. Then we will pour silicone underneath and place it on top of another card. When placed it will join and form part of the base.

Step Six:
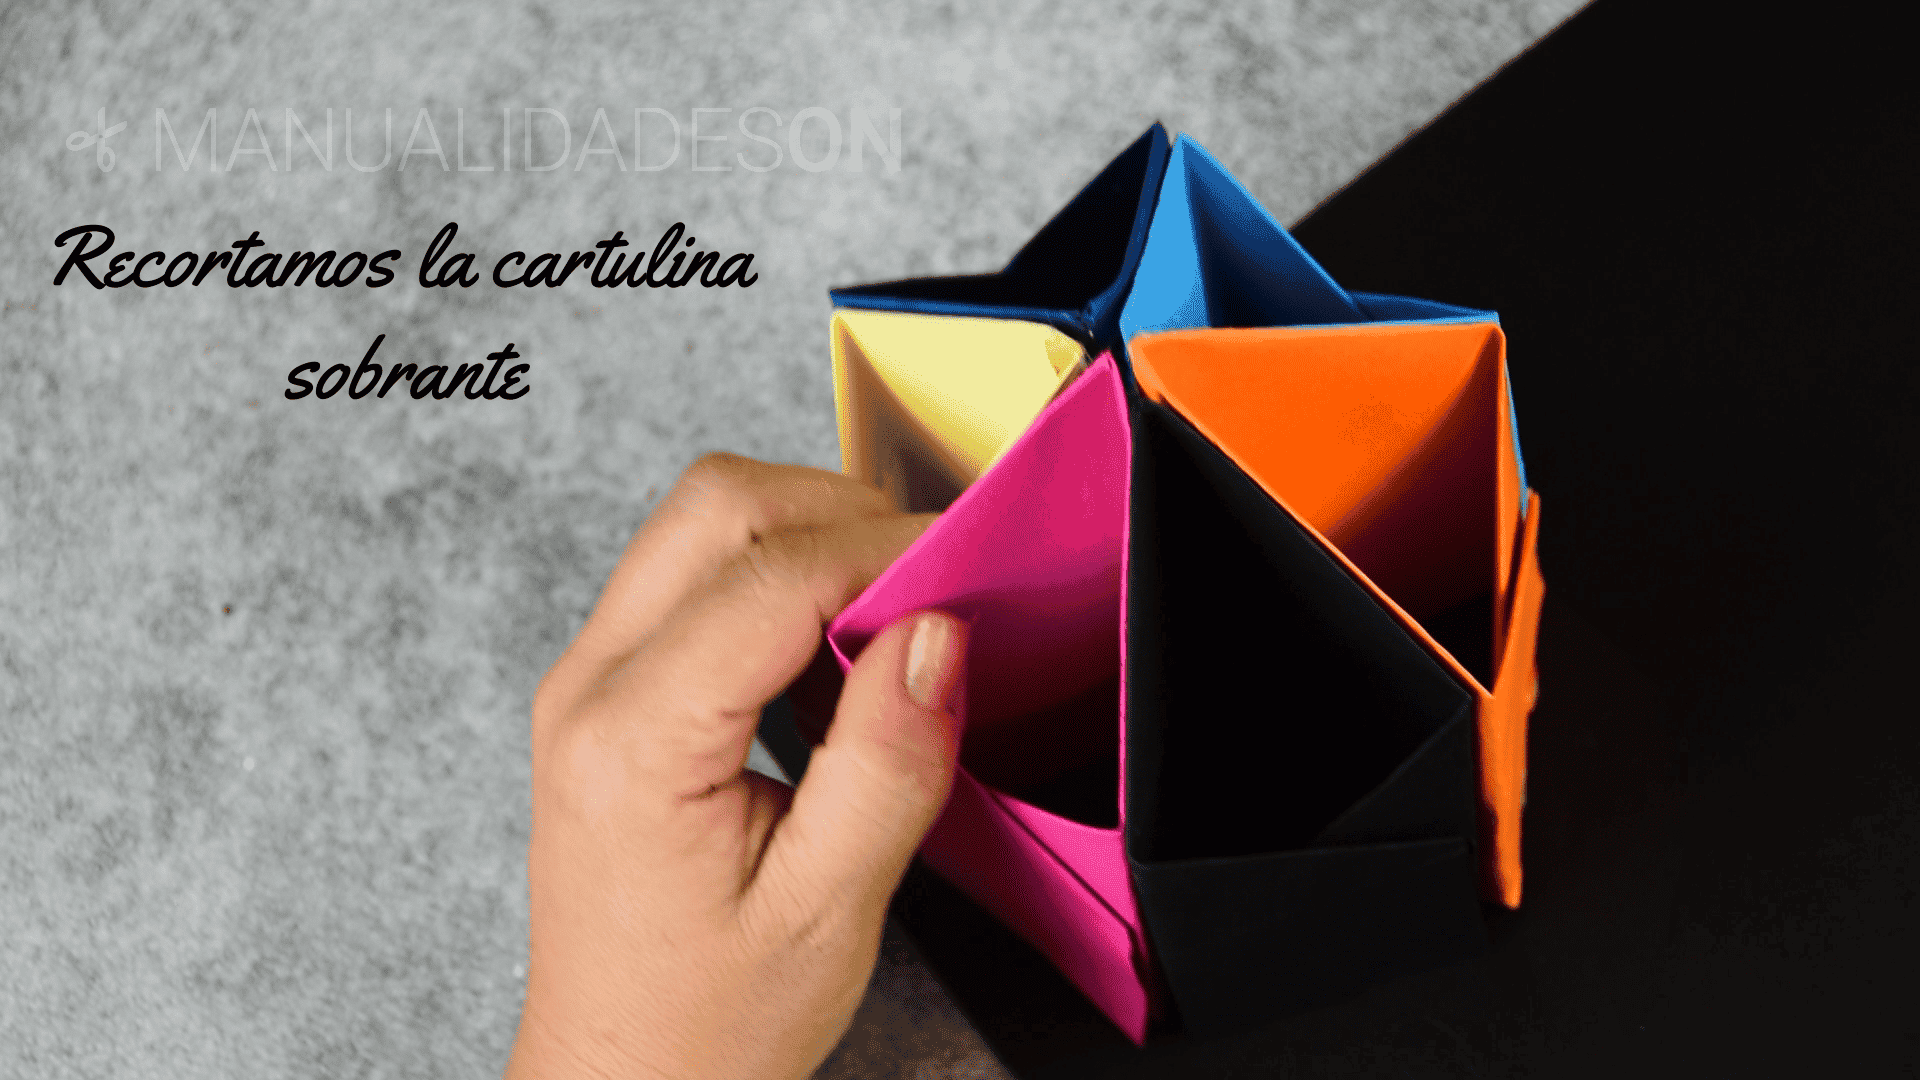
We'll take the scissors and we will cut all the excess part of the cardboard and the base can be formed. We can now enjoy the boat and be able to fill it with our small belongings.