
The paper birds They are very beautiful animals to decorate our walls. In this post I am going to teach you how to make this one made of eva rubber and paper that will be the delight of the little ones in the house.
Materials to make the bird
- Colored eva rubber
- Colored folios
- Permanent markers
- Scissors
- Glue
- Eva rubber punches
Process to make the bird
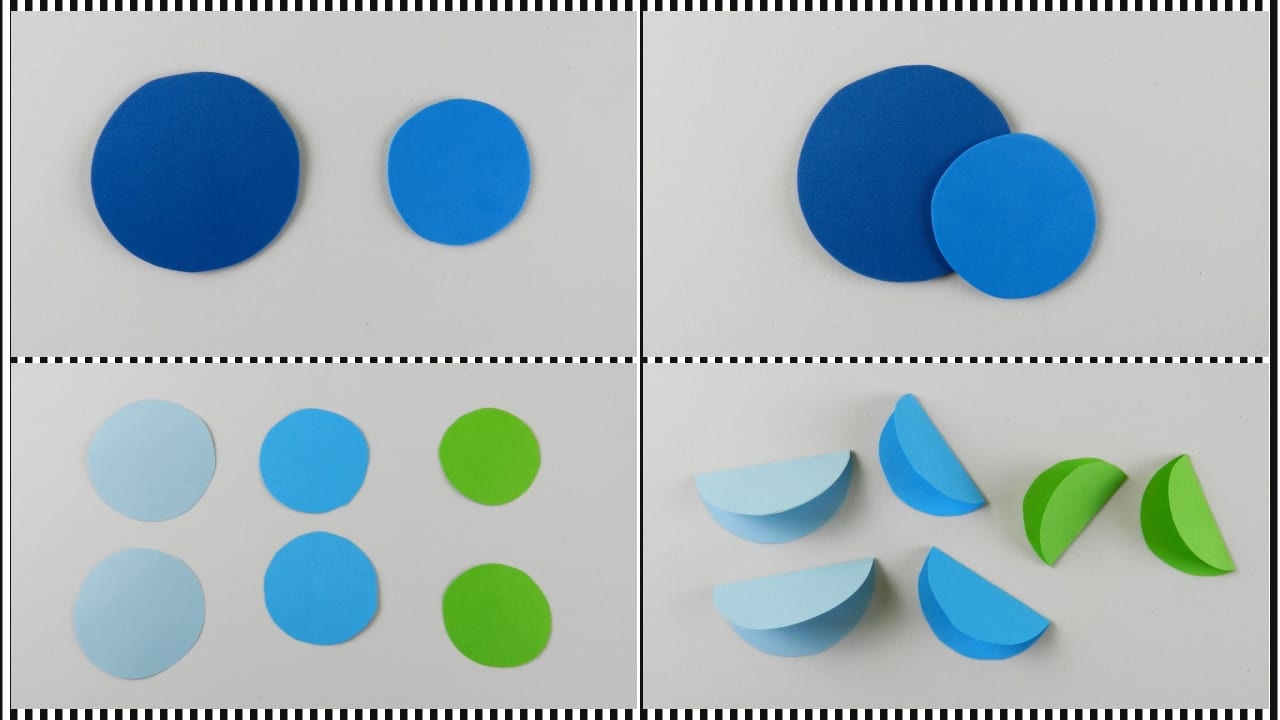
- To start, cut out in rubber eva two circles; one, 6 cm in diameter and another approximately 8 cm.
- Glue the small one over the big one, This will be the head of the bird.
- Cut out 6 paper circles de various colors. The measurements are 6, 5 and 4 cm respectively.
- Fold them in half, but leaving the folio slightly crooked so that the fold of the paper can be seen.
- Now, go pasting the circles from largest to smallest to form the wings.
- Be very careful, they have to look symmetrical, the others have to be done the other way around so that you can stick them on the bird and they are perfect.
- Once the wings are made, glue them to the sides of the bird.

- Cut these 3 pieces into colored folios, which will be tail feathers of the little bird.
- Glue them very carefully so that they are centered.
- Now, with two black and white circles I will form the eyes and I'm going to stick them on the bird's face.

- We will form peak with a piece of orange eva rubber and stick it on the face.
- With a white marker I'm going to make the details in the eyes.
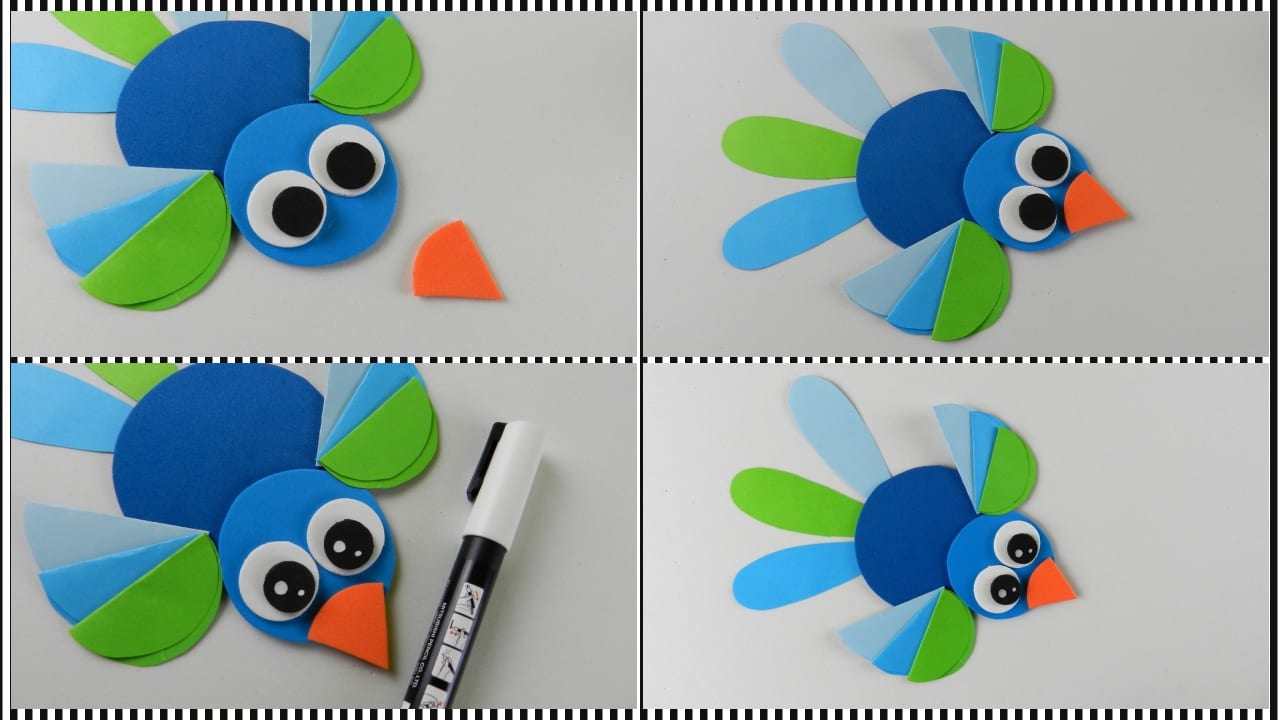
And we have finished this precious bird. Remember that you can play with colors and designs to create something totally new and original.
And if you like birds, here is another one that you may like. It is made with eva rubber and is a perfect keychain for a gift or a detail.

I guess it's cute and helps me a lot in my homework.