We have made a very personal notebook that looks vintage so you can give away. It is a great gift or a very special decoration object that you can make with the help of some wooden sticks and a touch of acrylic paint. You can follow all the steps with our demo video to know the trick of how to leave that worn and original look.
The materials I have used for the notebook:
- A small notebook that is as tall as the sticks to cover it
- Wooden sticks, enough to cover the width of the notebook
- Red acrylic paint
- White acrylic paint
- Silver acrylic paint
- A medium coarse grit sandpaper
- A decorative red and white string
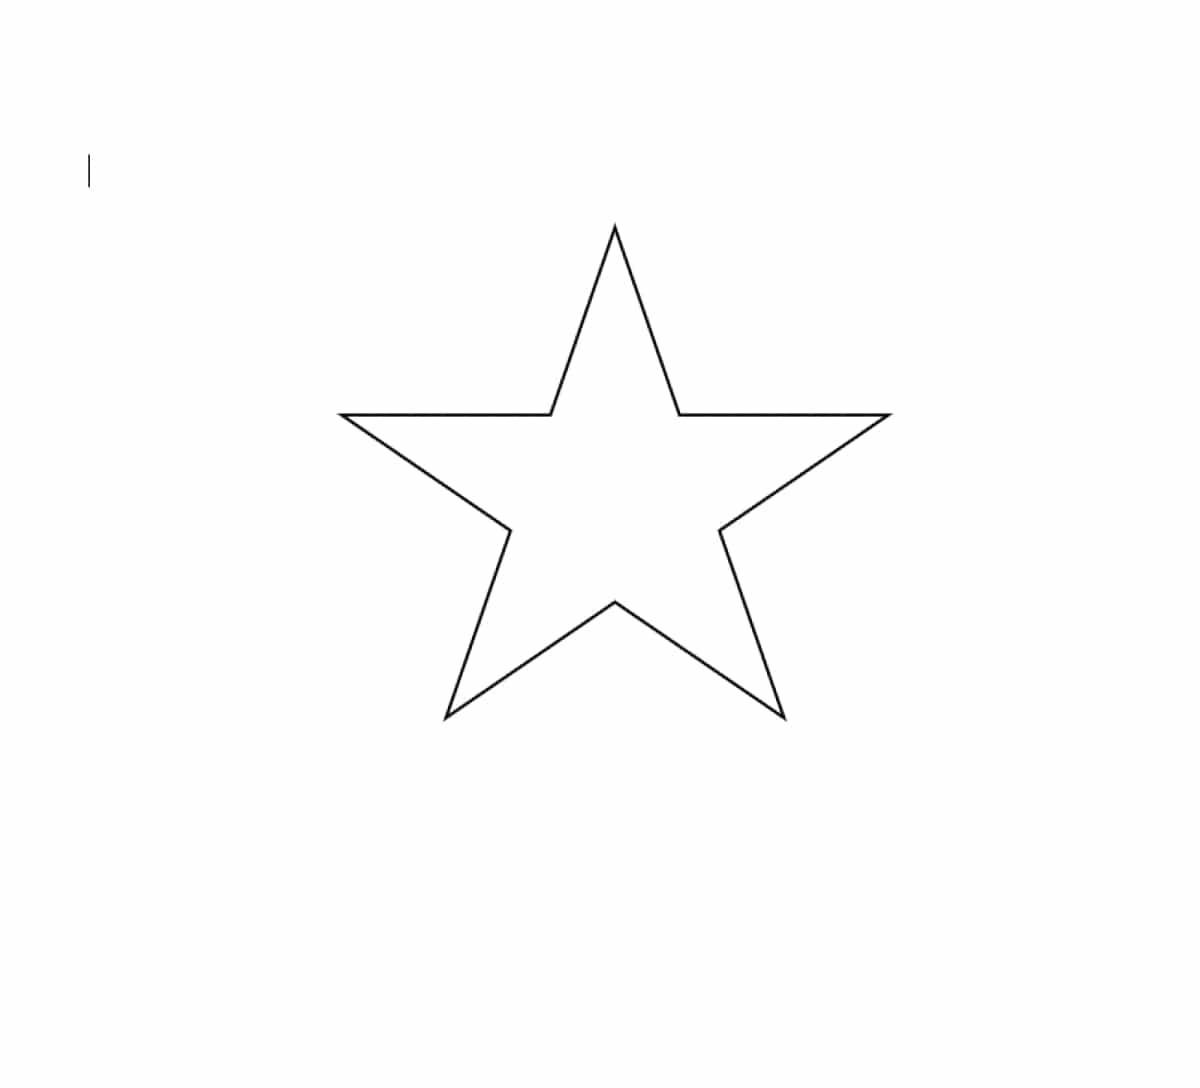
- A template of a star (you can print it with the image that I leave below)
- Hot silicone and her gun
- A pencil
- A small, chunky craft brush
- A fine brush
- Scissors
You can see this craft step by step in the following video:
First step:
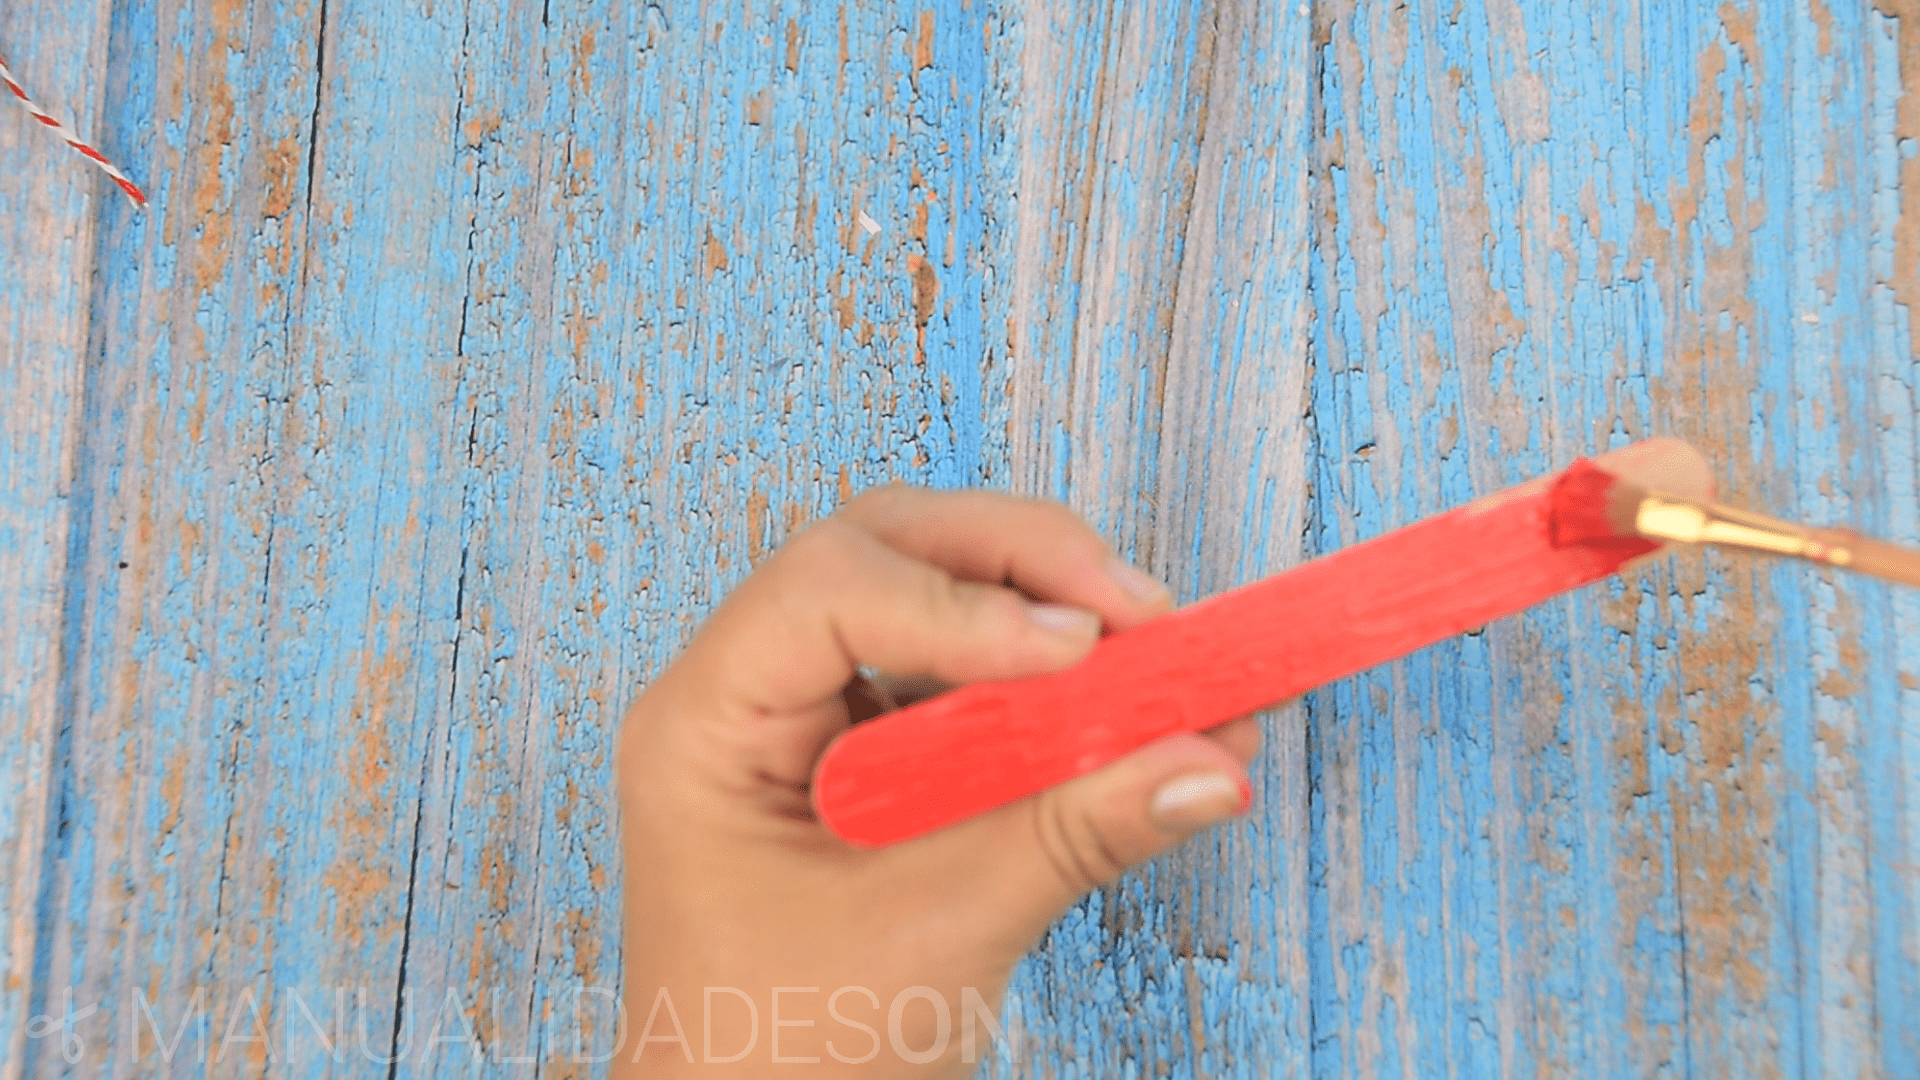
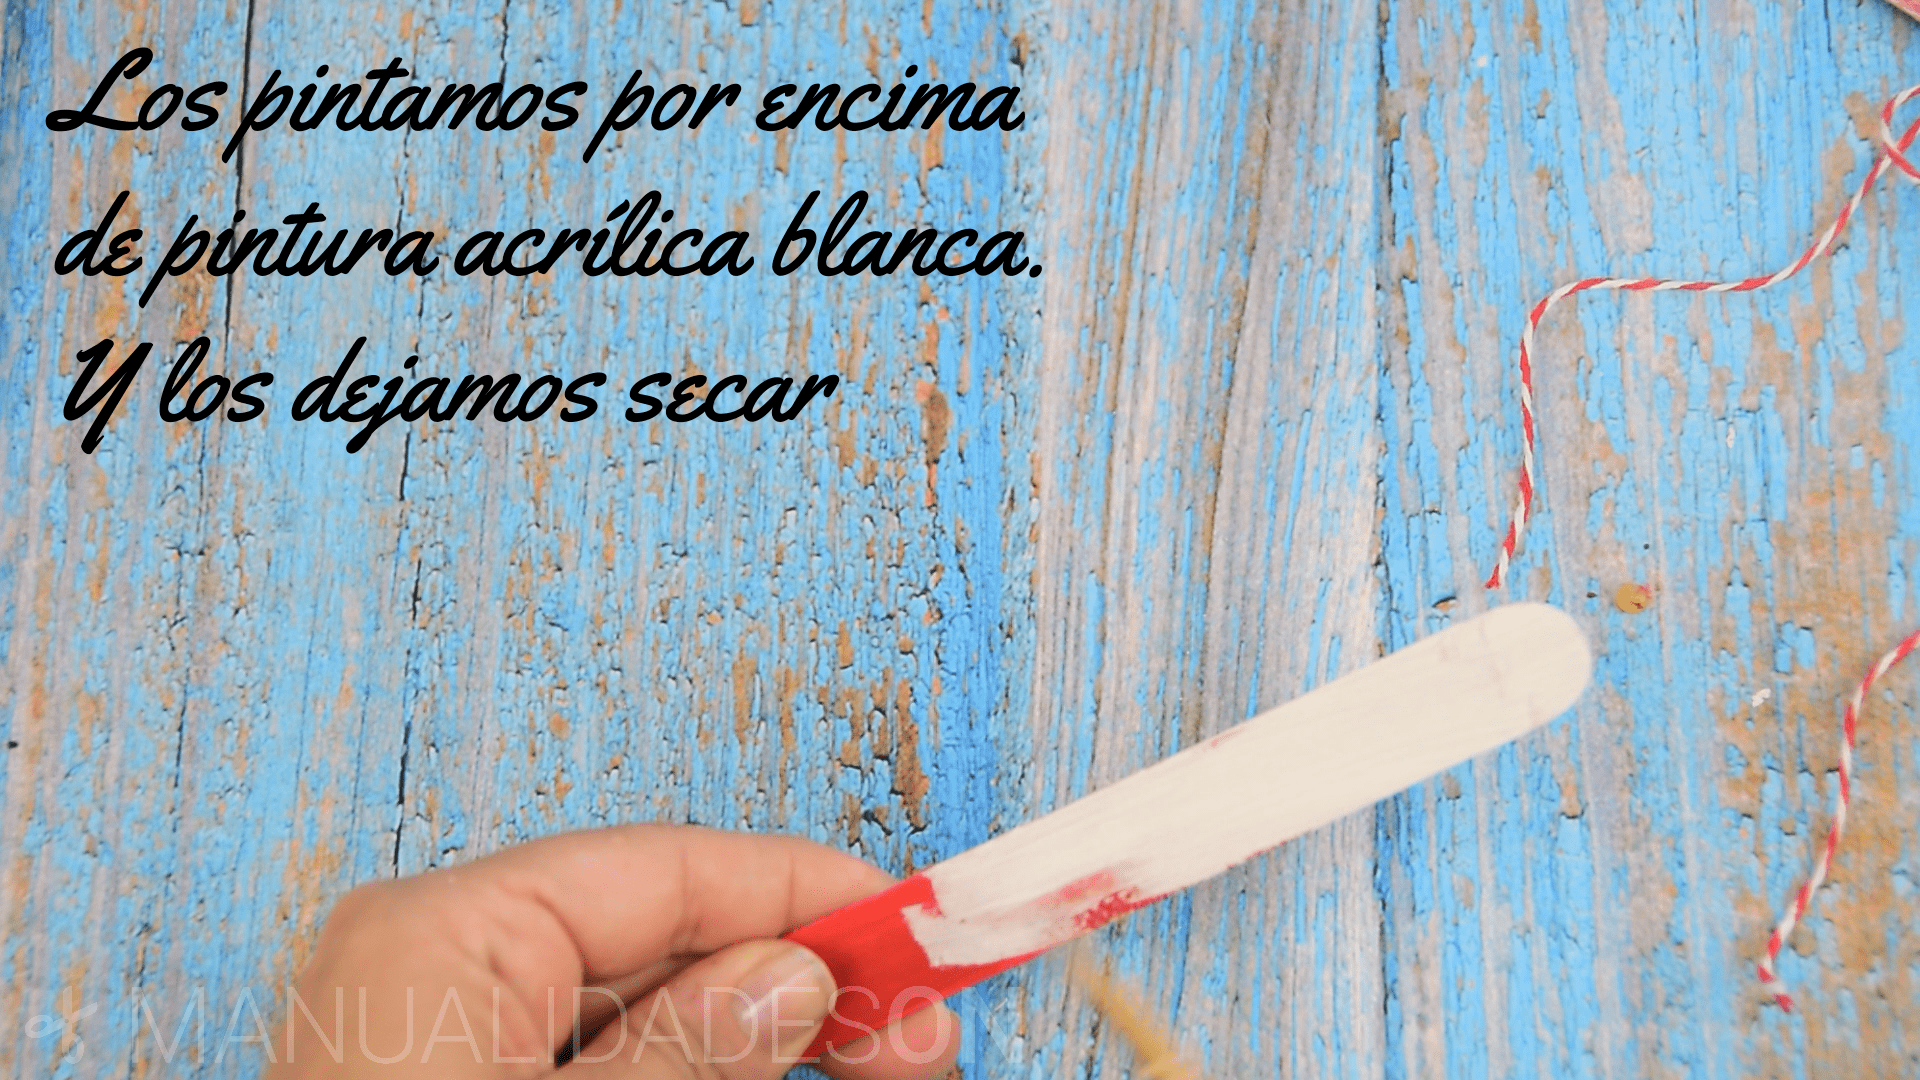
All the wooden sticks we are going to paint red on one of their faces. We will let it dry and repaint over another layer of white paint. We also let it dry.
Second step:
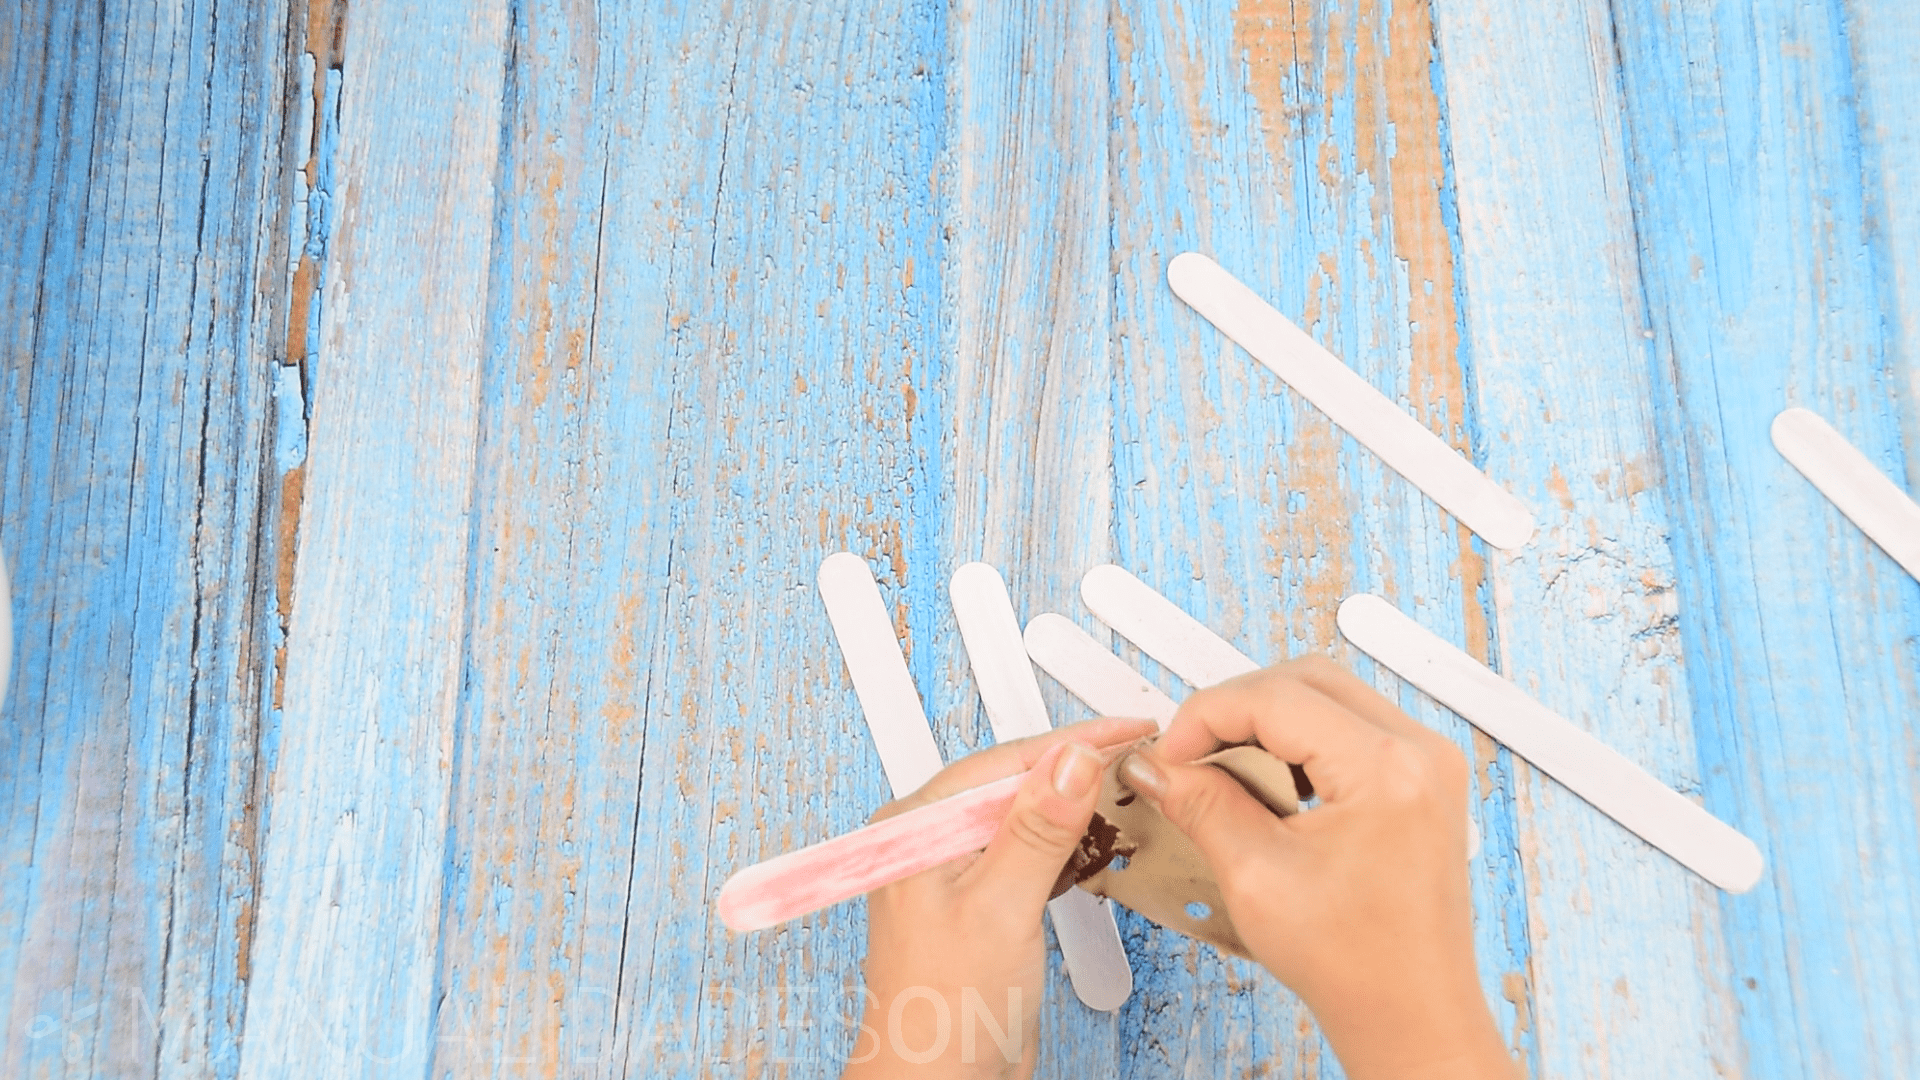
We take the sandpaper and we scrape the surface so that the white paint is scratched. In this way we will not remove all the white paint and let the red one show underneath, giving the sticks that vintage look.
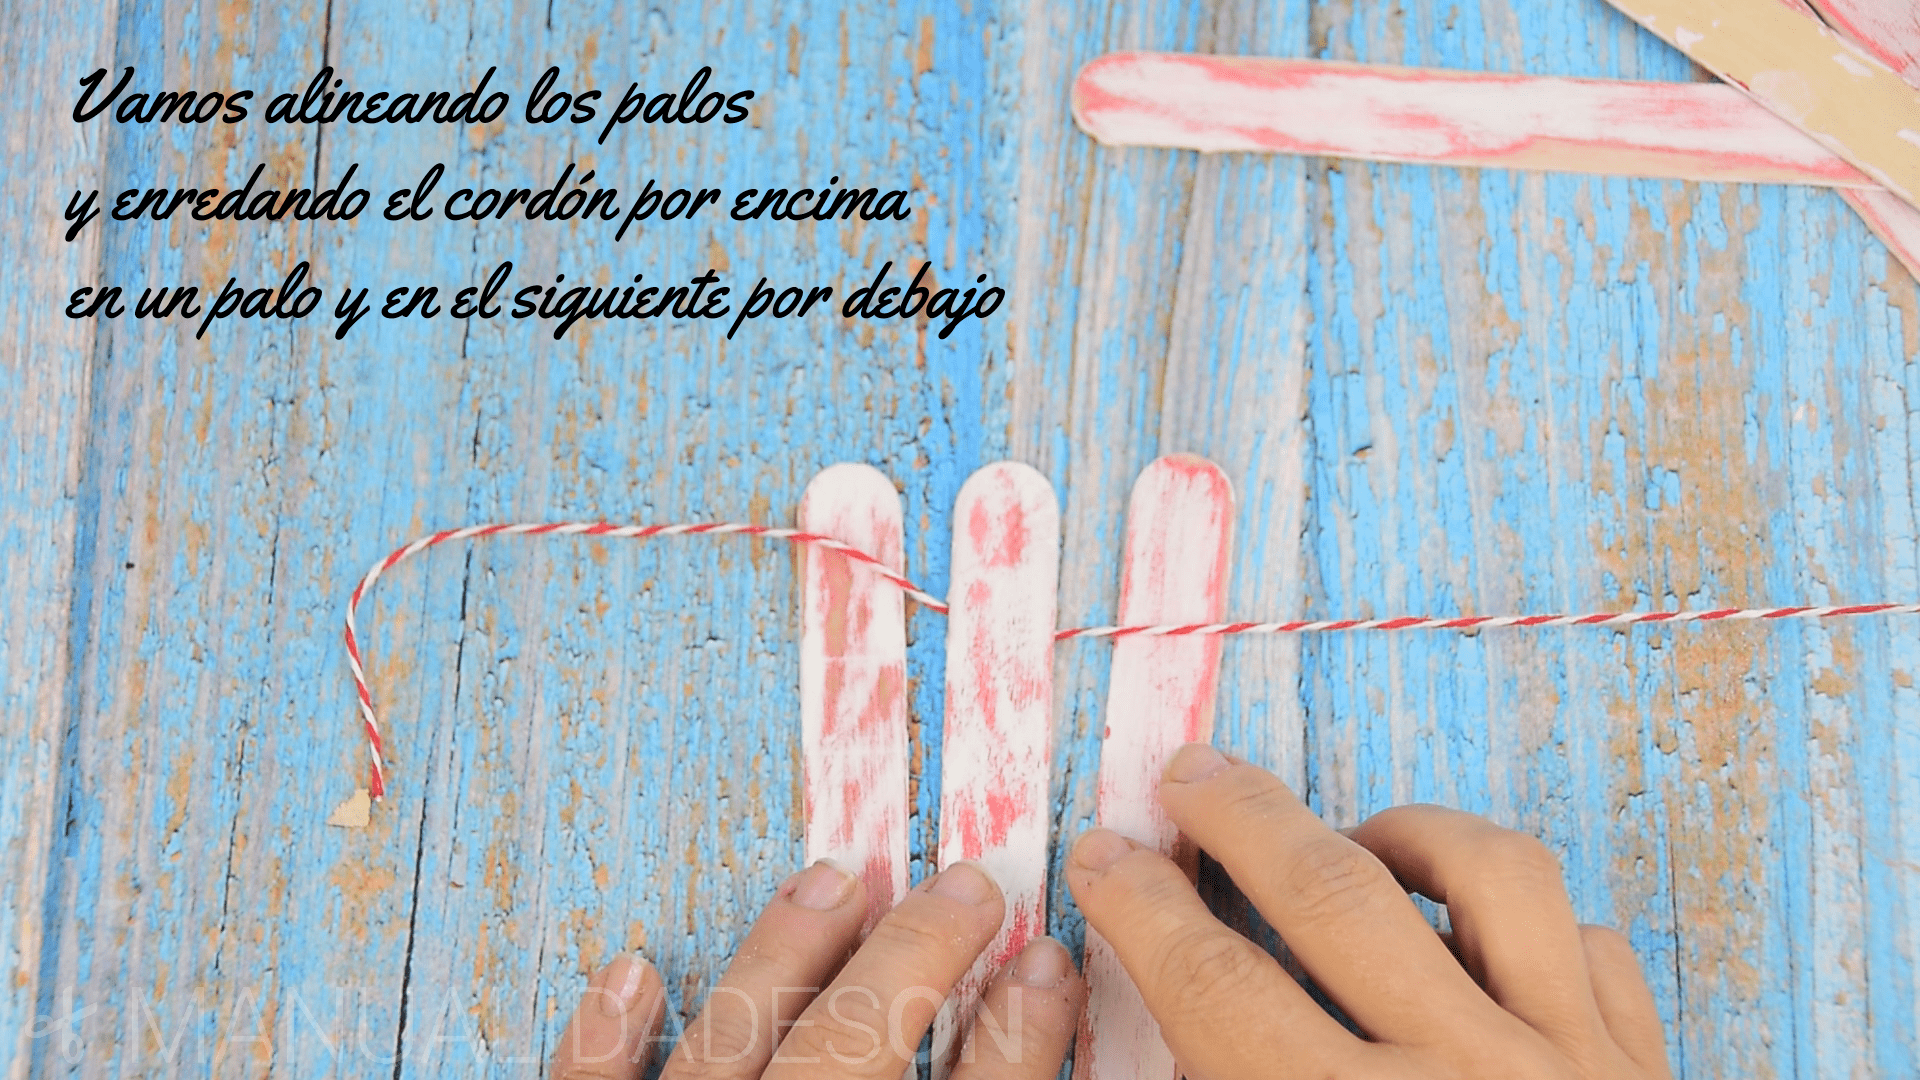
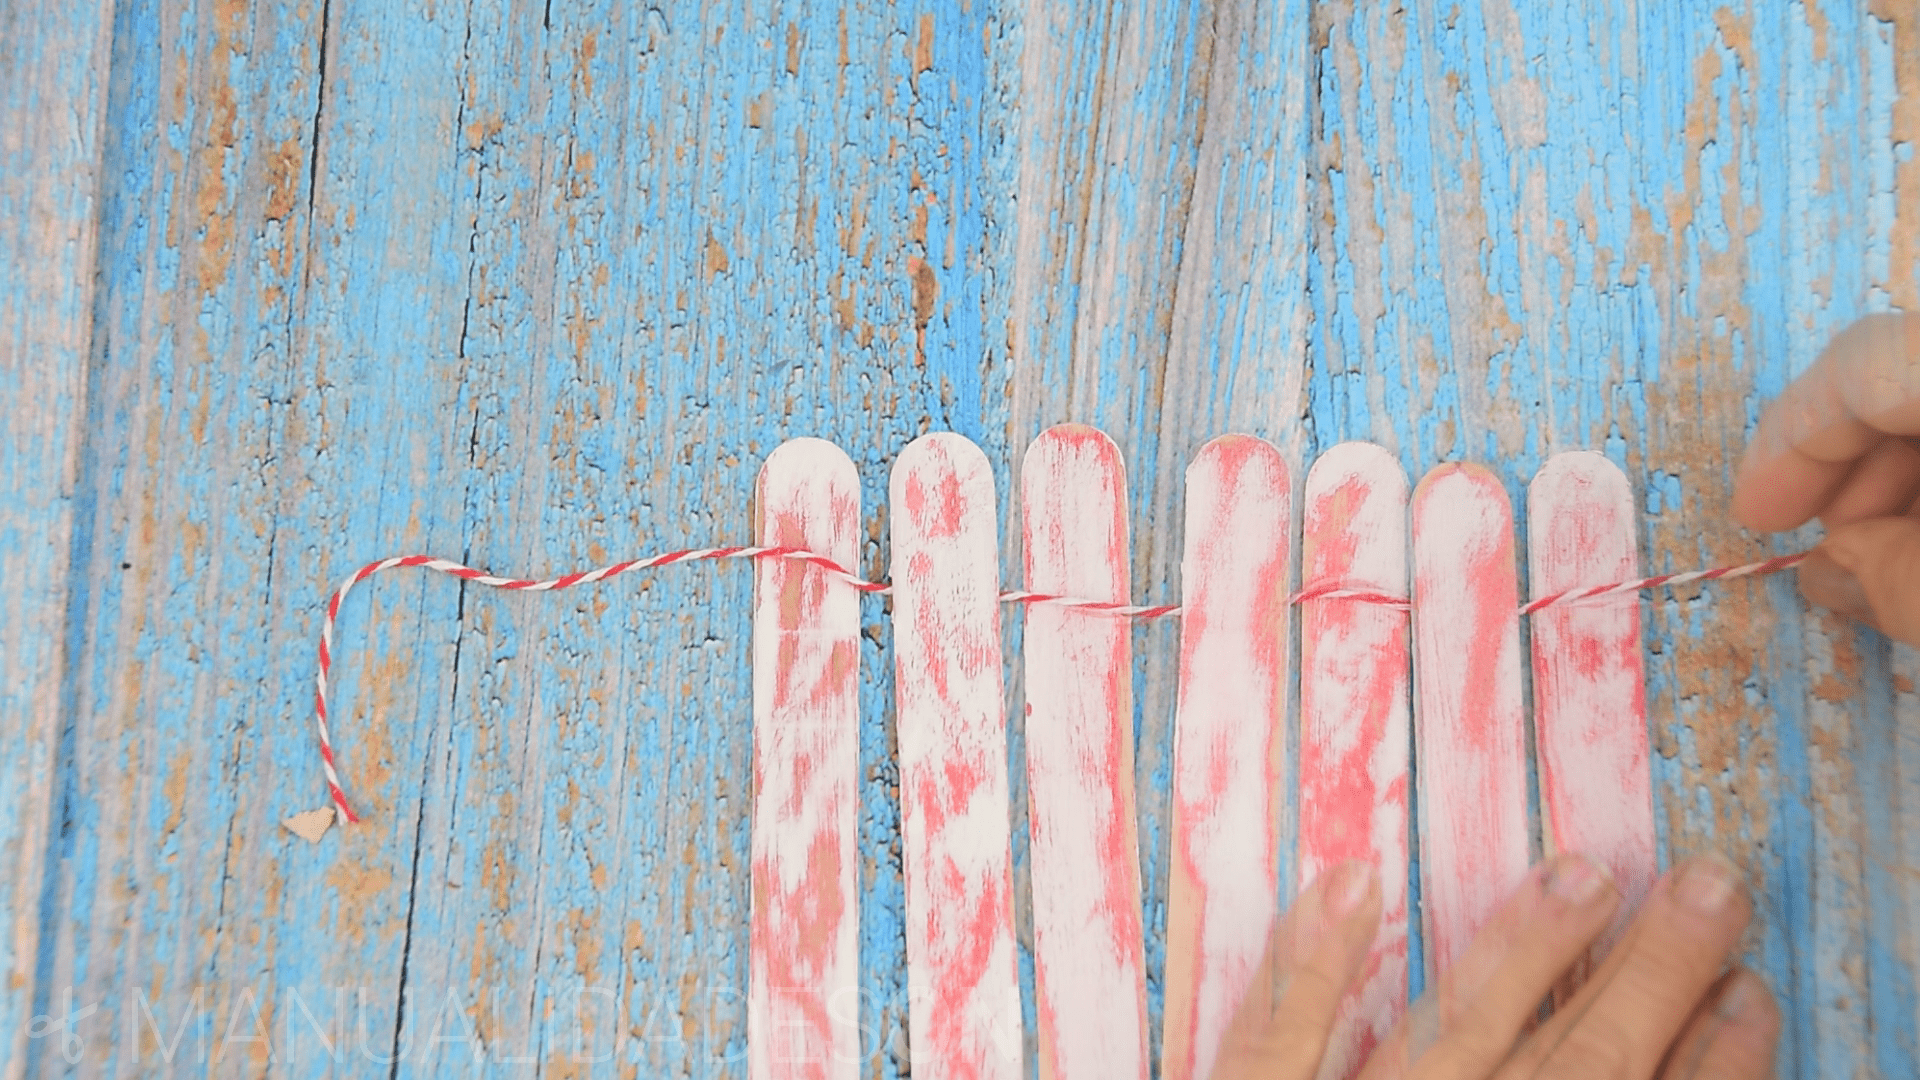
Third step:
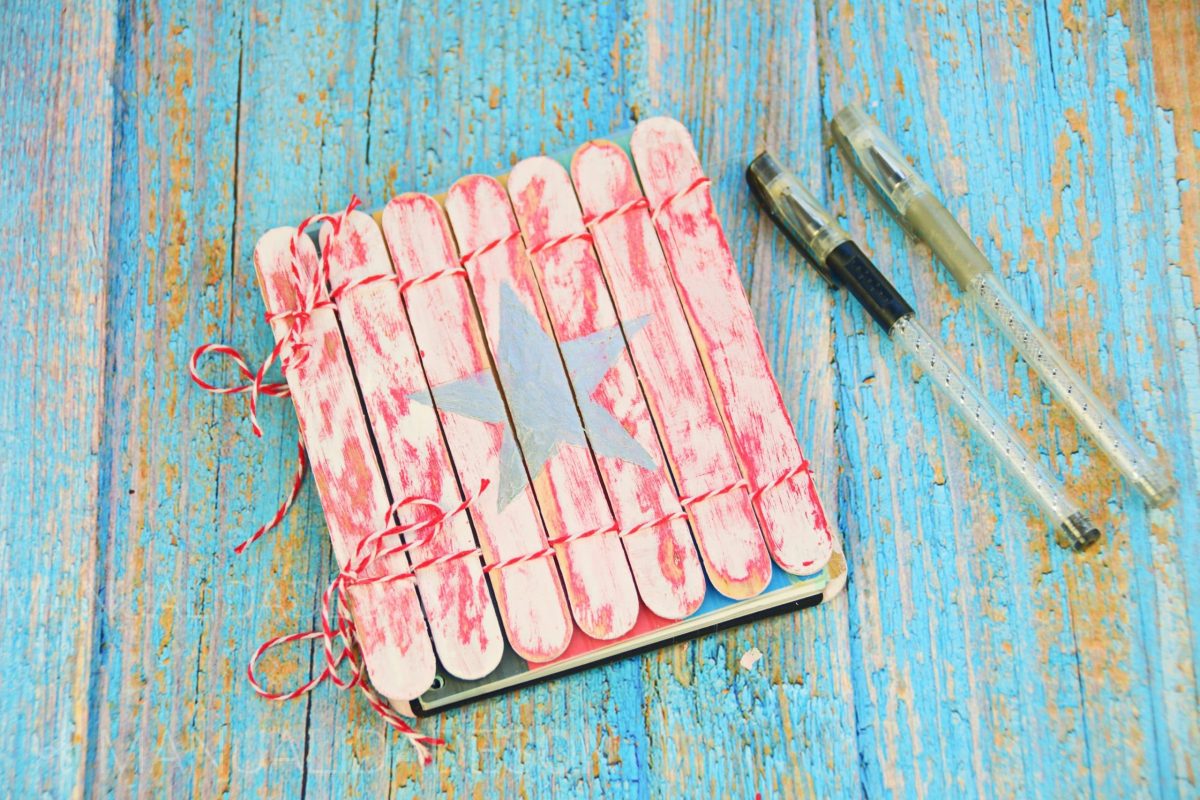
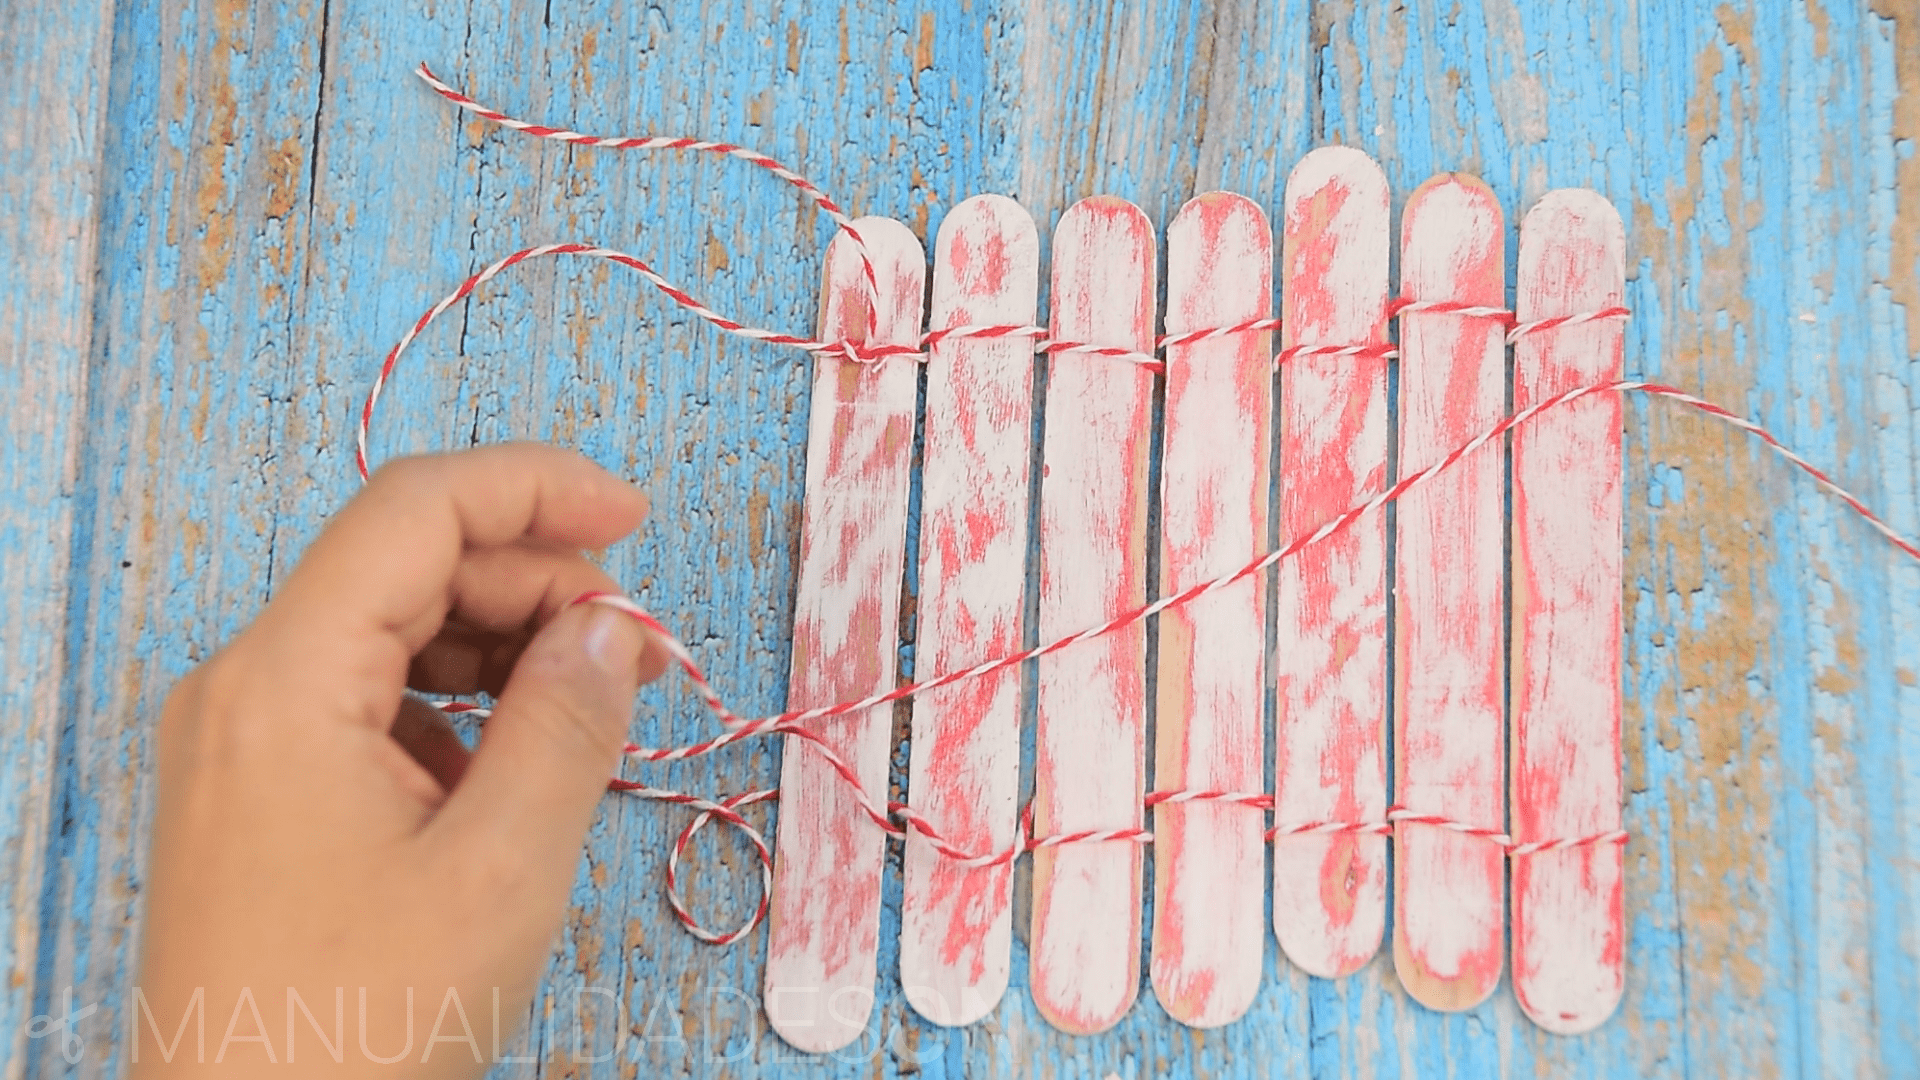
We align all the sticks that we are going to use to cover one of the covers of the notebook. We will start by leaving one end of the rope somewhat long and the rest we will pass it between the sticks at the top. In this case we pass the thread on top of a stick, in the next we will pass it underneath and so on until the end of all the sticks. When we get to the end we start again, but in reverse. We put the thread above where we had passed the thread below and so on until the end. When we finish we knot the two ends of the thread and we make a nice bow. We do the same in the lower part of the sticks and entangling the thread in the same way as in the previous steps.
Fourth step:
We do the previous step for the two covers of the notebook. We place each of the structures on each cover of the notebook and we will glue them with the help of hot silicone. To make it look good we must align the sticks well, that they fit well together and that the thread is well straight and aligned.


Fifth step:
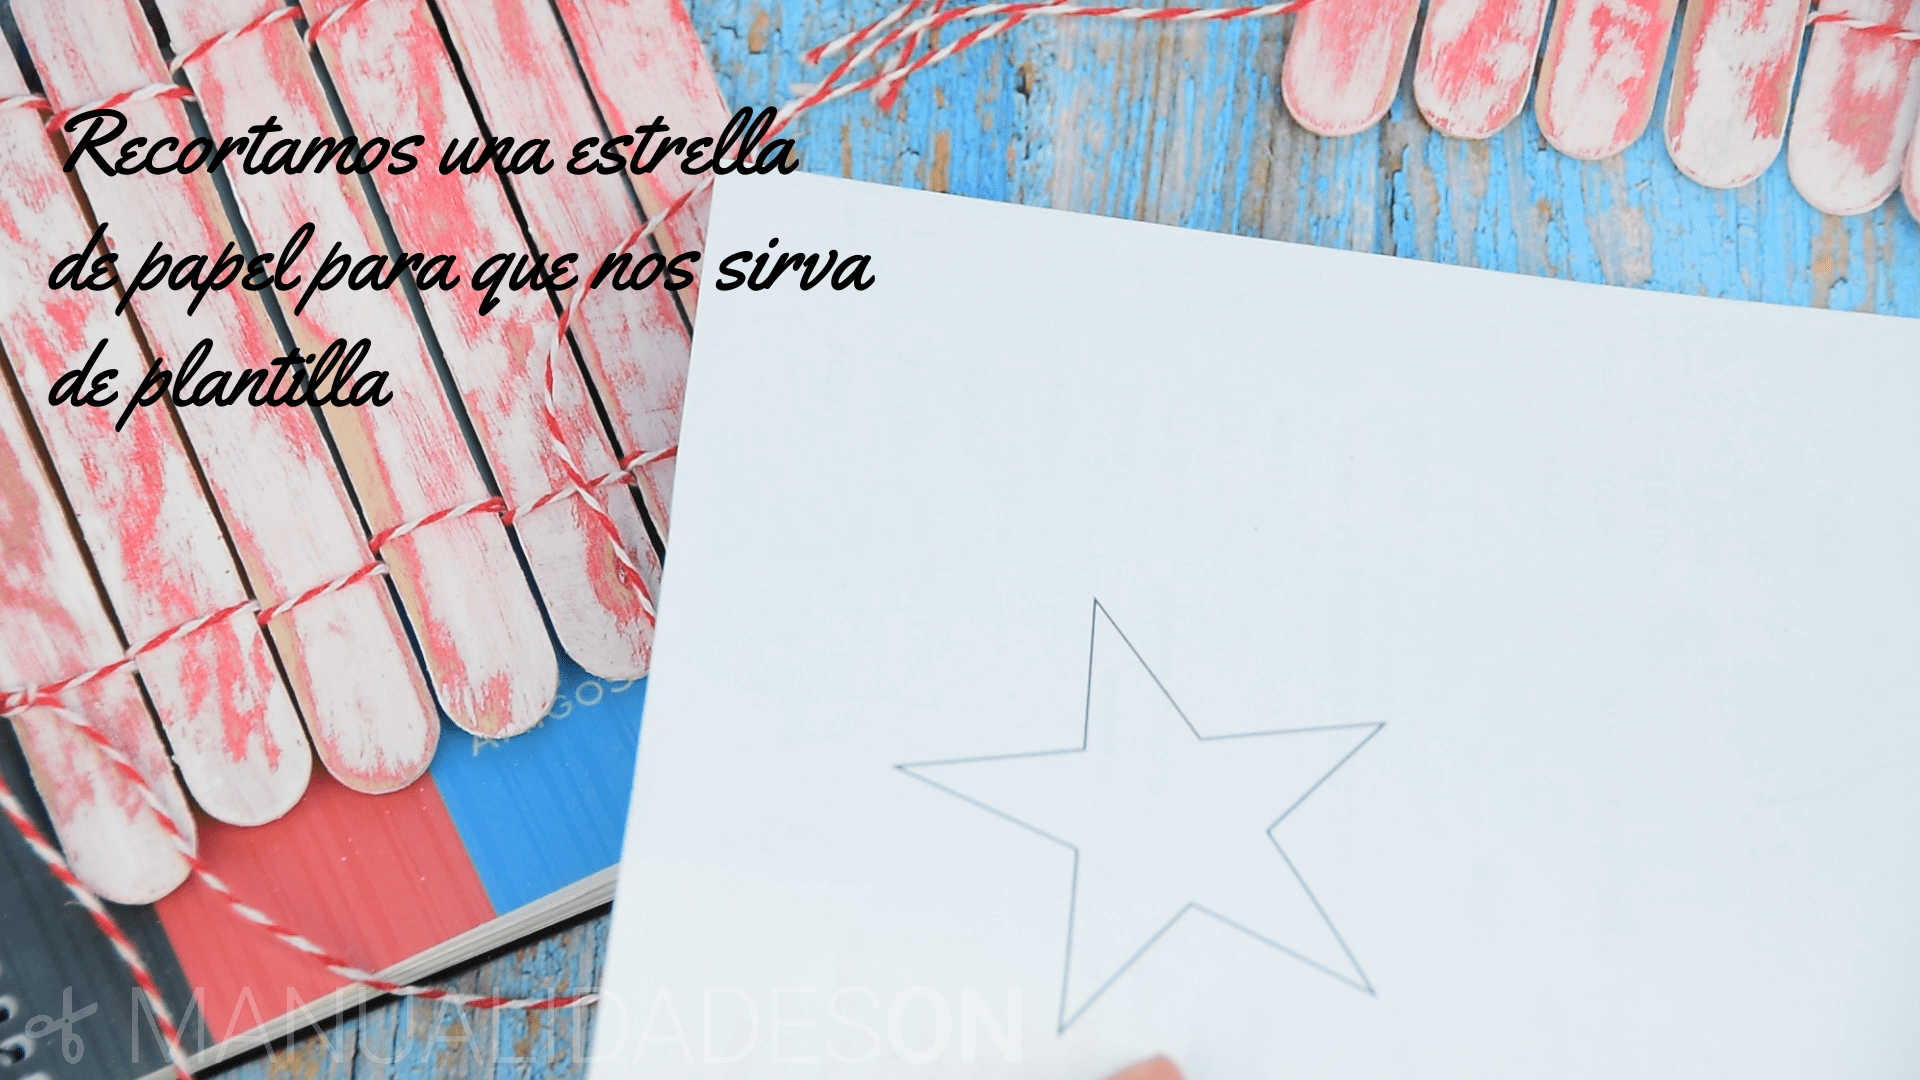
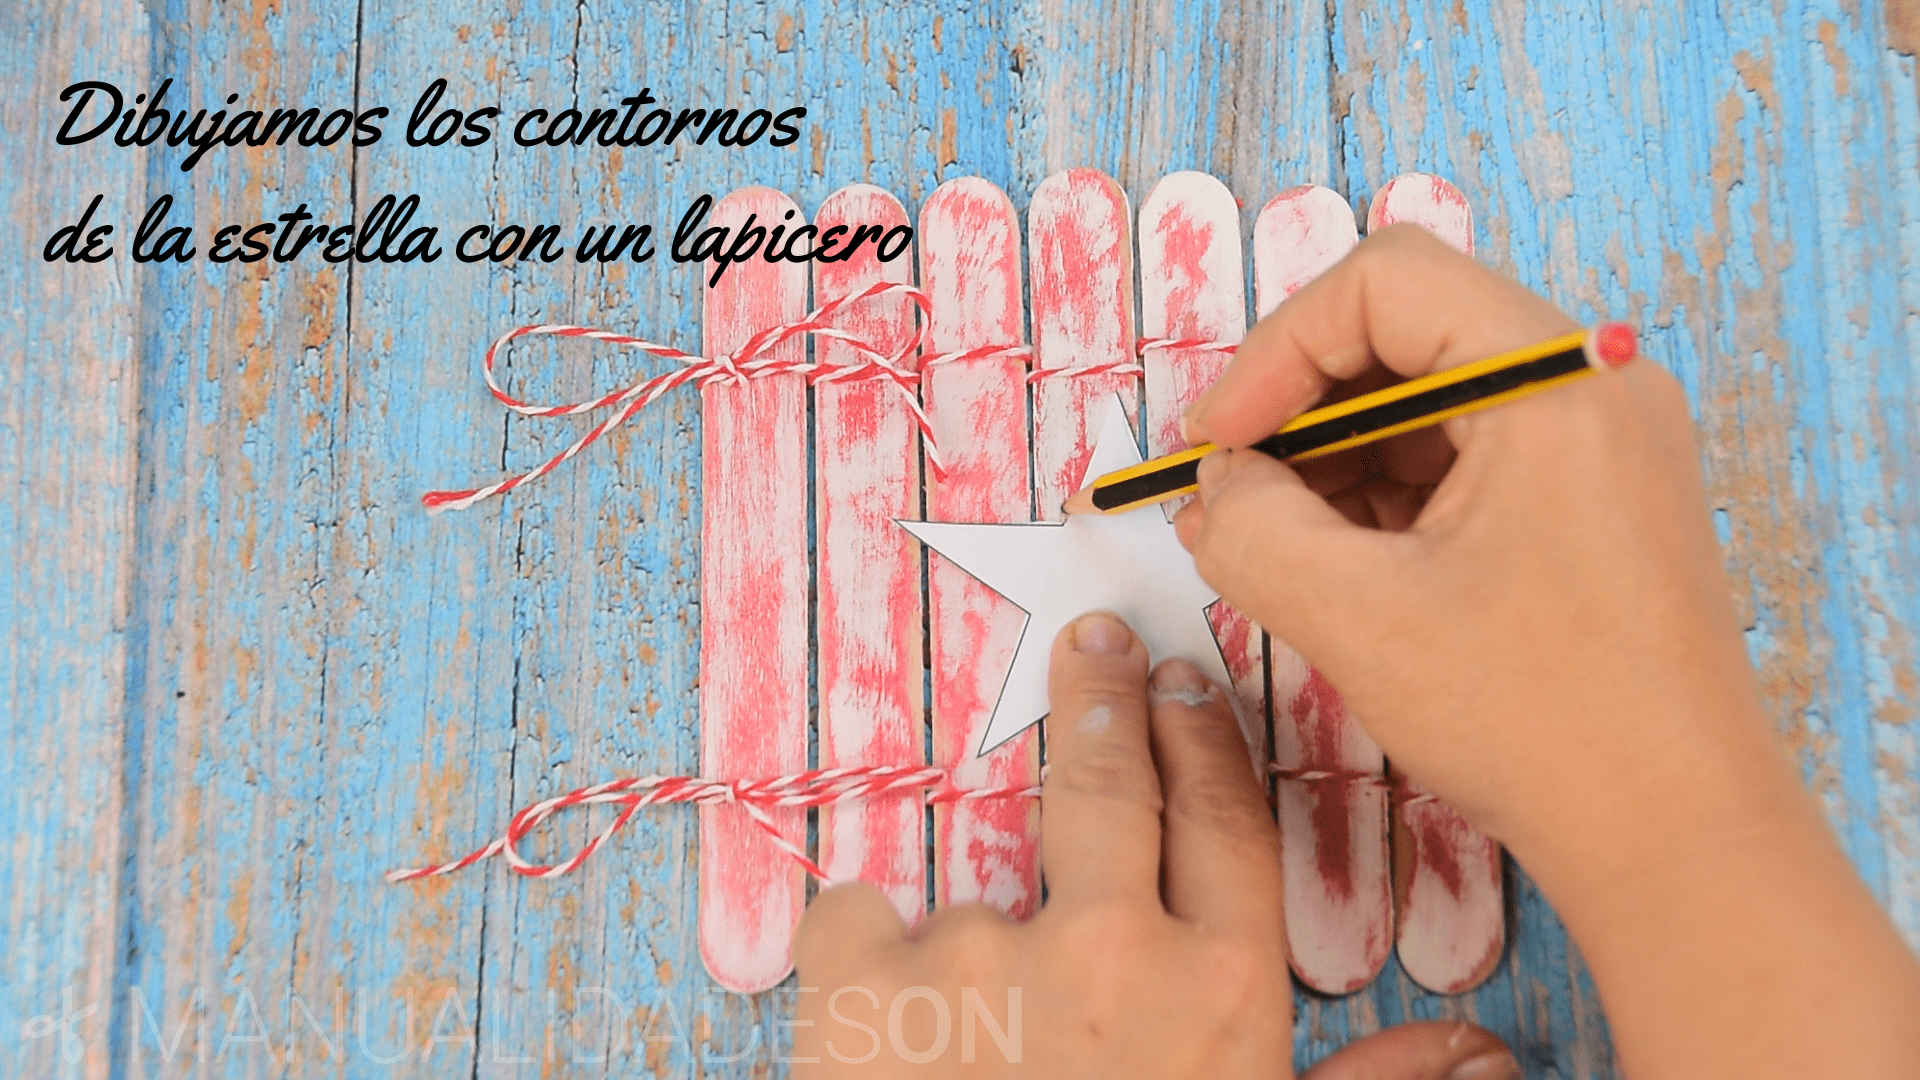
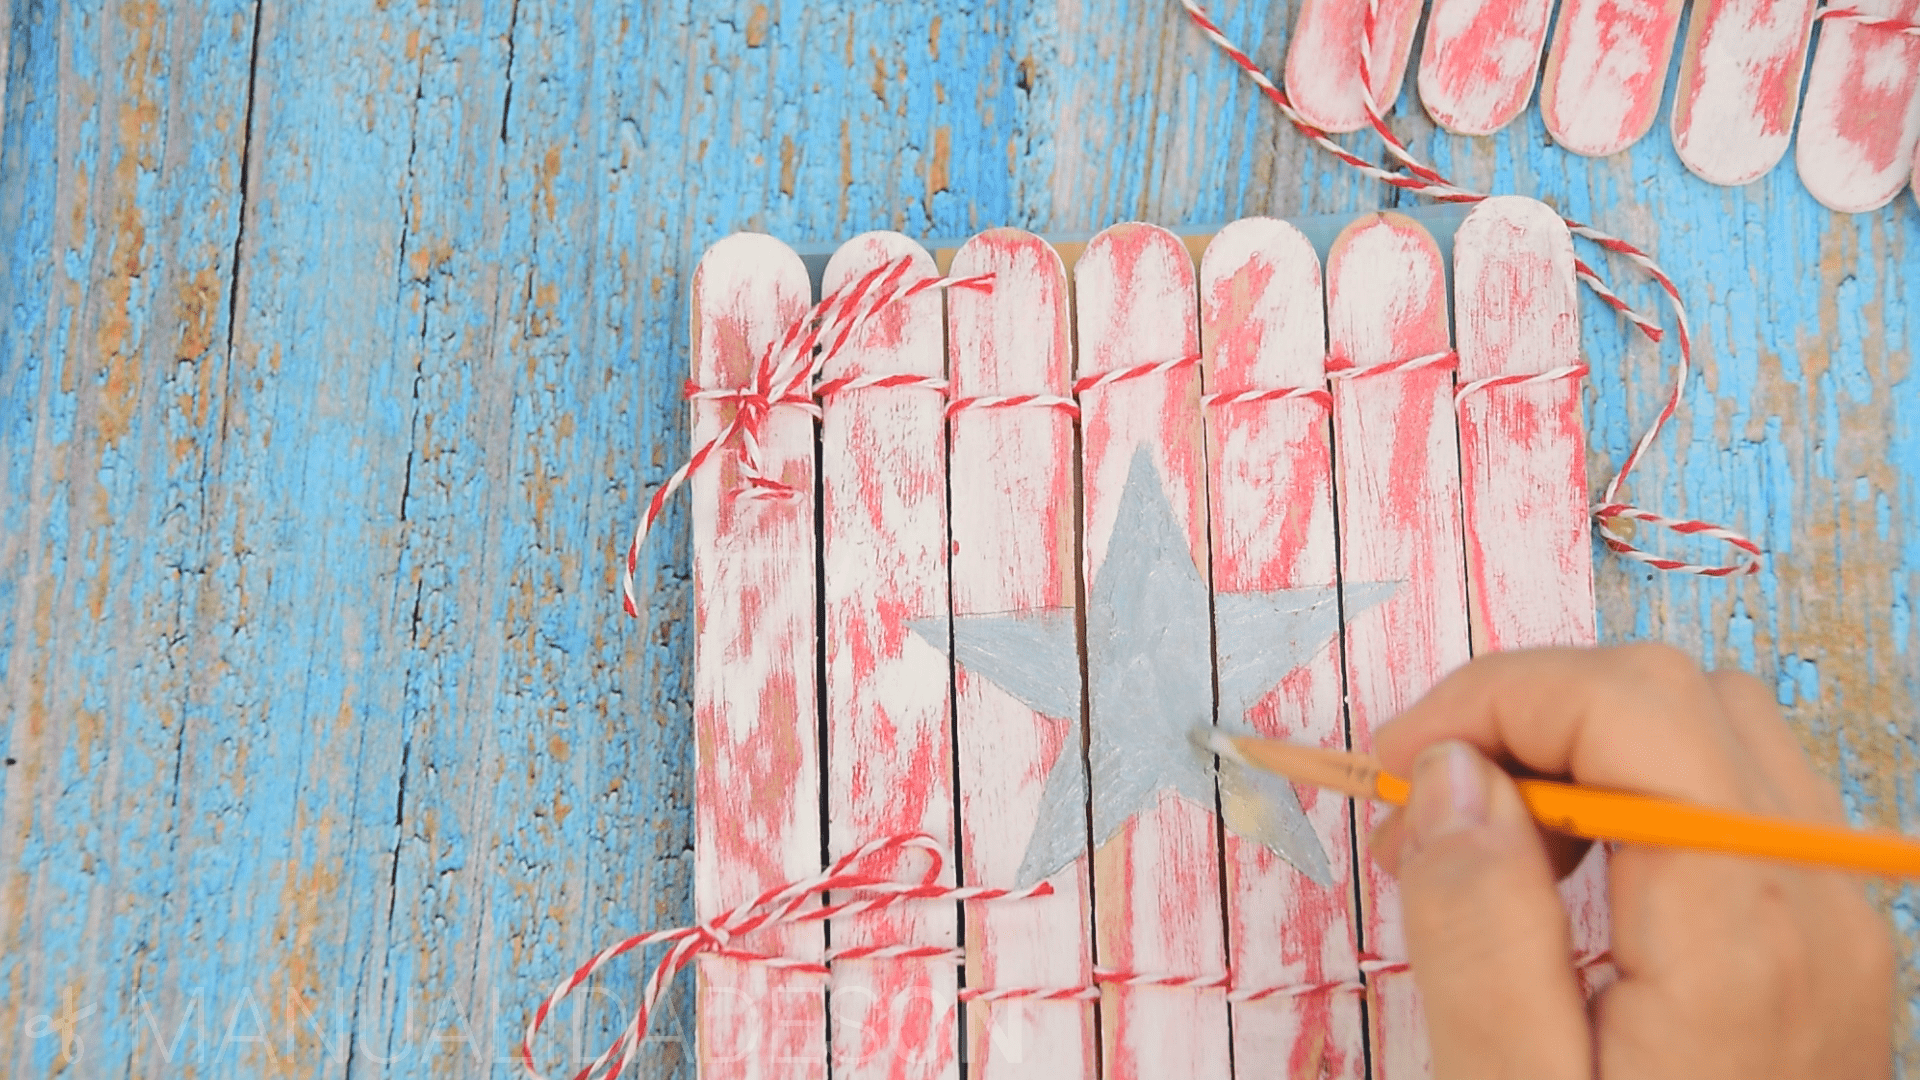
We print the star and cut it out. It should be the perfect size to fit on the cover and between the strings. We will use it as a template to draw it and color it on the cover of the notebook. To do this, we will paint the contours of the star with a pencil and thus we will have the star made. Next we color with silver paint taking good care of the edges. And we will have our notebook finished.