
We are going to make a simple craft, a dog-shaped doll recycling a roll of toilet paper and with few other materials.
Do you want to see how?
Materials that we are going to need
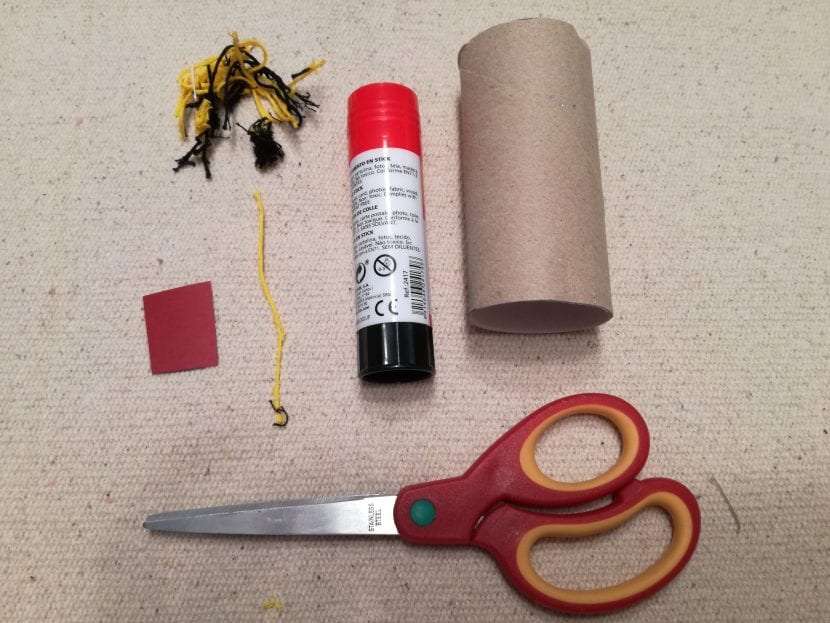
- 1 carton of toilet paper roll
- Some red card
- Remains of dark colored threads, if you do not have remains, you can use a piece of thread fraying it a little
- Scissors
- Glue
Hands on craft
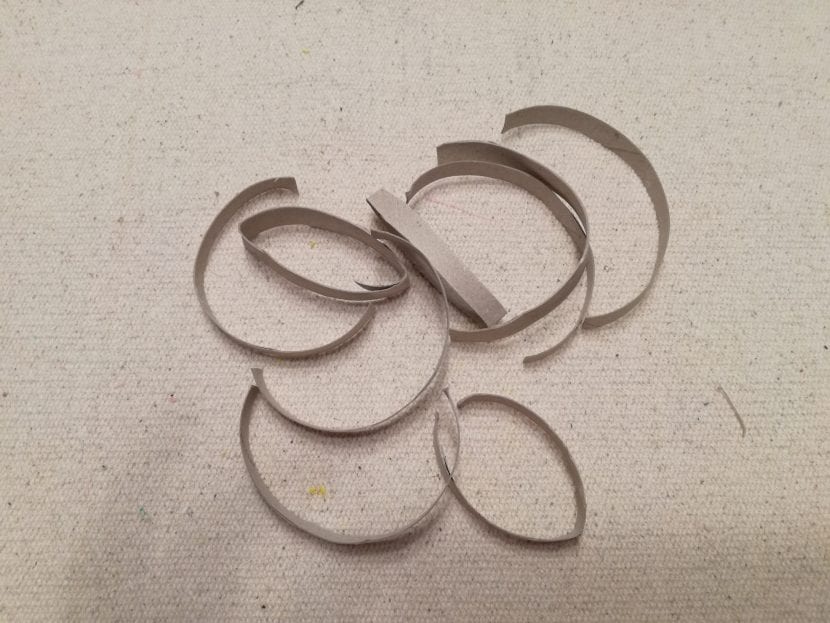
- We cut the toilet paper roll into nine sections, if possible that two of these sections are a closed circle. For the rest of the sections, you can cut the cardboard lengthwise to facilitate cutting and subsequent assembly.
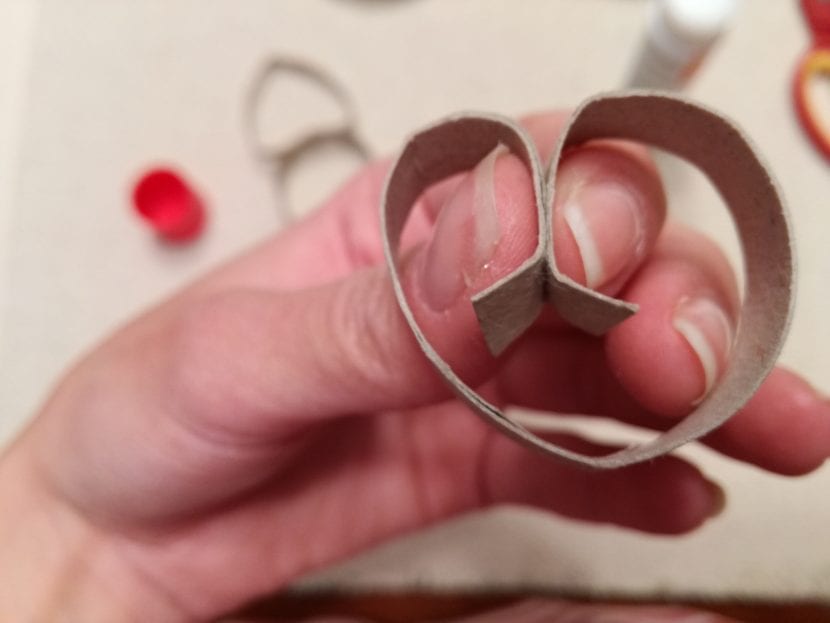
- We take the two circular sections. With them we are going to make the base of our doll. We give a rounded shape to a of them, since when cutting it has surely been deformed. With the other circle we are going to make the shape of a heart invested. We glue the two circles as seen in the image.

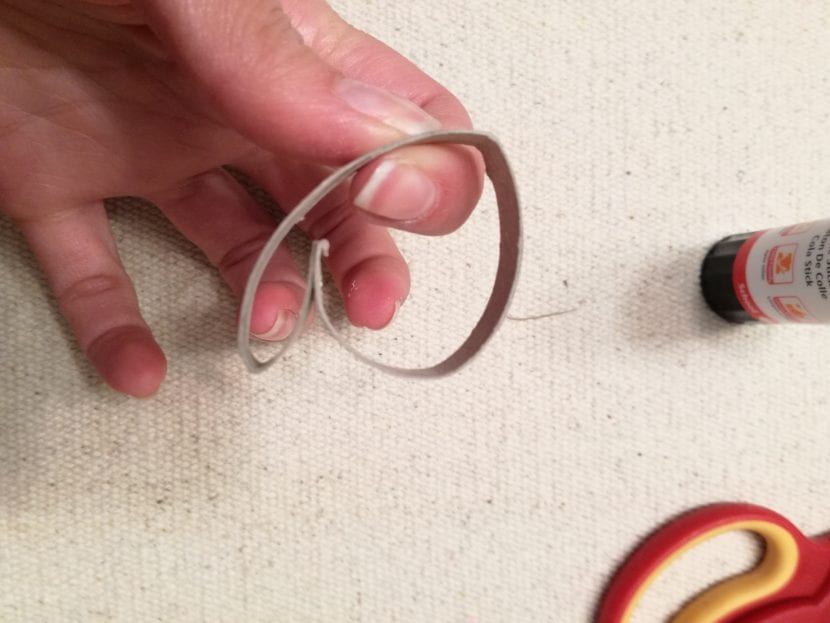
- With another of the sections, we will join the two ends and put them inside the circle and fold the end of each end making some flaps As seen in the image. We glue the ends together and then the flaps to the bottom of the piece. This will be the hind legs of our dog. We glue them to the base.

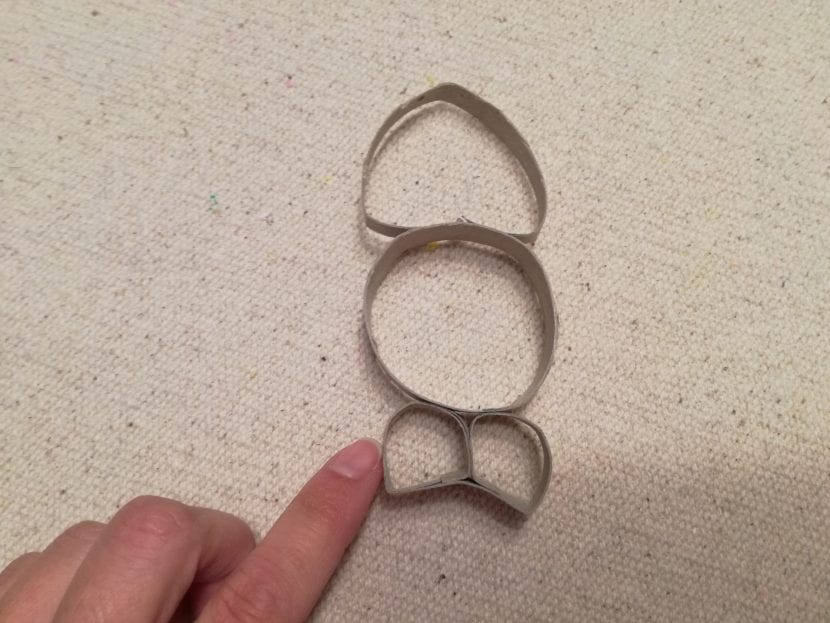
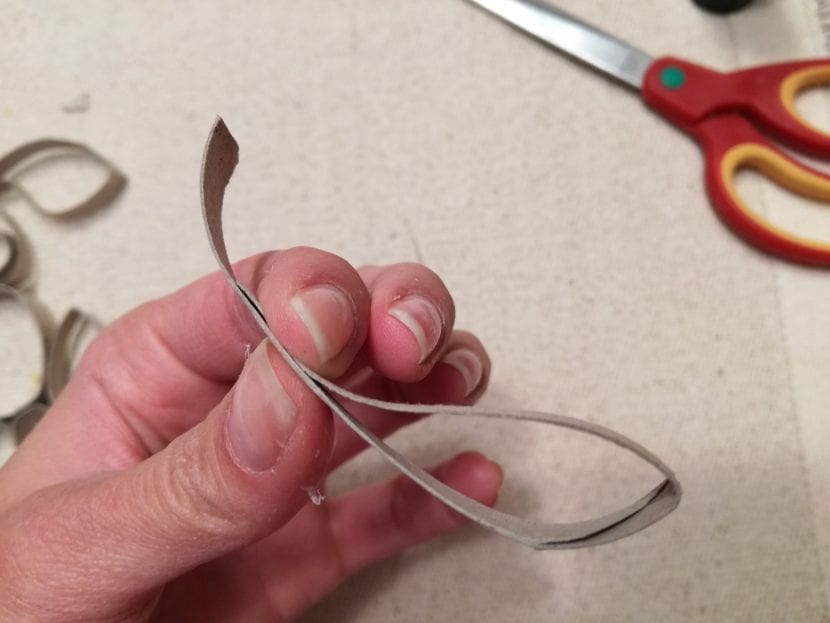
- Now we are going to do the front legs, for this we are going to take two circles in which we will do the same process. We put together the two ends tucking them in of the circle as we had done in the previous case. The idea is that the ends separate two circular shapes, one much larger than the other. We flatten the small shape leaving it flat following the glued ends. Later We pinch the furthest part of the large shape. To finish, we open the two parts a little to create the shape of two drops. We hit the dog's body.

- Ears we are going to do them with two other sections of the roll, gluing the ends out, contrary to what we have been doing so far. It will be there where then they stick to the dog's head. But before, we will make a clamp approximately 1 cm from the ends that we have pasted.

- We repeat the way we had done for the hind legs but without making the flaps. We stick it inside the dog's head to make The snout.

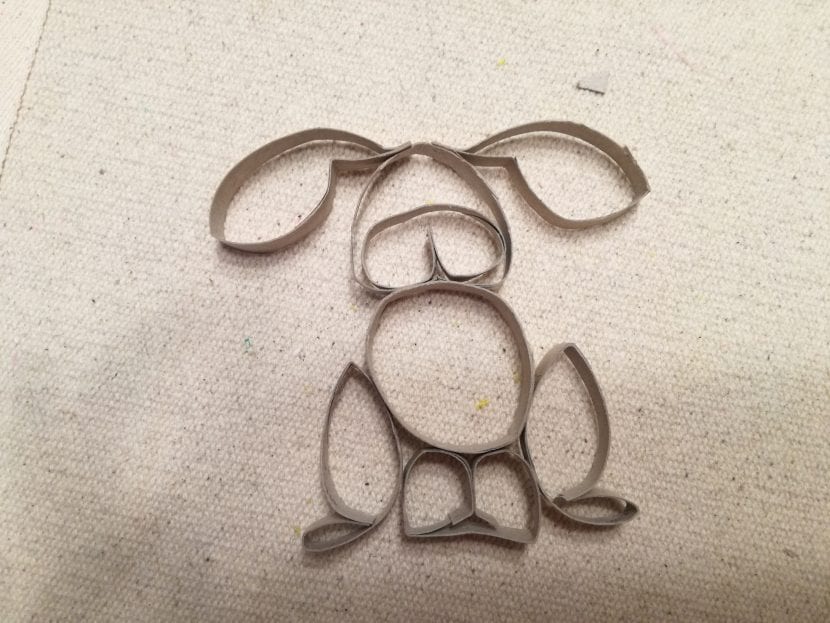
- The tail we are going to do it, gluing two ends outwards but sticking one of them 1-2cm from the end of the other end. We flatten the resulting oval a little and glue it to the body.
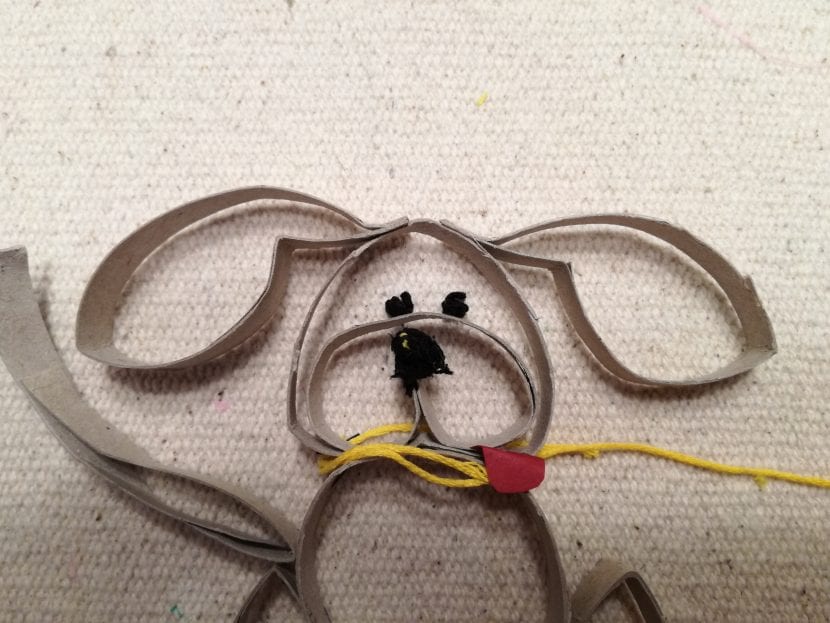
- To finish we are going to add some details such as a tongue on red cardboard, a nose and eyes made with little balls of yarnor dark in color. I also added a strap with yellow thread. And ready!
I hope you cheer up and do this craft.