
These weeks of good weather seem like you want to change the decoration a bit of the house by something more springtime. For this we are going to make this beautiful cherry blossom craft.
Are you ready?
Materials that we are going to need
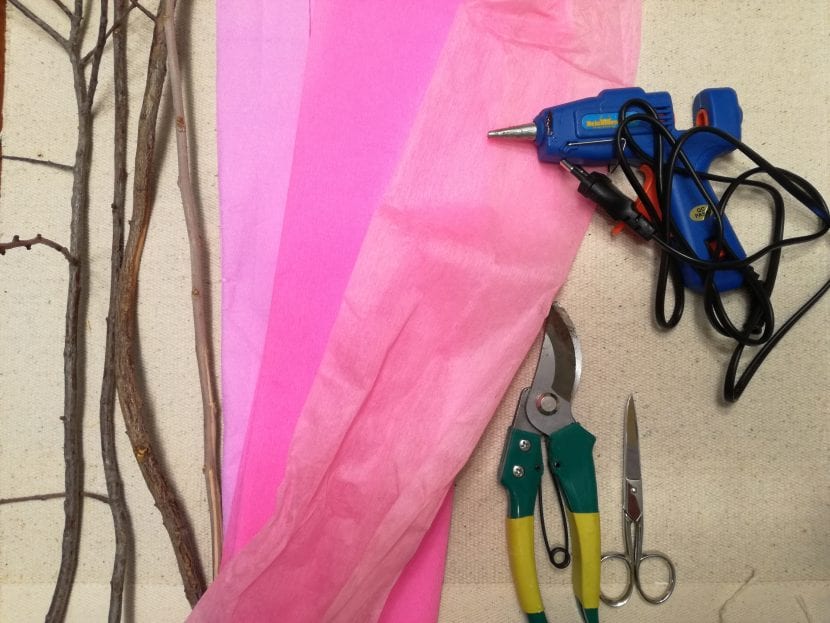
- Crepe paper in different shades of pink. The important thing is that there is at least a fairly raised shade of pink, and a lighter one.
- Branches that we can find in decoration stores, or if you want the craft to be more curious, choose real branches that have fallen on the ground. The latter is the option I have chosen.
- Hot silicone
- Scissors
- Pruning shears
- Pencil
Hands on craft
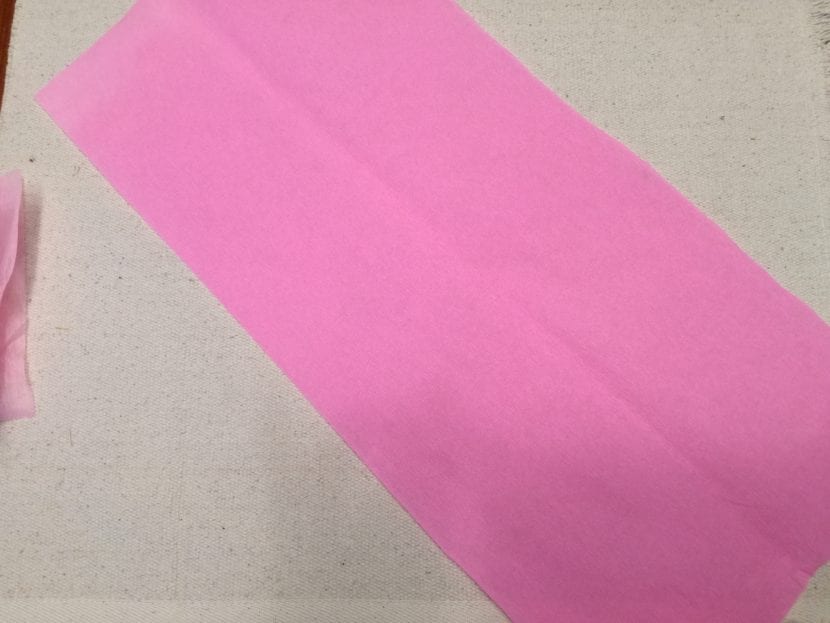
- We cut a large rectangle from each of the papers crepe that we have chosen.
- We fold the papers into several doubles and we draw flowers. We will draw those of the loudest color very uneven, small and more pointed.
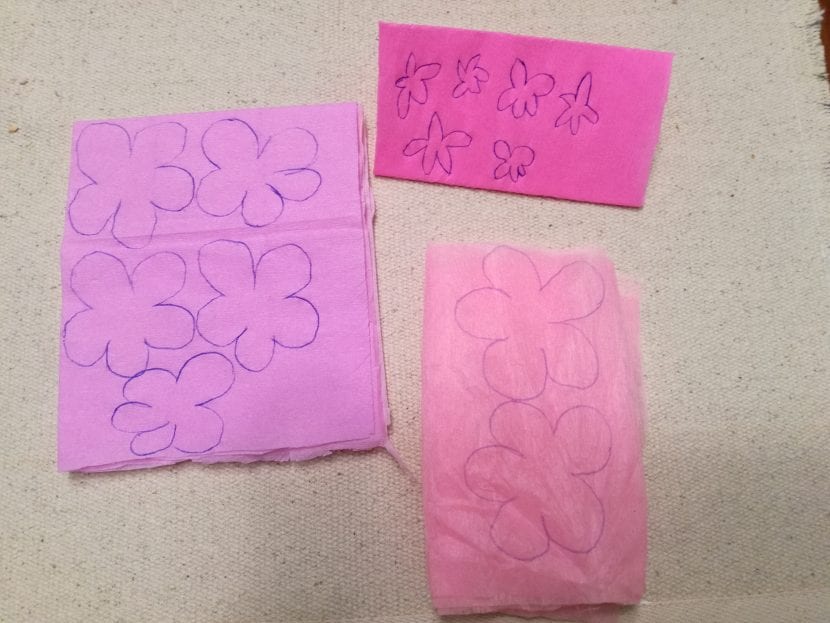
- We take care so that the paper does not unfold and we are cutting out the pictures. By doing this we will cut out many flowers in one go. It is important to have good scissors for this, but otherwise you can make less folds.
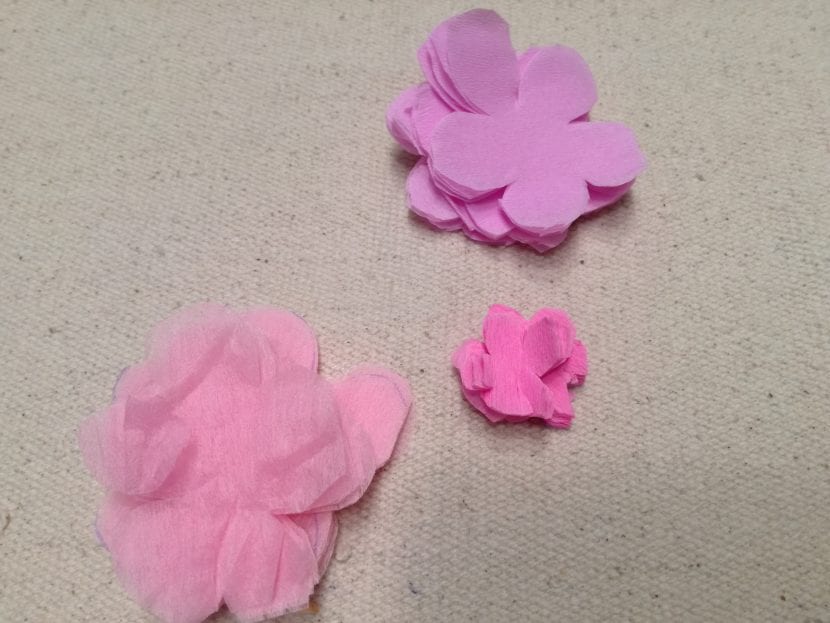
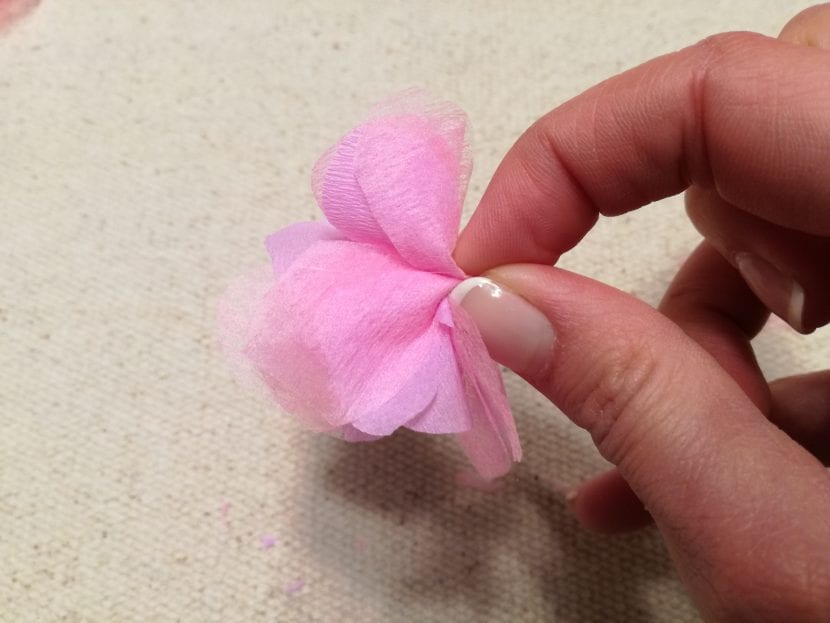
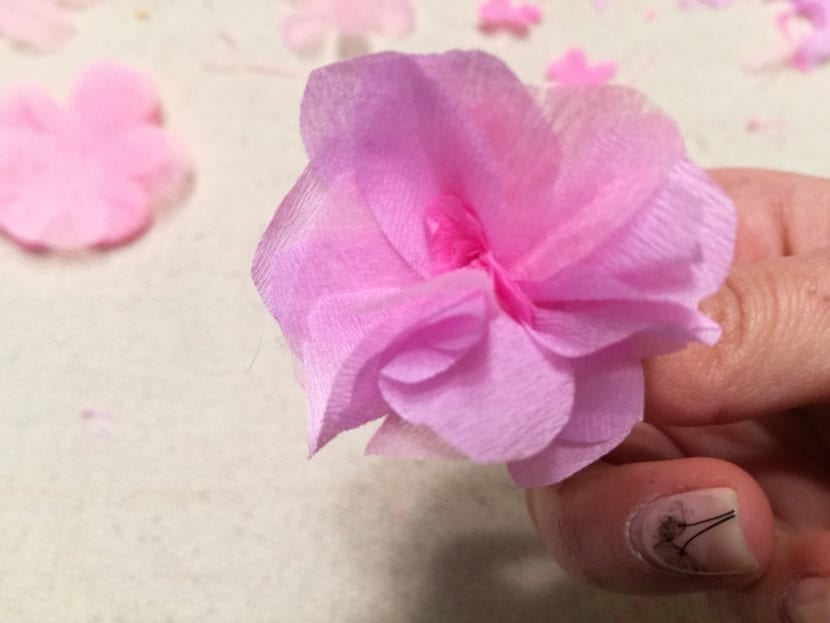
- Now let's ride the flowersFor this, it is necessary that we separate the largest flowers that we have cut and the medium and small ones. We will put la larger flower below and we will put other smaller ones on top (in total between 4 and 5 layers) and to finish two layers of the smallest flowers with a higher color. To fix the layers we are going to put a drop of hot silicone in the center every 2 or 3 sheets. When we have put all the layers of leaves we will press well in the center so that it sticks.

- We fold the flower in half and with our fingers, putting them where the droplet of silicone is, we are going to make a pinch with our fingers to shape the flower. When we have the piquito done, we hold it well and with the other hand we will open the petals until the rose-colored paper is seen in the center of the flower.

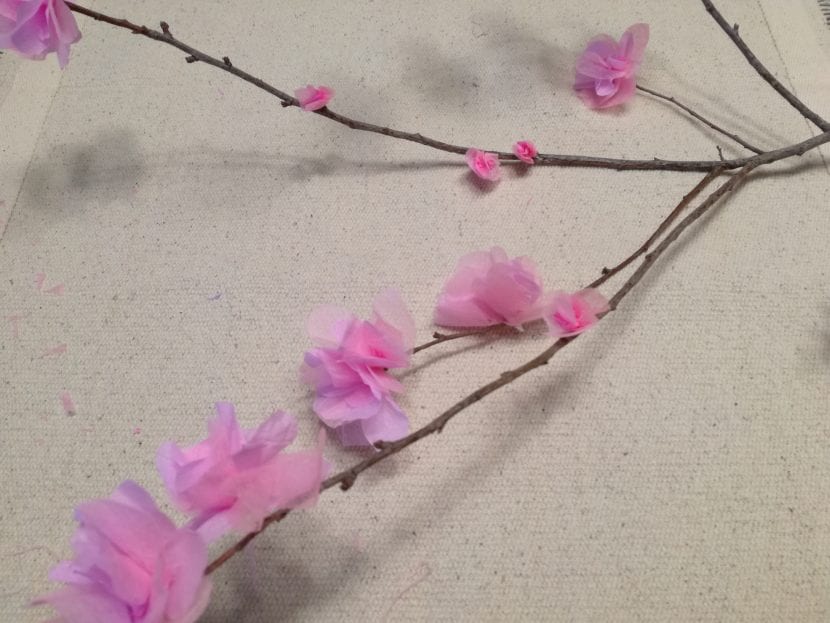
- When we have a few flowers, we will take the branches and cut them in length and remove those twigs that do not interest us. For this we will use the pruning shears or pliers, depending on whether we use real branches or from a decoration store. Now let's glue the flowers by putting a drop of silicone in those points of the branches where we want a flower to be. We press the flower's peck against the branch and the silicone and wait a second before releasing.


- We can make some smaller flowers and play with the composition on the branches. And ready!
I hope you cheer up and do this craft.