
Approaches Christmas and in this post I am going to teach you how to do this so funny card in the shape of a snowman. It is great to do with the little ones in the house.
Materials to make the Christmas card
- Colored cards
- Scissors
- Glue
- Mobile eyes
- A CD
- Snowflake and circle hole punch.
- Permanent markers
Procedure for making the Christmas card
Next I will explain the process to make this card that is super easy.
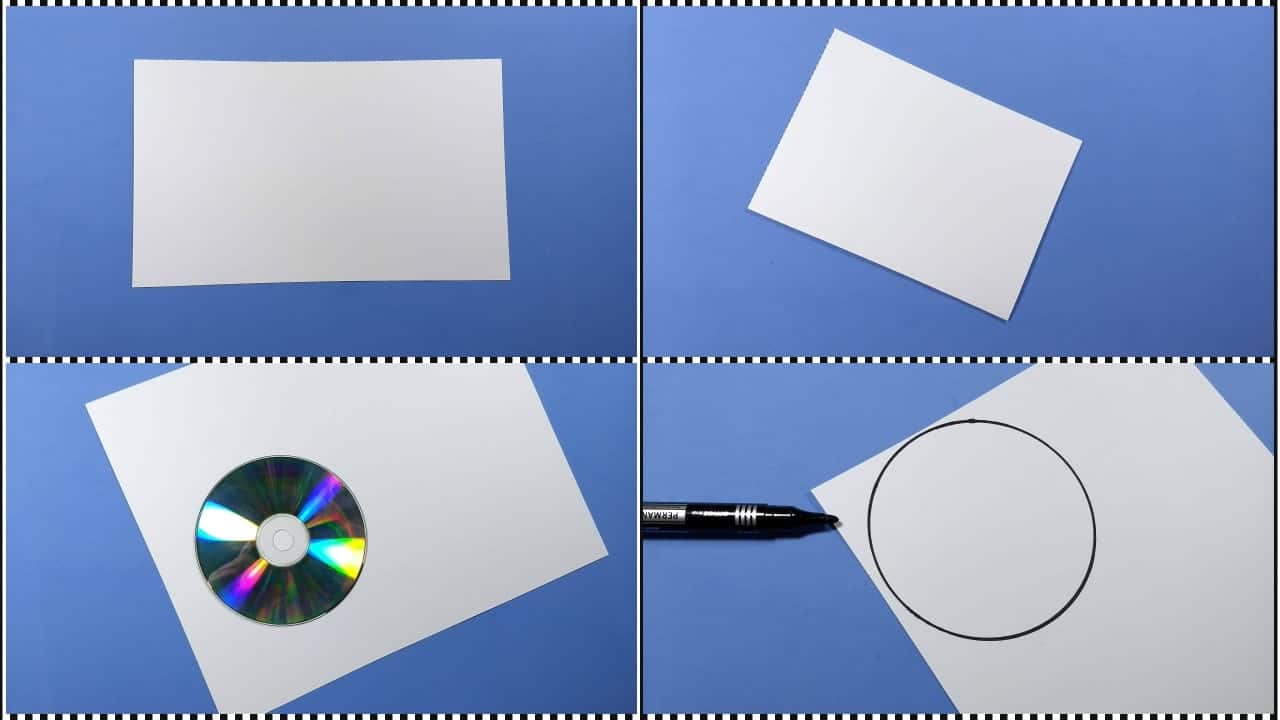
- To start you need a white card that measures 26 cm x 18 cm.
- Fold it in half and you will have 13 cm x 18 cm.
- With the help of a CD draw the snowman's head.
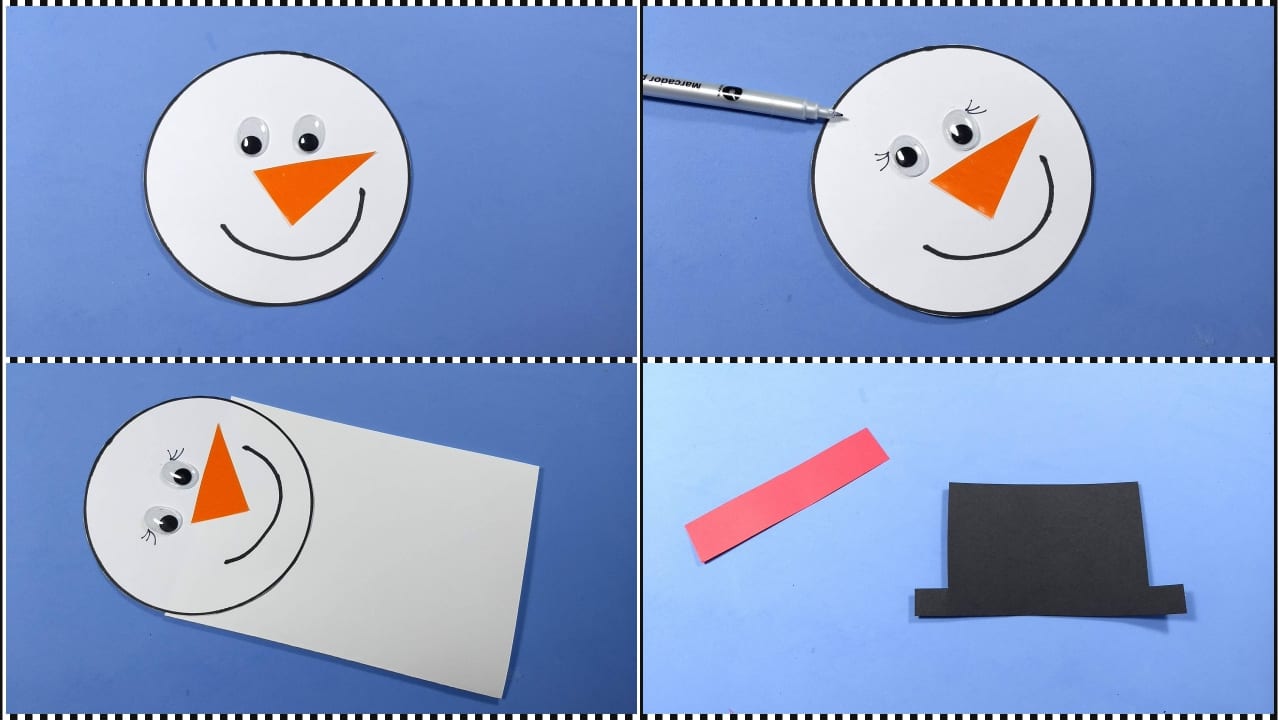
- Draw the doll's smile and then place an orange triangle that will be nose.
- Cut out the snowman's head leaving the black outline.

- Paste the mobile eyes on the doll's face.
- Draw the eyelashes with a fine marker.
- Glue the head to the body of the card.
- Prepare these two pieces that will be the hat de our character.
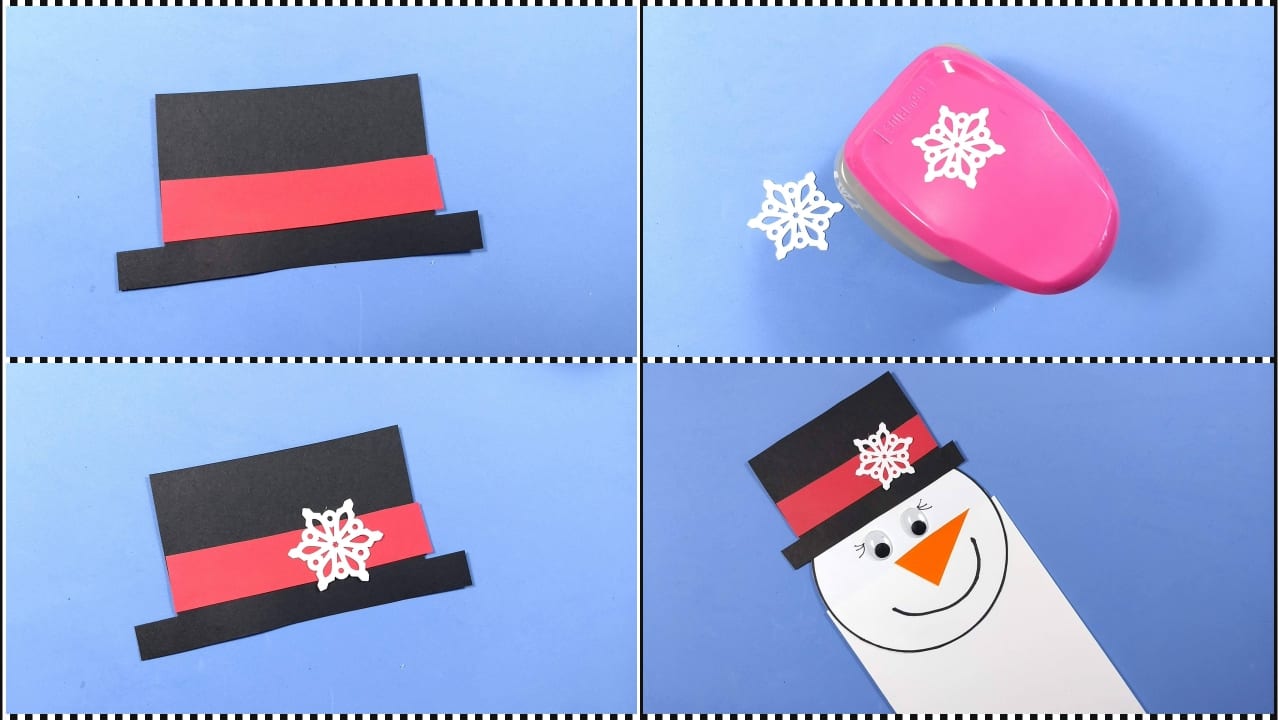
- Glue the two pieces together to form the snowman's hat.
- Create a Snowflake with the hole punch, if you don't have, you can use stars.
- Glue the snowflake to the hat and then to the head.
- With the circle punch I'm going to make 3 blacks that will be the buttons.
- I'm going to stick them on the snowman's belly.
- To finish the job, I'm going to make two little white dots on each button with a marker.

And you have finished this card to congratulate christmas to your friends and loved ones, you can make all the models and sizes you like. It is a very nice way to wish HAPPY HOLIDAYS.
I hope you liked it and if you do it, do not forget to send me a photo through any of my social networks. Bye!!