
How did you start July? Surely you already have many DIY projects to do to alleviate these heat waves in the shade that seem to mark the summer.
We, from CraftsON, have started July with a lot of projects and this one box made with EVA rubber is our first proposal of the month.
Materials
- An EVA rubber plate.
- A pen or pencil.
- Scissors.
- A rule.
- Superglue glue or heat sealer glue.
Our Process
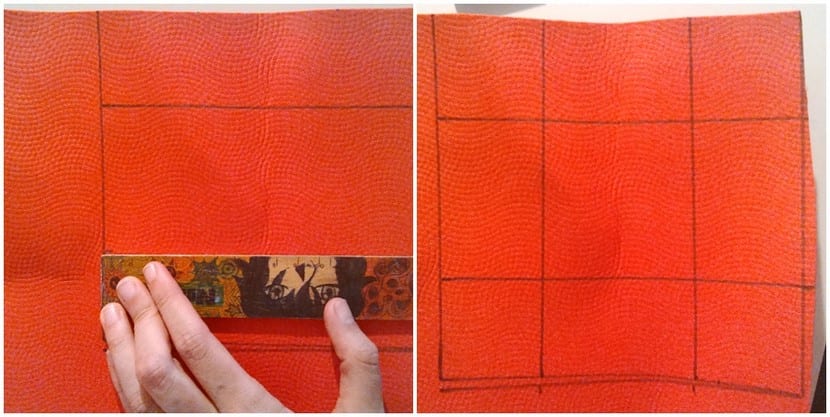
First we will do a square of 16 centimeters by 16 centimeters to create the base of our box and inside we will make a grid as follows. From the ends of the square, we will mark four centimeters for each of the lines, and then we will join the points as we see in the second photograph.

Next, we will do a Rectangle the same size as the central one and which will be the lid of the box. After, we will make the tabs that will help us to hook the pieces of the boxes. Remember that it is only necessary to make one tab for each corner and for the closure of the box.

Then we will cut it out and we will have a piece like the one we have in the photo above. If we want the corners to have a perfect 90º angle, We will apply heat by bending the corners so that they are marked and angular.

Finally, with a little superglue or thermal glue we will hook the inner lashes and let them dry.
If you liked it, feel free to like, share and comment. We will be delighted to receive all your comments and proposals.
Until the next DIY!