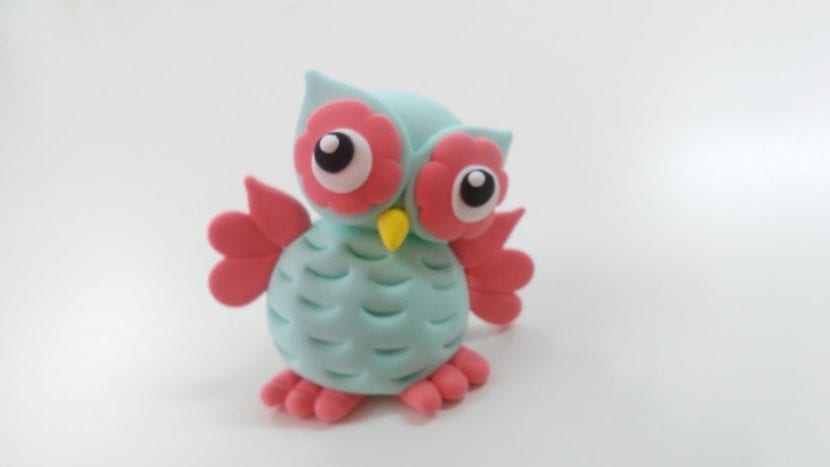
In this tutorial I will teach you how to model a Fimo or polymer clay owl, which is very good to decorate, as a detail for a gift, to complement a cake, as a keychain ...
Materials
To make the Fimo or polymer clay owl it is not necessary that you use the same colors that you are going to see in this tutorial. Choose your favorite colors or those of the person who is going to keep this figure.
You can use any type of polymer clay, baking, air drying, elastic ...
Step by step
El body and cabeza They are very simple, just create a ball for the body and a slightly smaller one for the head. Glue them so that the small ball is on top of the large one.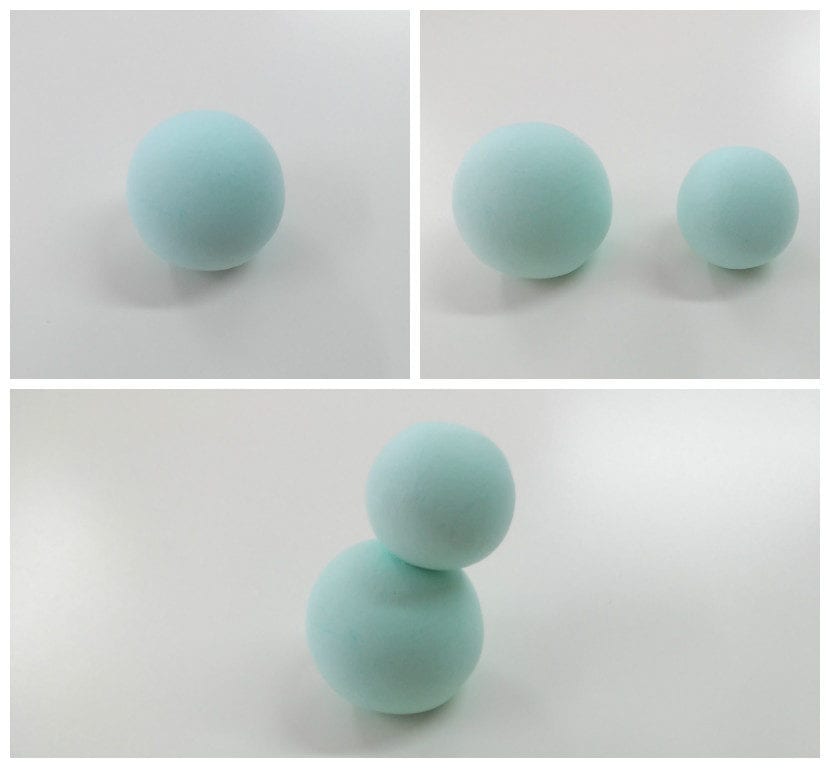
As you can see in the picture, the ball on top is tilted a little to one side. If you want the head completely straight, stick it just above it, but if you want it like this owl's, you should stick it a little offset.
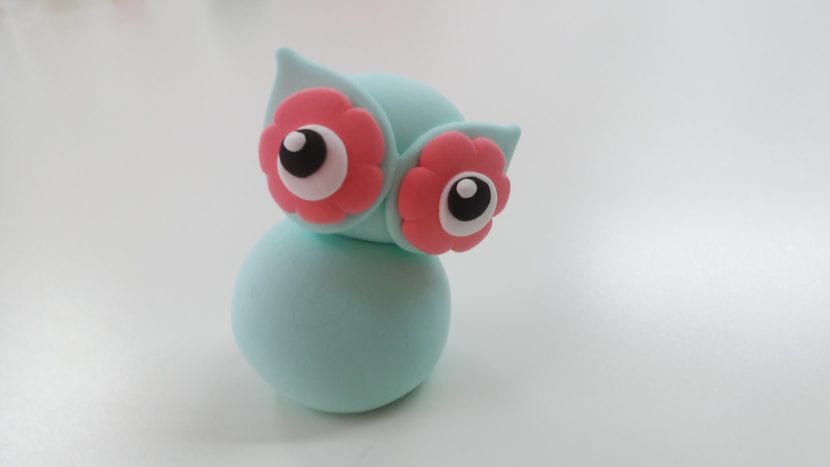
With the following form you will make two parts at the same time, because it will be used as a base for the eyes and at the same time like ears. Make two balls, and then roll them with your finger on one side, this way you will create the shape of a drop. Then squash these drops and glue them together on the side of the widest part.
Now that you have them together, you must glue them on the owl's face, in such a way that the peaks of the drops are facing up.

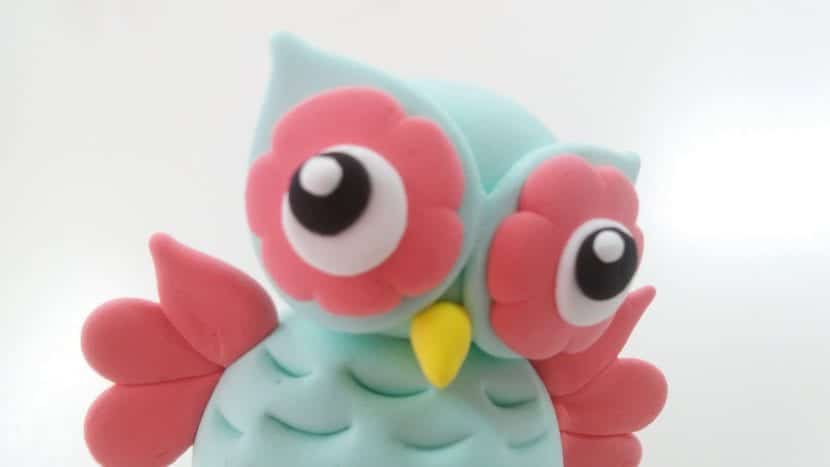
Follow the eyes. Choose another color, create two equal balls and squash them. When they are crushed, sink the edges with a knife creating a kind of flower. Flatten them a bit so that the knife marks are not so noticeable.
You can already stick them on the part of the eyes.

Create two small white balls and flatten them. Glue them over the flowers you just made for the eyes.
To make them Pupils They are simply two black balls, you squash them and you hit them.
And to make the look even better, stick another two very small white balls to imitate the gloss of the eyes.
The eyes are ready. It is time to do the alas.
Create three equal balls, and roll them on one side. Just like you did with the ears, you will create drops. Crush them.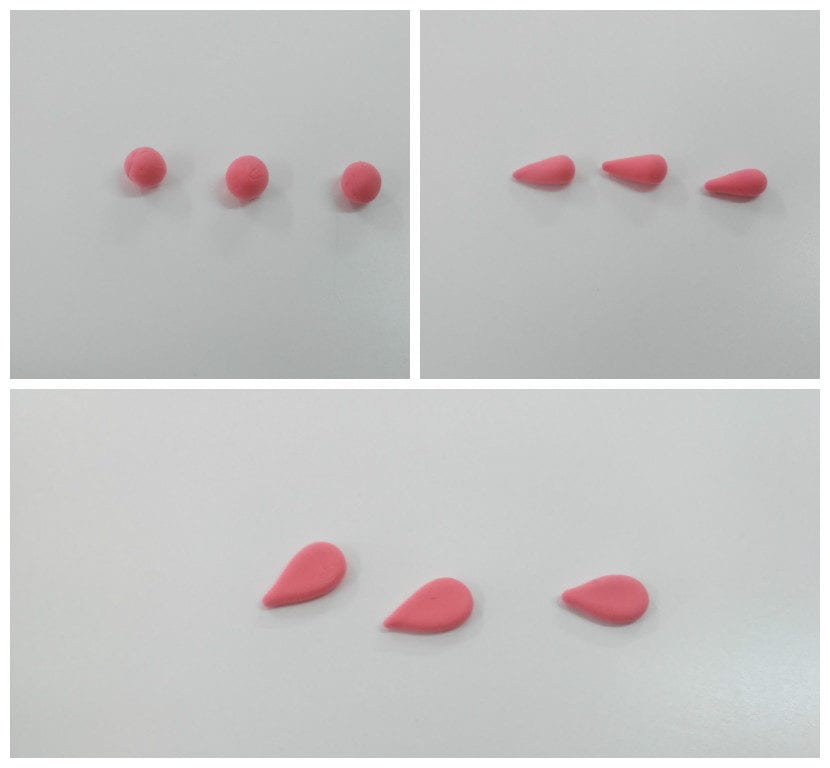
Glue two of them on one side, in such a way that the peaks are attached, and the third drop must be glued upside down, thus leaving that peak on the other side. Squash them a bit more when you have them all together.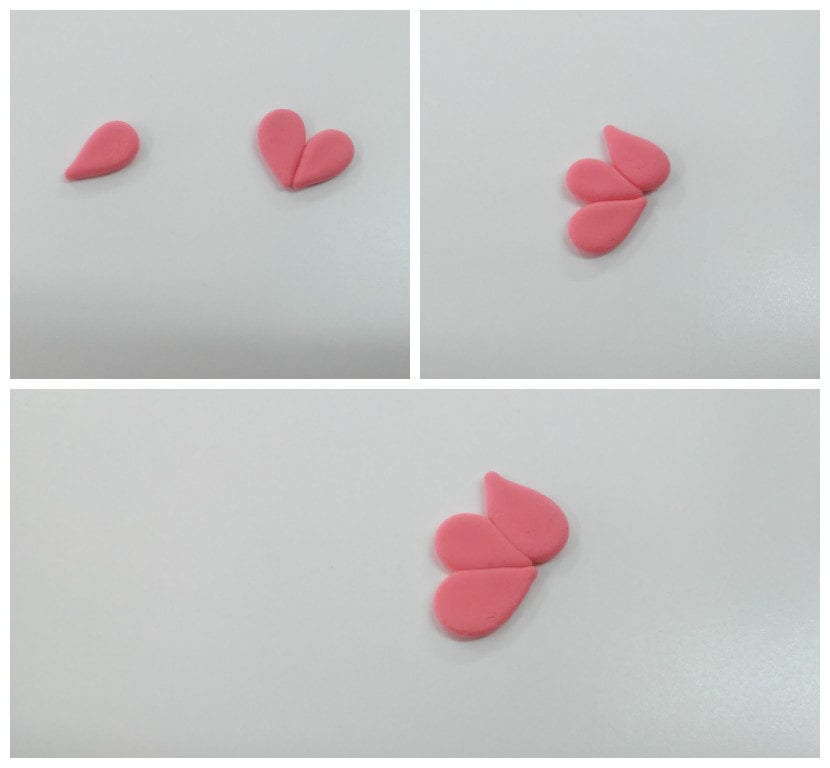
Glue them to the body leaving the drop inside out. Do the same for the other wing.

For pins make three equal balls again. This time stretch the entire ball to create a small line. Put the three together and mark some lines horizontally with respect to the fingers.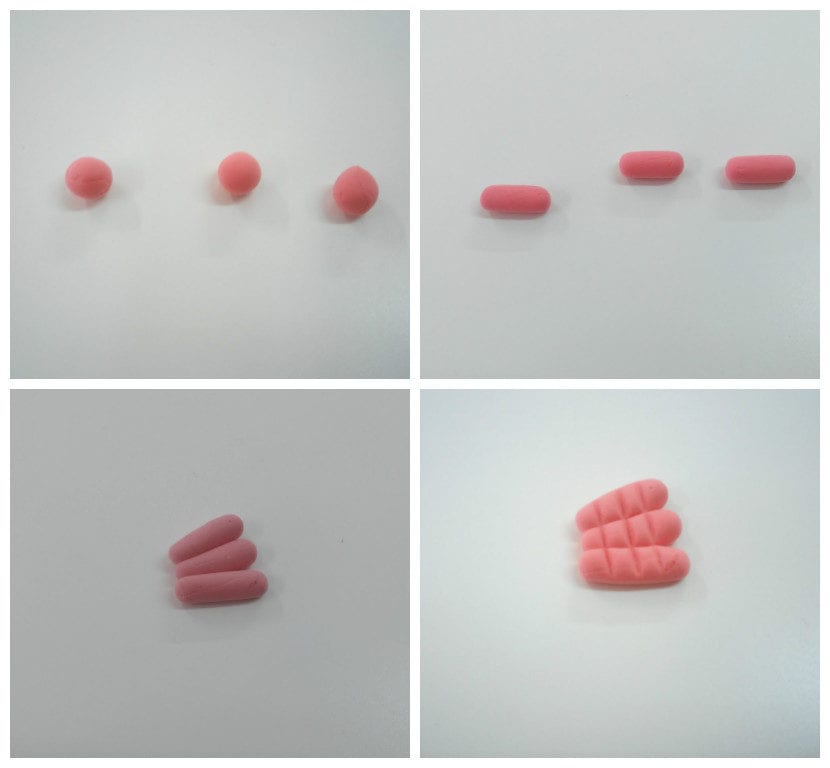
Repeat the same procedure for the other wing and leg under the owl, letting the fingers stick out a bit.

To make the beak, simply roll a ball on one side to create a small drop, and stick it across the thick part of the owl's face.
To make the marks of the feathers For the body I have used a modeling tool that is used to create smiles, but if you don't have it, you can cut a straw in width, and with one of the halves you can also make this curved shape.

And this is the result from Fimo or polymer clay.