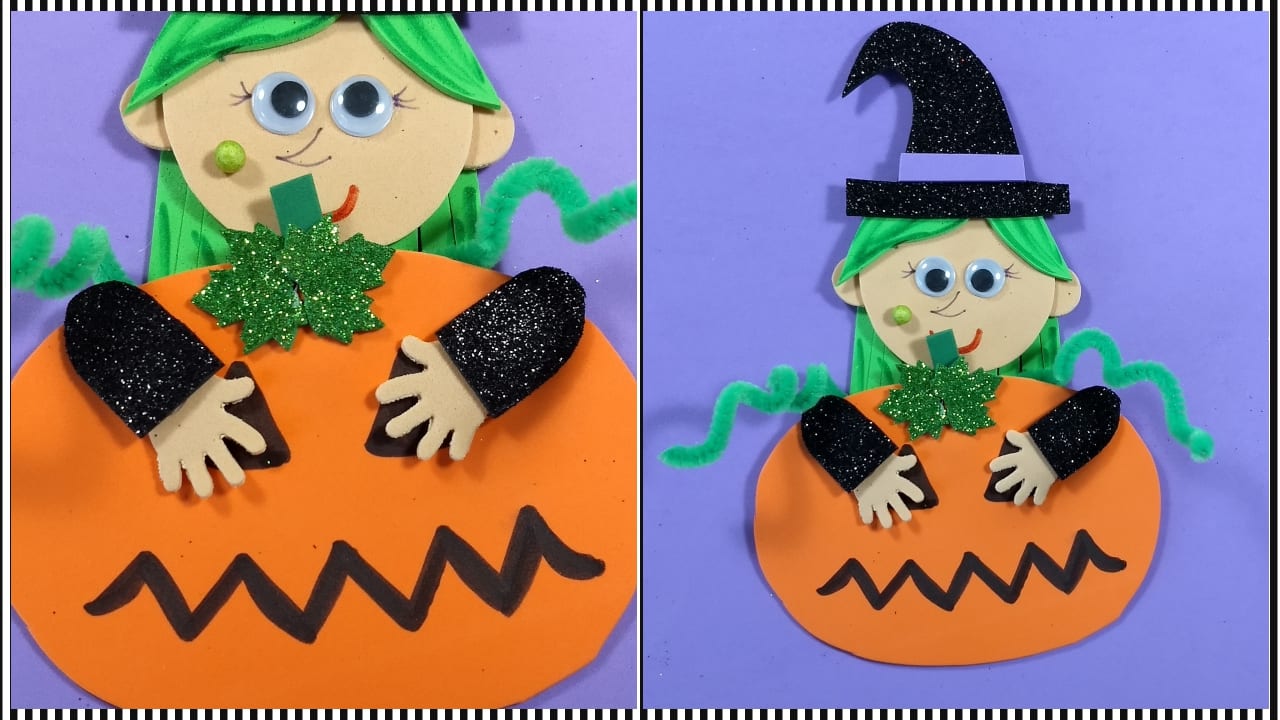
Halloween It is very close and we fill our houses and schools with super nice decorations. In this post I am going to teach you how to do this little witch with her pumpkin for you to use as a card, magnet or sign for your door. It is very easy to do and you can design different models.
Materials to make the witch with the Halloween pumpkin
- Colored eva rubber
- Scissors
- Glue
- Permanent markers
- Mobile eyes
- Eva rubber punches (optional)
- Pipe cleaner
Procedure to make the witch with the Halloween pumpkin
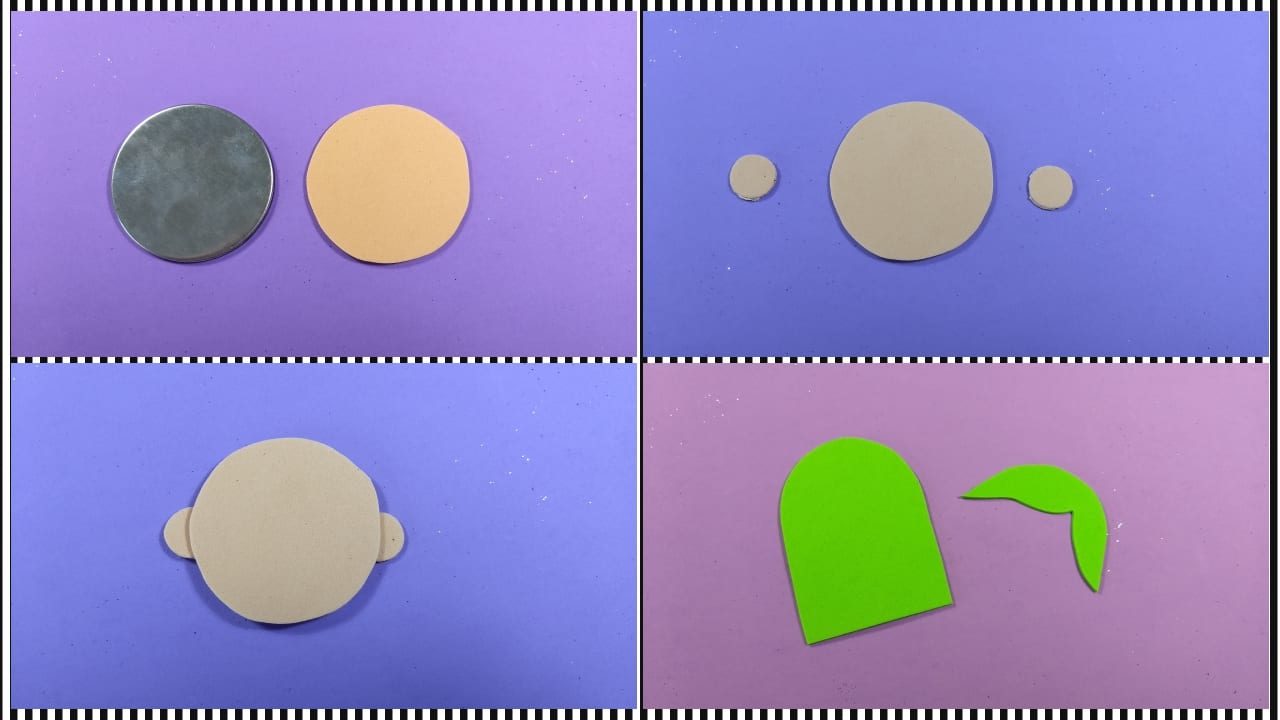
- To start we are going to trim witch's head. Mine is 6 cm in diameter, but you can make it the size that suits your needs.
- The two small circles will be ears, stick them to the sides of the head.
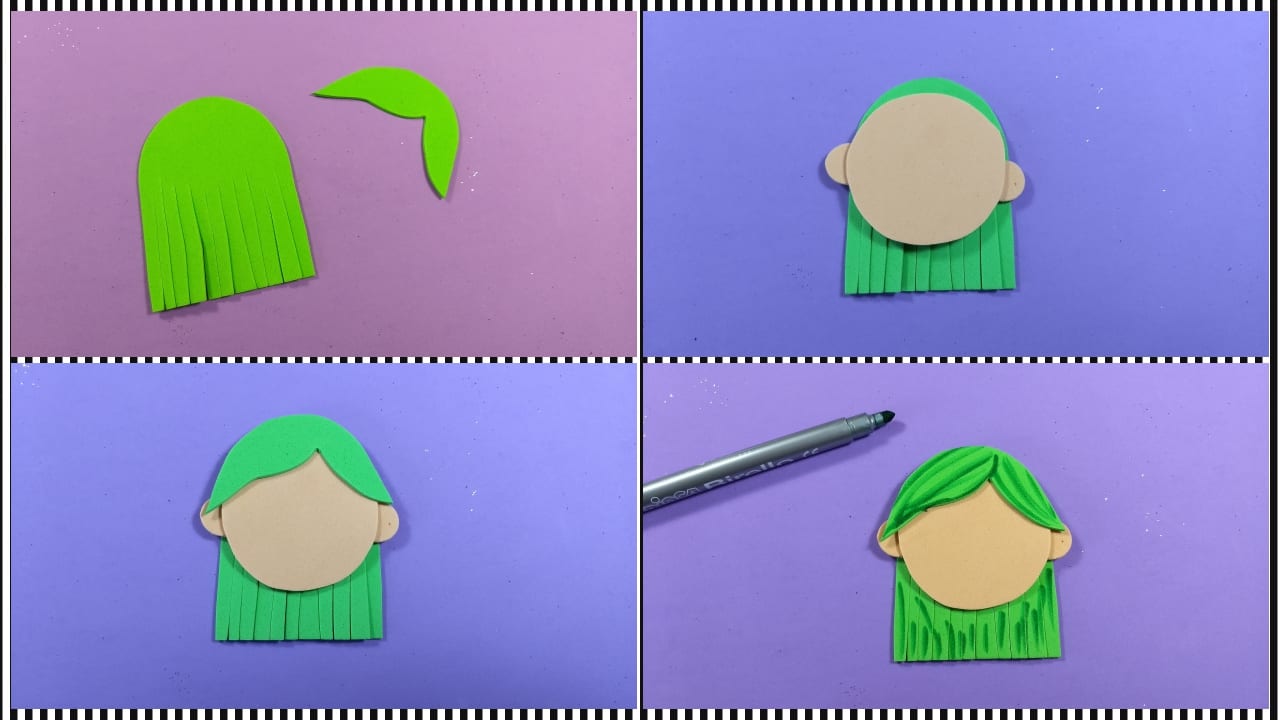
- Cut out hair, I have chosen a green, but you can do it as you like and the hairstyle as well.
- Place the head on top of the mane and glue the bangs on top.
- With dark green marker, make some shadows in the hair.
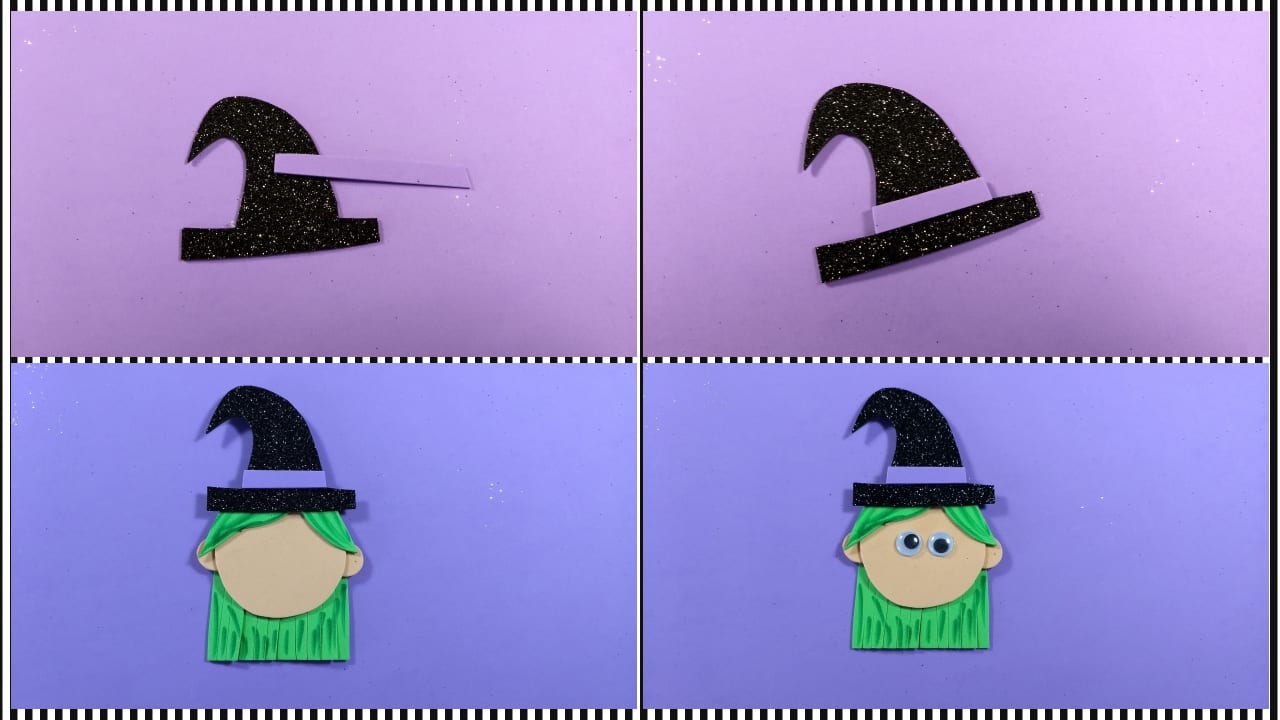
- Cut out this piece that will be the hat and glue the purple strip on top.
- Remove the excess from the sides with the scissors.
- Glue the hat on top of the witch's head.
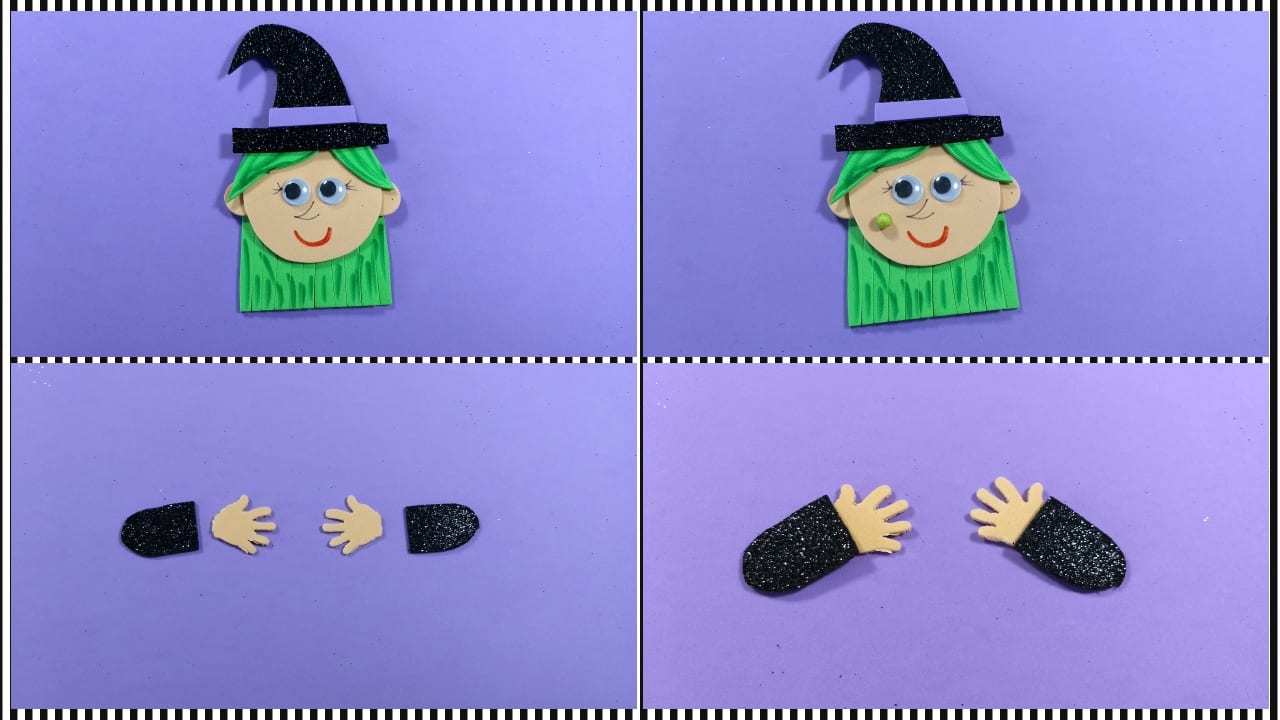
- Then use two eyes mobiles for the face.
- With markers I am going to make the details of the face: eyelashes, nose and mouth.
- I'm also going to stick one wart with a cork ball.
- To form the arms I just need some hands and sleeves.
- It is the turn to do the pumpkin.
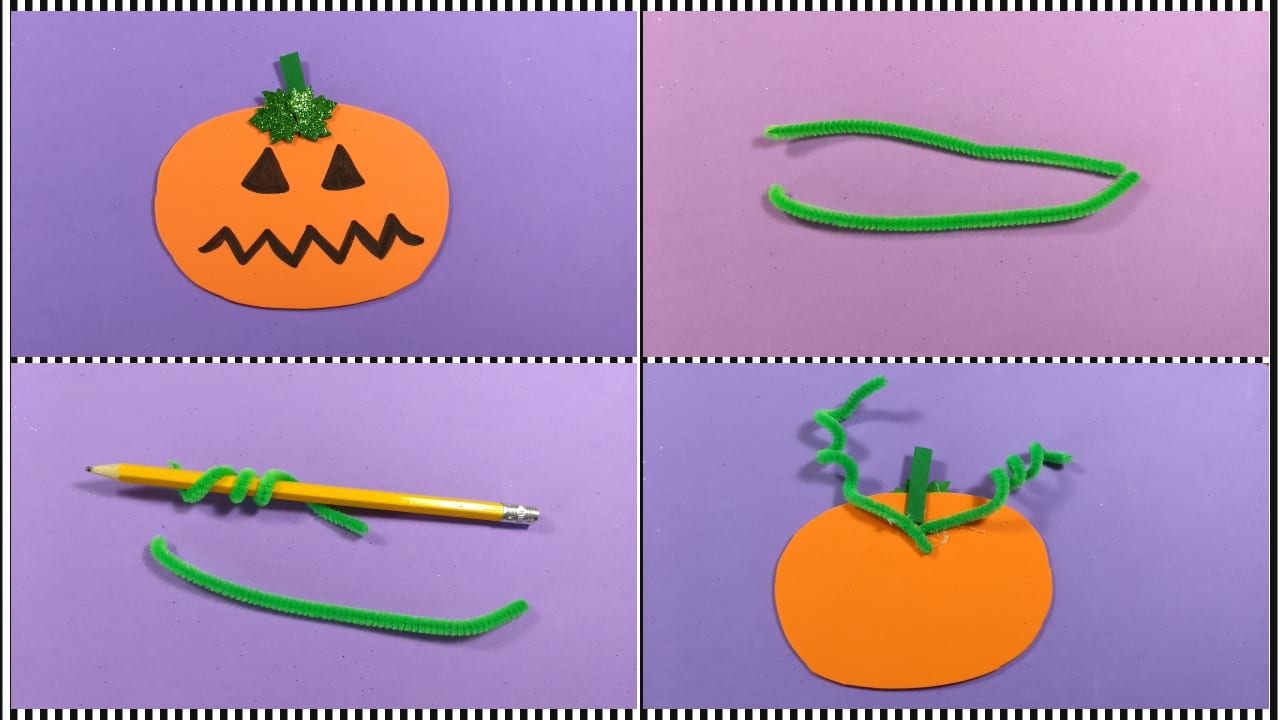
- Cut an orange oval shape out of foam rubber.
- With black marker, make the smile in the form of a zigzag and two triangles that will be the eyes.
- Prepare a stem and two leaves for the top.

- Glue the stem and leaves together.
- Cut a green pipe cleaner in half and roll it around the pencil to make it curly.
- Insert the two pieces from behind and secure this joint with a piece of eva rubber, I have used a circle.
- Now we only have to stick the witch to the pumpkin and on top of the arms.
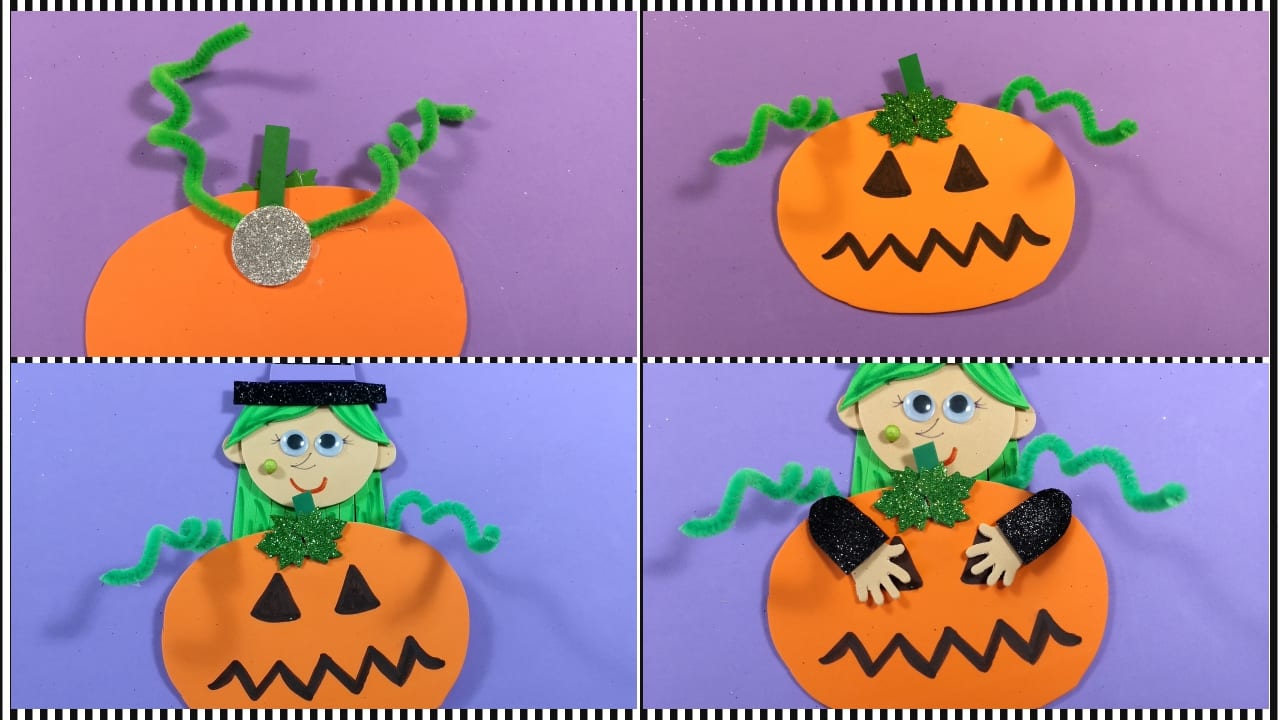
And so our halloween craft, You can use it for a card, box, decoration or for a sign on the door of your class. I hope you liked it. See you soon, bye !!