
Hello everyone! Today I bring you an ideal tutorial for this spring time and to be fashionable since this summer's fashion accessory is the hippie tiara.
As always in the market we can find them in a thousand different ways and materials but in my opinion I like them more made by myself.
For my little girl's birthday I have made a hippie tiara with paper flowers as a complement to the box of surprises.
Look how simple the tutorial and get going!
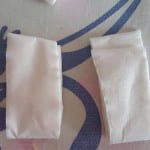
Materials to make a flower hippie tiara
- Crepe or crepe paper.
- Scissors.
- glue.
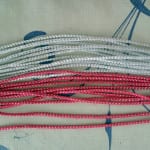
- Colored laces.
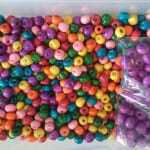
- Colored beads.
Procedure
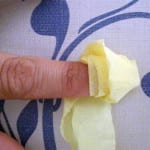
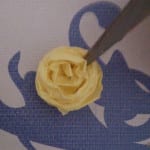
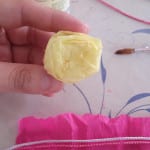
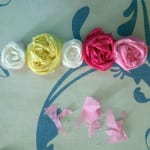
To start making our hippie tiara with flowers, what we have to do are precisely the flowers. I have used a technique that I have seen on the Internet and after several attempts I have gotten the hang of it and they have started to get better and better. It is really simple, what we have to do is cut a long piece of paper and roll it around our fingers, the more fingers we use, the bigger the flowers will grow.

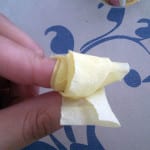

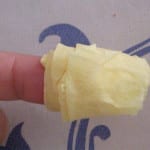

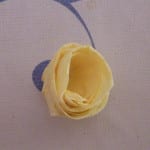
It is about going around the fingers with the paper and giving it a small fold in each turn, when we have the desired width we cut the paper and glue it to the bottom with glue and what we have to do is with scissors or a small clip to accommodate the turns of paper and shaping our flower for the hippie tiara.


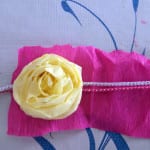
When we have the flowers made for the hippie tiara, the next thing is to assemble it. In my case, I used colored cords with silver threads, I cut them about 45 centimeters each and I used one of each color for each hippie tiara I wanted. To glue the flowers, what I did was take a piece of the same paper that I used to make the flowers and glue the flowers one by one, taking care to put enough glue on the floor of the flower and also on the side so that it sticks to the flower that I put at his side.
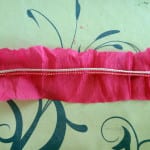
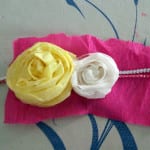
When I had all the flowers placed in the hippie tiara, I let it dry very well so that the flowers and laces would be well fixed and would not come loose easily.
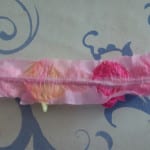
When they were dry, I cut off the excess paper and then chose some round colored wooden beads to put on each end of the hippie tiara's laces.

And with this last step we will have our hippie tiara finished and ready to wear.

I hope you liked this tutorial and that you leave me your comments.
Until next time!