
In this tutorial I teach you to create a horse shaped pencil that the little ones in the house will especially love. Even with your help you can follow the step by step create it themselves.
Materials
You should only use air-drying polymer clay, of any brand but that does not need baking. The colors that you will need would be the following:
- Dark brown
- Light brown
- RED
- Black
- Yellow
Anyway, you can make the horse and its reins the color you want. These are the ones I have chosen, but do it as you decide.
In addition you will also need a pencil to place the horse on it.
Step by step
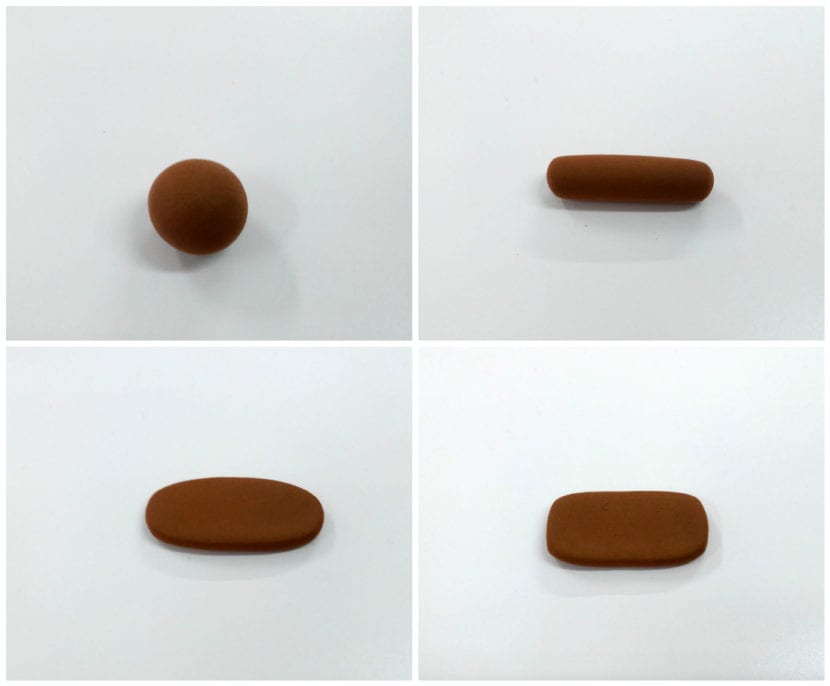
Start by creating the base that will be glued to the pencil. To do this, create, from a ball, a line rolling the clay. Squash it to flatten it, and straighten the edges to create a rectangle.
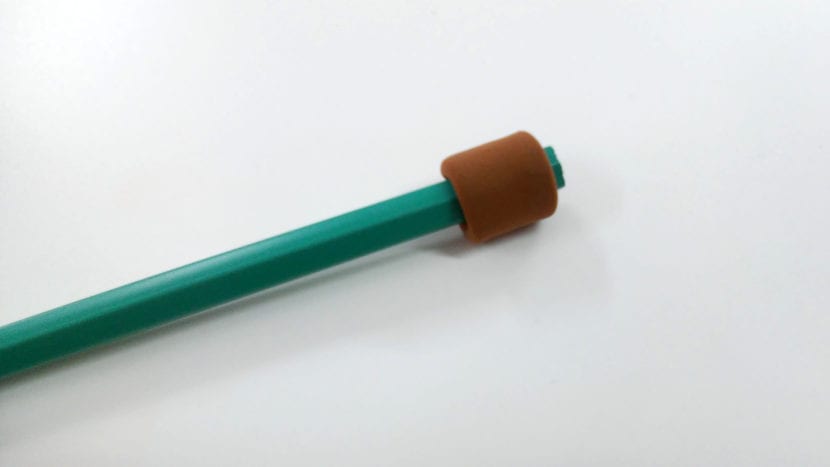
Surround the top of the pencil with the clay shape you just created.
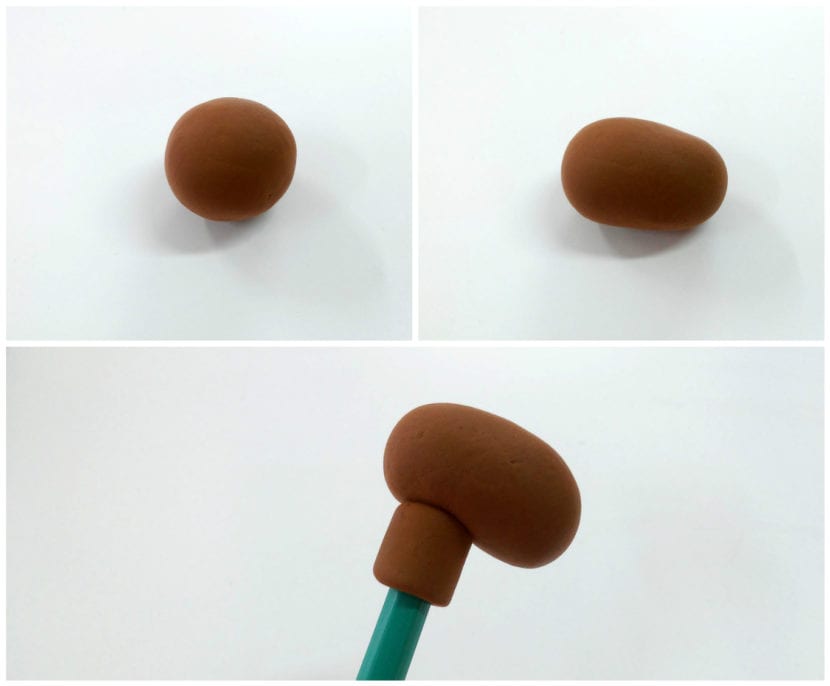
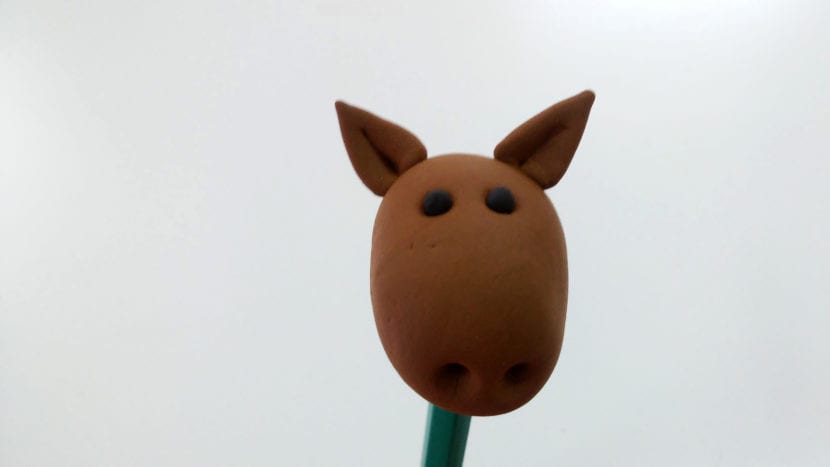
To make the head of the horse, roll a brown ball a little to stretch it, and glue it on the pencil.
With an awl, make two holes in the nose to create the nose.

To put the eyes, make two more holes in the head and glue two black balls.

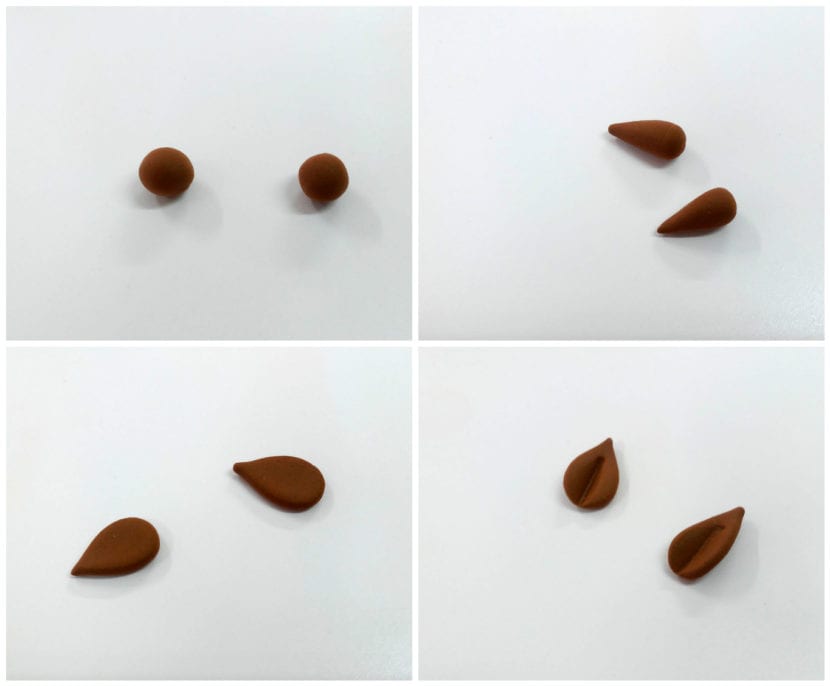
To make the ears, roll two brown balls on one side and you will create two drops. Flatten them and mark a line in the center with a knife.
Glue them on the head.
Next create the reins. To do this, stretch the clay creating a line and flatten it. Glue it around the muzzle.
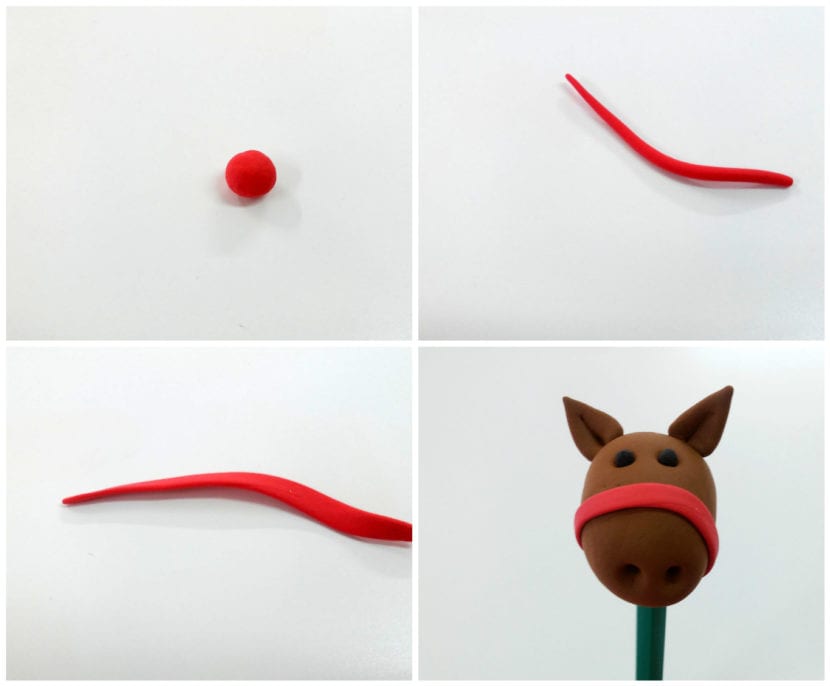
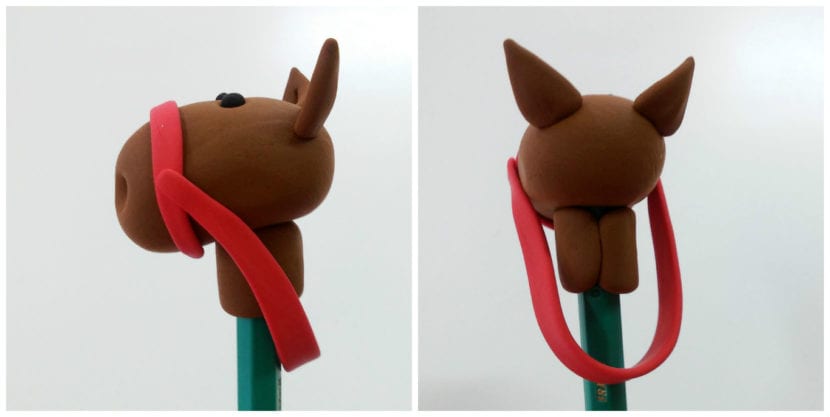
Do the same for the reins hanging from behind.
To add more detail, squash two yellow balls and glue them where the reins meet.
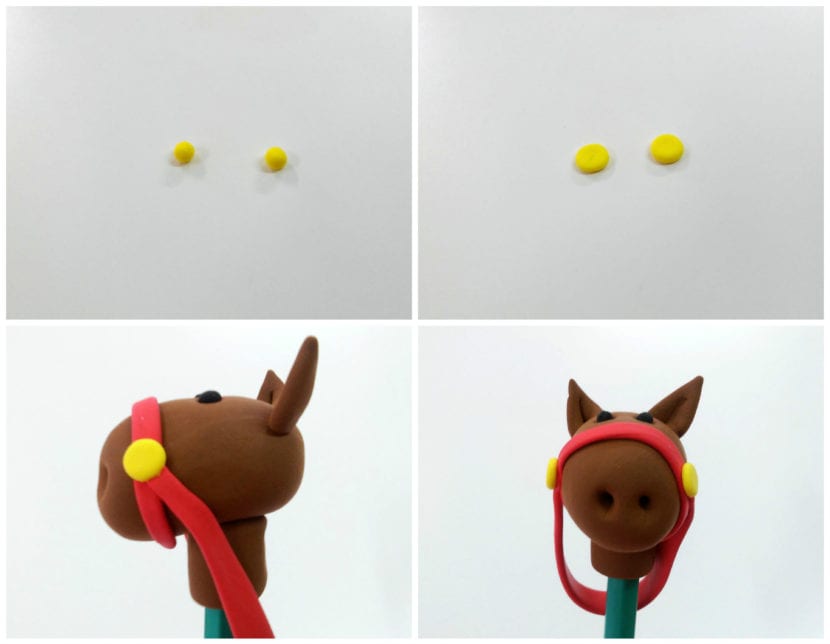
Finally, to make it more sympathetic, add a few strands of hair. Roll three balls on one side to create three drops. Join them by the thick part and glue them on the head.

And you will have your horse-shaped pencil ready. Let it dry and you can use it to write and draw whatever you want.