
Some time ago a friend asked me if I could make her a jewelry box to store her jewelry. She is not a girl who is to carry many things, and to a large extent they are stored. So I decided to make this last one for her, and have her have a place to keep them. If you want to know how to make a jewelry box with ice cream sticks and a sheet of wood, keep reading!
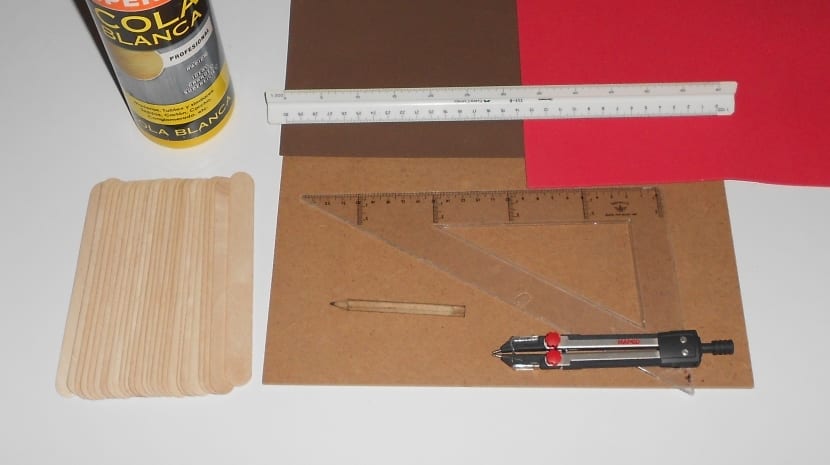
Materials
- Icecream sticks
- Wood sheet
- Pencil or marker
- Compass
- Rules
- Two color eva rubber (one unless it is brown)
- Scissors
- Sierra
Our Process
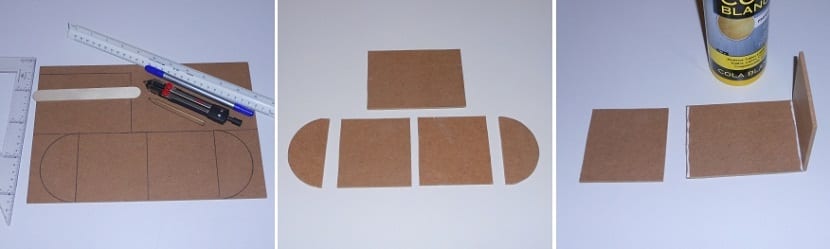
- Trace with the ruler (I used a label to make it more visual) the base and the corners. With the help of the compass in the corners, arrange it in the middle, so that you get an exact semicircle. You can make the corners completely square, I made 10cm x 10cm.
- Trim with the saw all the figures that we have drawn.
- Glue the corners with the white glue. If you are very much a perfectionist and want right angles, use any straight-based object with a good angle to support it. After 5 minutes it will hold on by itself.
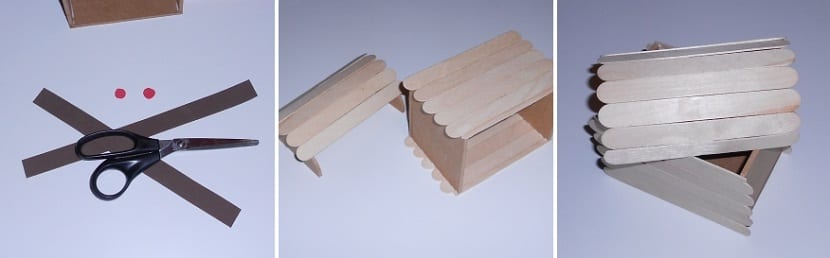
- While the 5 minutes pass for the corners to adhere, cut two long strips of eva rubber. Then a couple of rounds for decoration.
- Start gluing the popsicle sticks, on the front and back sides. Then do the same with the semicircles. Placing and gluing the sticks on top of them.
- In the final parts, they may not match you. Don't worry, cut out a popsicle stick or two so that all the edges are well finished.
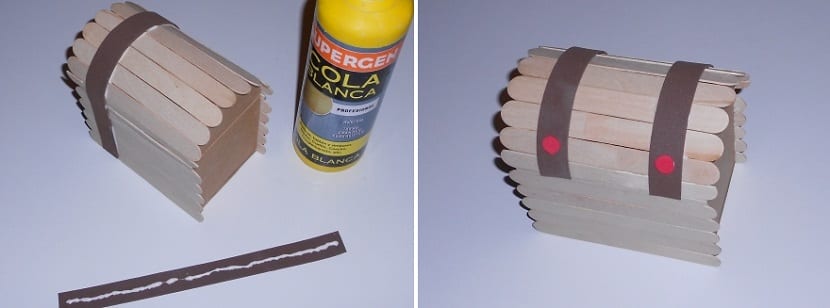
- Glue the long strips with a rich tail from the back to where the jewelry box will open.
- Place and glue the two round ones red on the front to finish the jewelry box.
You can give it a personalized touch from the front. Pasting a photo, writing some letters, etc. In this way it will be personalized and more flirtatious. I hope you are encouraged to make this jewelry box, it is very easy to make!