If you want to learn how to make a fun Pop Up card, here is this very original way to give this card as a gift and present it in a joyful way. It may cost you a little to make this craft but the result is worth it. I have left the measurements of all the cardboard cutouts that I have been designing so that it does not cost so much work to manufacture it. You can give it the creativity you want, if you want to choose another color of cardboard you can do it and even place the drawings that you most want. You can also choose all the decorative ornaments you want, I have made it very simple, but you can add glitter or stickers to your liking.
The materials that I have used for this craft are:
- 4 different color cards, A4 size
- A piece of decorative paper
- Something decorative to put it inside the circle, or failing that you can make a drawing
- Scissors
- A rule
- A compass
- Glue type
- A brush to distribute the glue well
You can see this craft step by step in the following video:
First step:
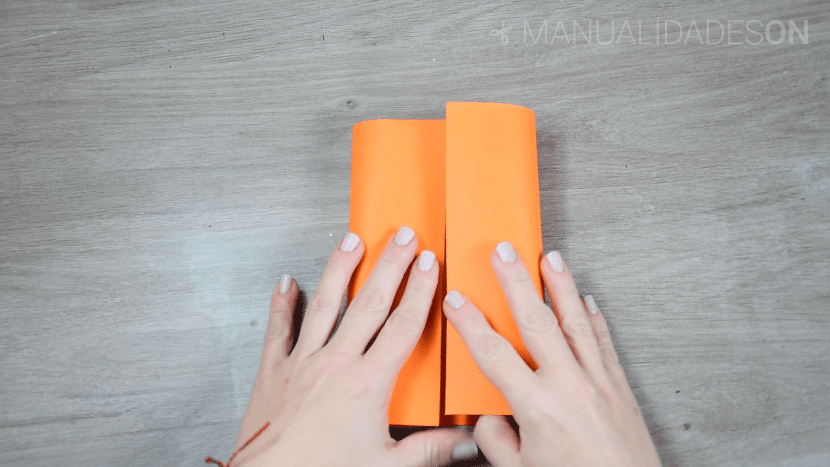
We choose a piece of cardboard To make the card, we take the measurements with a pencil and a ruler. 24cm wide by 16,5cm high.
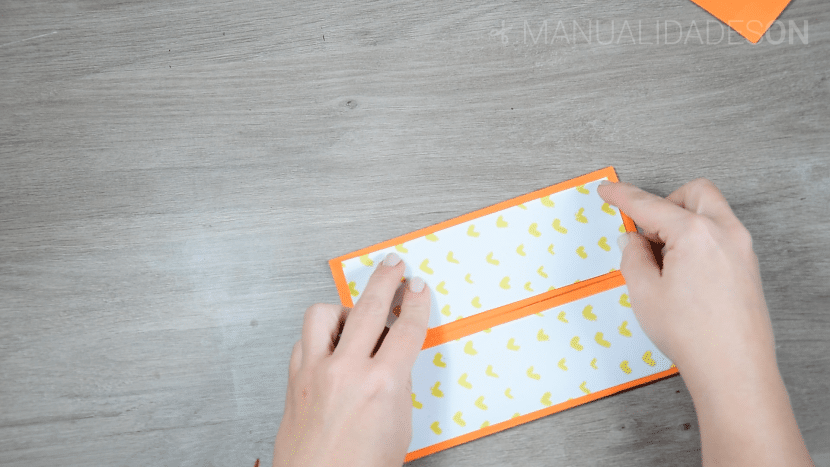
We have to fold the cardboard towards the middle. To do this we measure its half with a ruler and we mark with the pencil. Next we will fold the cardboard. We choose the decorative paper and we measure the parts front (cover) that were bent to place it. The measurements have to be a little smaller so that a box is visible around the paper.
Second step:
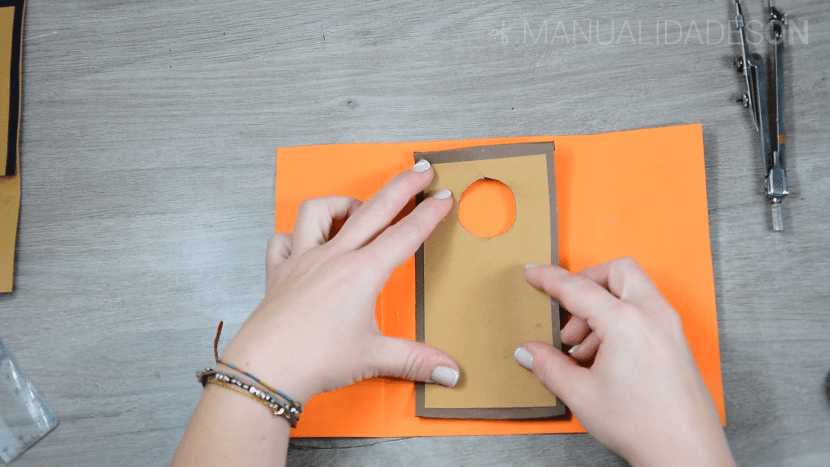
We take a piece of cardboard of different color. We are going to cut out a piece with the measurements of 16,5cm tall by 8cm Wide. We choose another piece of cardboard of a different color and we are going to cut it to the same proportions but a little smaller. The idea is to place the smallest on top of the largest and show a square around it. We make a mark with the pencil on the central part of the structure what have we done. We are going to draw a circle with a compass and for this we need to do it well centered. When the circle is done we will cut it out. We make some folds at the top and bottom of what we have worked. We are going to stick it to the card, remember that only up and down because it has to be a free space in between.
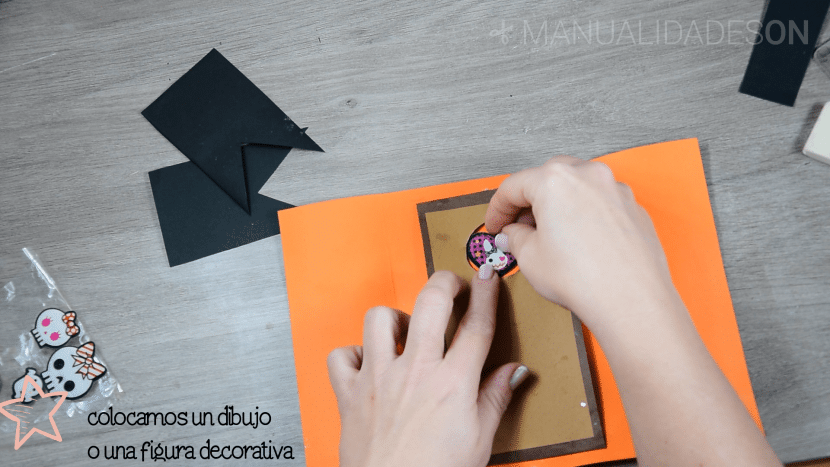
Third step:
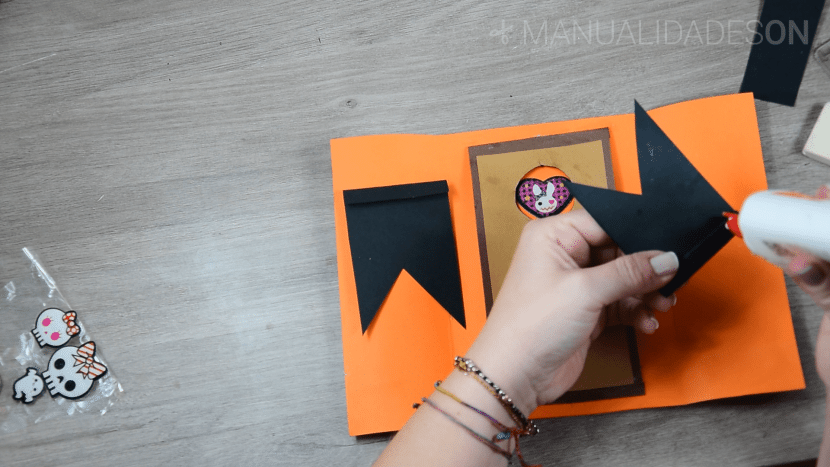
We place inside the circle a decorative sticker that we have chosen. You can also draw a picture on a piece of paper and place it there. We choose two pieces of cardboard and we make the shapes in the photo below, they will be the ones we paste later to make the pop up effect. The measurements are 5,5cm wide by 9cm high and we will make some triangular cutouts for them.

Fourth step:
We take the cutouts to make the pop up shape and we make them a fold on its side from the most inverse part to that of the cut triangular shape. We will queue in the folded part because we are going to stick it on the card. We have to fit the piece together with the other so that when the card is opened and closed, it makes the opening and closing form. It is important that the part that we are going to paste to be done behind the line that we have folded from the card to have enough space to do the mechanical part. You can see much better in the video.