
The Angry Birds It seems that they do not go out of style. This addictive game is known to everyone, or at least they know its characters. Well, in this tutorial we are going to make one of them, I'll tell you how to make a Red Angry Bird with Fimo or polymer clay.
Necessary colors
To create the red Angry Bird you will need the following colors:
- Blanco
- RED
- Black
- Yellow
Step by step
To create the red Angry Bird, start with the basics, the shape of the body and the belly.
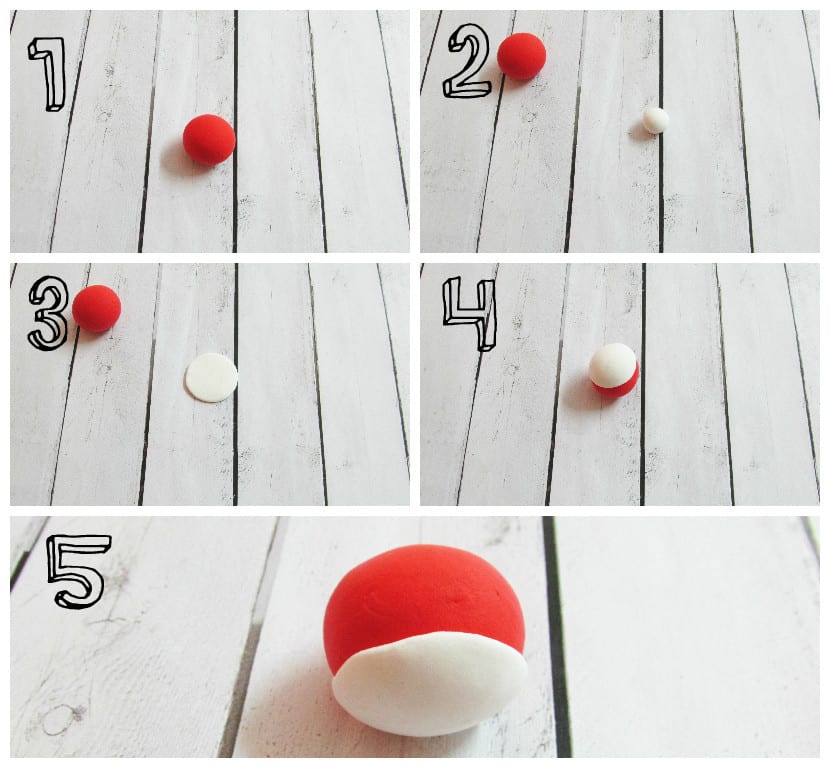
- Make a red ball.
- Create another much smaller white ball.
- Smash the cue ball.
- Hit the white ball on the red one.
- Flatten the base a little, keeping in mind that it has to take almost half of the white part.
Follow the peak.

- Make two yellow balls, one larger than the other.
- Create a drop with each one, rolling your finger down one side of the ball.
- Glue the two drops together.
- Glue the beak to the head, leaving the smallest drop down.
Make her eyes.
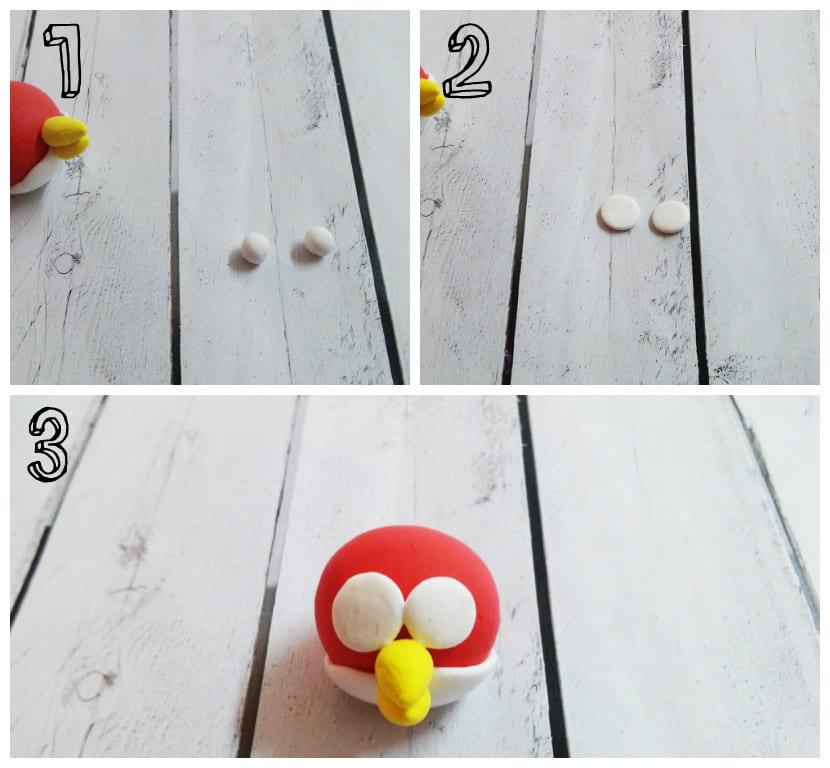
- Create two white balls.
- Crush them.
- Glue them on top of the beak next to each other.
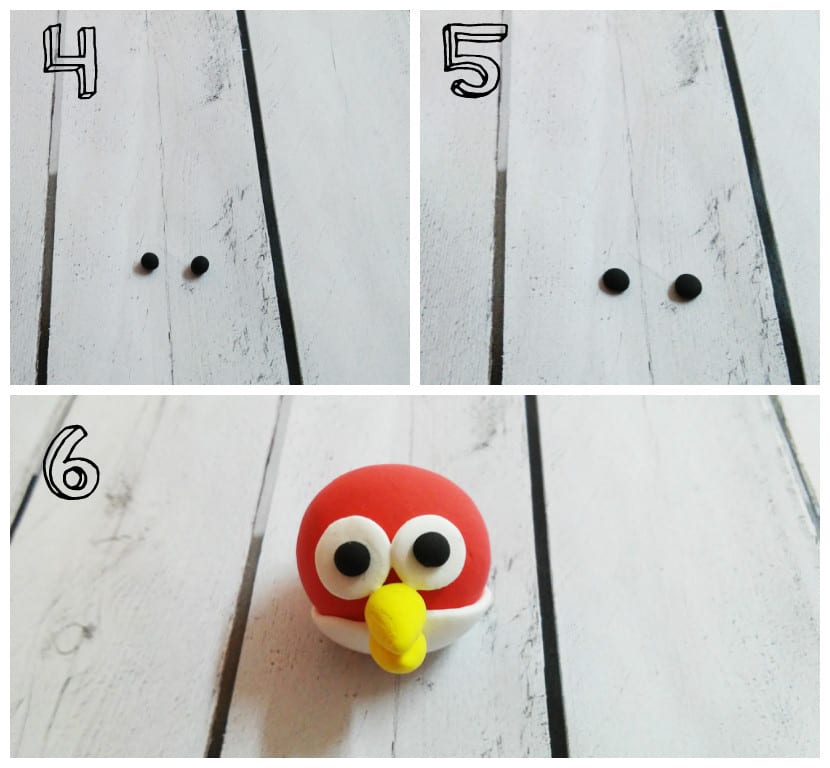
- Create two other smaller black balls.
- Crush them.
- Glue them on the white eyes to make the pupils.

- For the eyebrows make two black balls.
- Create with them two drops.
- Crush them.
- Stick them on the eyes with the tips of the drops towards the center.
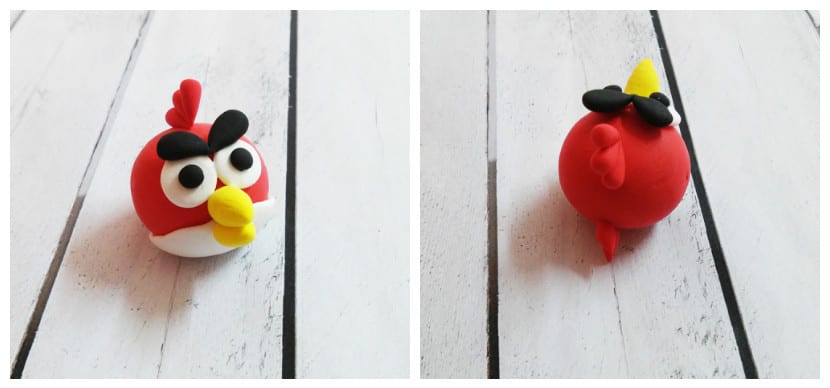
The red Angry Bird wears a feather on its head.
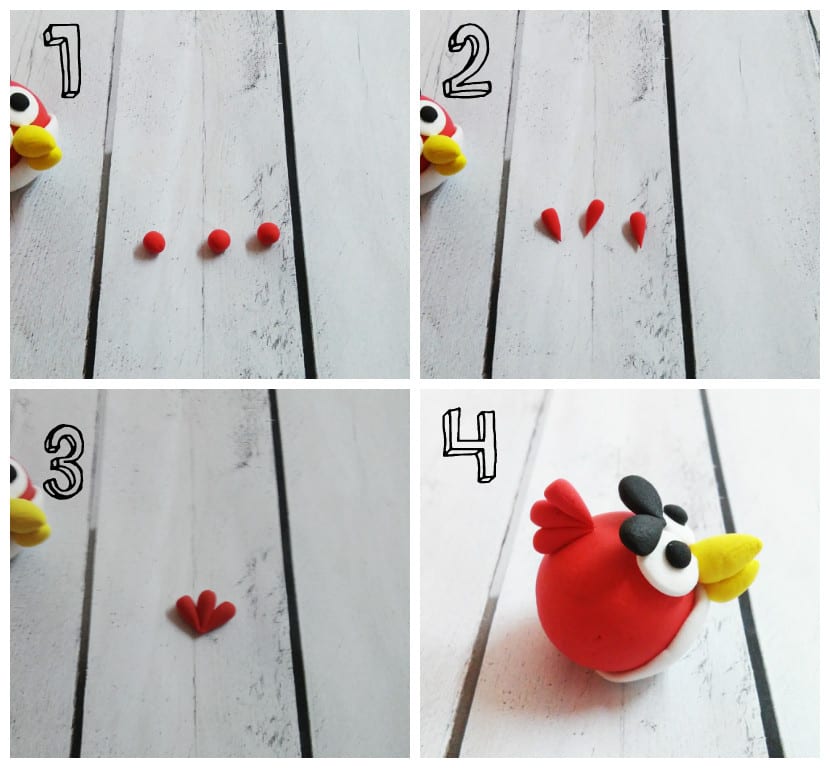
- Create three small red balls.
- Make a drop with each of them.
- Glue them together on one side.
- Stick them on the head by the side of one of the drops, leaving the peaks of these down.
It also has a tail similar to the feathers on its head.

- Make two red balls.
- Create with them two drops.
- Glue them together, this time only on the thick side, leaving the peaks separated.
- Glue the tail on that fat part on the body, leaving the spikes out.
And this is the result.
Children love to put in a pencil or to play with them as if they were in the video game.