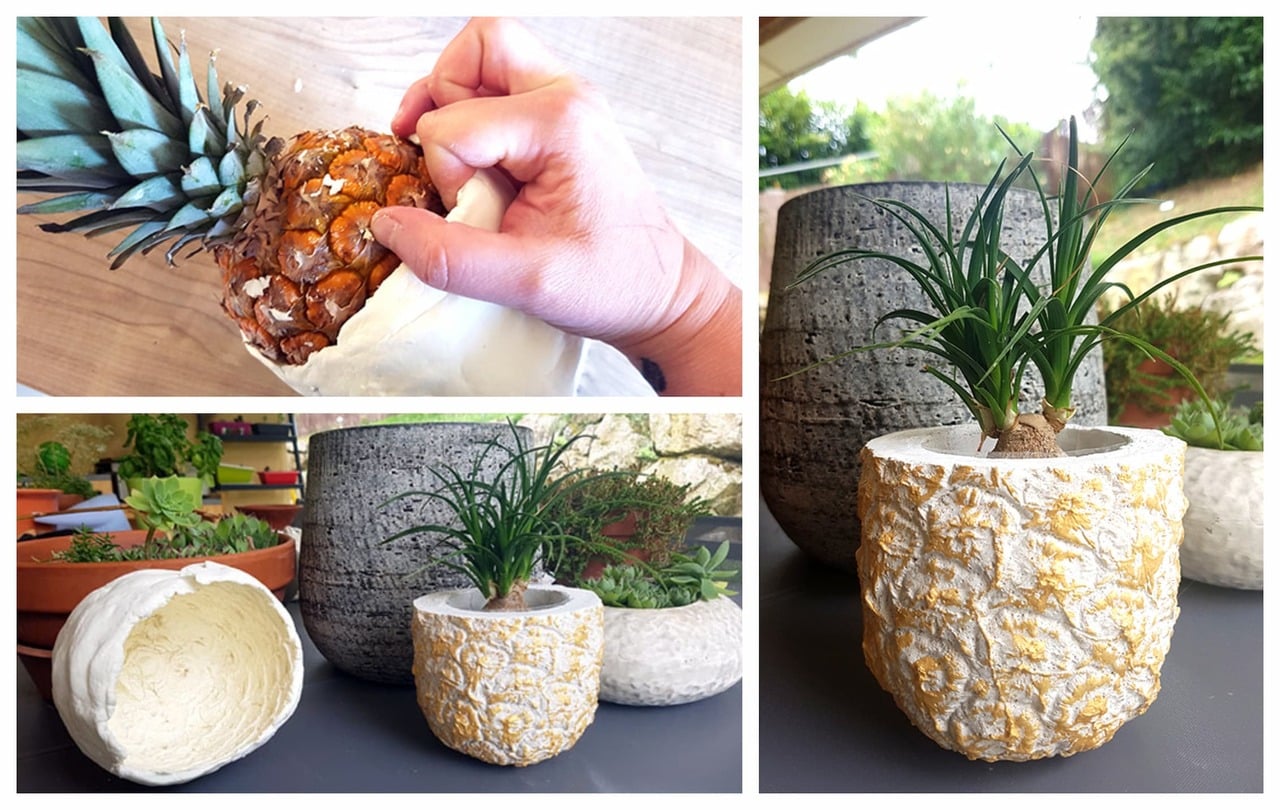
Either because you don't have molds or because you want to achieve an original shape, learning to make your own silicone molds it's a great idea. With them you can make bowls, pots and endless decorative objects.
In a previous tutorial, we explained how to make craft cement and thus be able to create modern and original objects. But to give you the opportunity to carry out an even more creative and personalized activity, we have prepared this small and simple tutorial to make your own molds.
Materials to make custom molds
The materials what you need are:
- A box of cornstarch (cornstarch).
- A cartridge of silicone sealant (the color does not matter).
- A gun for the caulk so you can easily remove it.
- A pair of gloves to protect your hands from any substance.
- A container and a wooden stick for mixing (this container cannot be used in the future for food purposes).
- A support to hold the object while the mold dries.
- The object you want to copy. In this case it is a pineapple, which will be our chosen object here.
How to make the silicone mold
- Add in the container (remember that you should not use one that is later used for cooking) the cornstarch (the same one used to make Cold porcelain) and silicone in equal parts. The order is not important the essential is the ratio (50/50). The total final quantity depends on the surface to be molded (for the pineapple we have used the entire cartridge).
- Mixture with a wooden rod and then knead with your hands until the dough is no longer sticky. If necessary, add a little cornstarch to make it less viscous and you can work it better.
- flatten the dough, similar to how you were making pasta. For this you can help yourself, for example, with a bottle.
- Now wraps the object to be molded. Try to cover it completely, without holes or fragile surfaces (the mold must be airtight). Important: press the dough well on the object so that the details of the object are integrated into the silicone (in our case, we are interested in preserving the hexagonal flake patterns of the pineapple rind).
- Once you have finished and you are sure that there is no opening left, place the object somewhere firm so that it can dry up for about 24 hours. Usually a couple of hours is enough for the silicone to dry, but depending on the thickness, letting it dry for a whole day will give you the security that it will be perfect.
- After that time, take the object out of the mold, gently pulling on the silicone if necessary.
And that's it! The mold is ready to start your next creative activity, be it with cement or plaster. Knowing how to make molds will allow you replicate virtually any object, being especially useful when making personalized pots or bowls.