
We continue with the crafts for summer and for children. In this post I am going to teach you how to do this Photo frame great for placing a photo of a scene at the beach, pool or on vacation. It is very easy to do and it is totally recycled because pieces of eva rubber, cardboard and other materials that we have left over from other projects or we have at home can be used.
Materials to make the summer photo frame
- Thin and thick cardboard
- Colored eva rubber
- Scissors
- Glue
- Permanent markers
- Wooden stick
- Colored cord
- Rubber letters eva
- Mobile eyes
Procedure for making the summer photo frame
- To start cut a rectangle of thin cardboard such as the cereal boxes with the measurements that appear in the photo.
- These measurements are perfectly adapted to a 10 x 15 cm photo.
- Also cut another cardboard of the same measurements, but somewhat thicker.
- Make 1cm marks on all sides except the top and join them together.

- Cut out the remaining u-shaped piece and glue it on top of the thin cardboard.
- Now we need another rectangle of eva rubber of the color that you like the most.

- Place a 10 x 15 cm photo on top of the eva eraser and reduce the rectangle 2 or 3 mm to cut it out.
- With these measures we avoid that any gap is seen when putting the photo.
- Once the eva rubber is cut, glue it on top of the previous set.
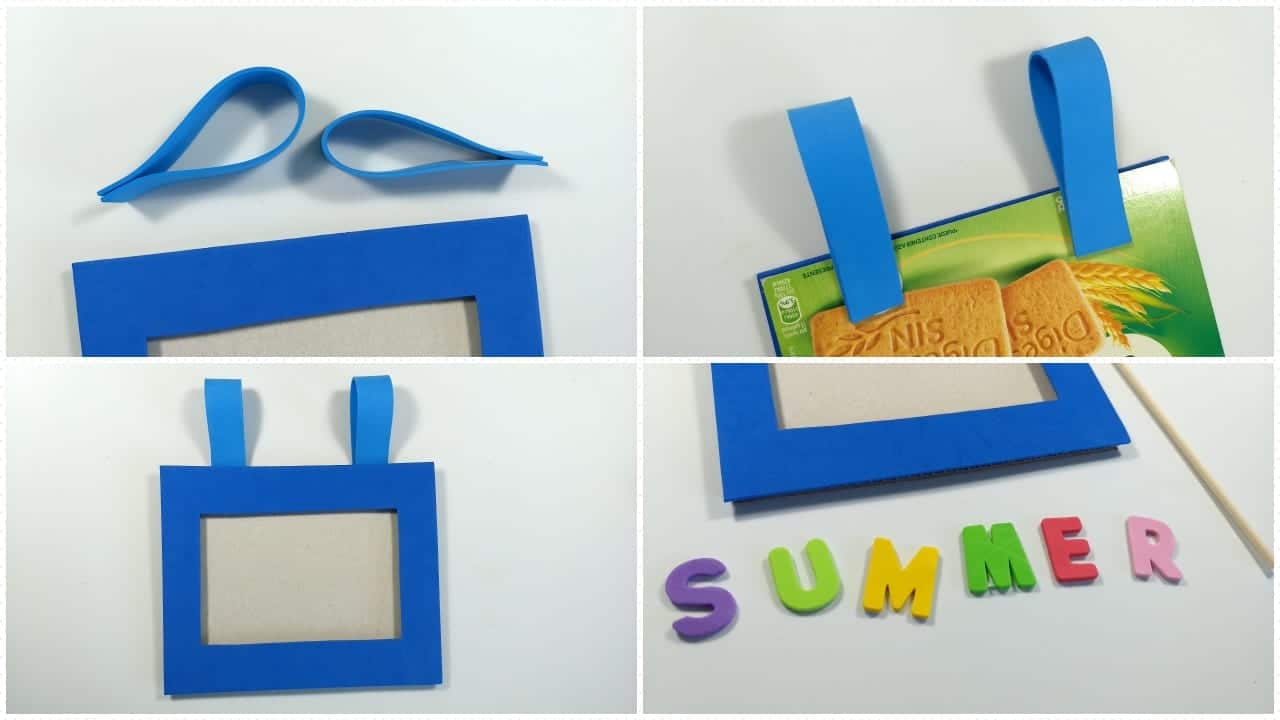
- We need now 2 strips of eva rubber of 20 x 2 cm approximately and a 30 cm wooden stick.
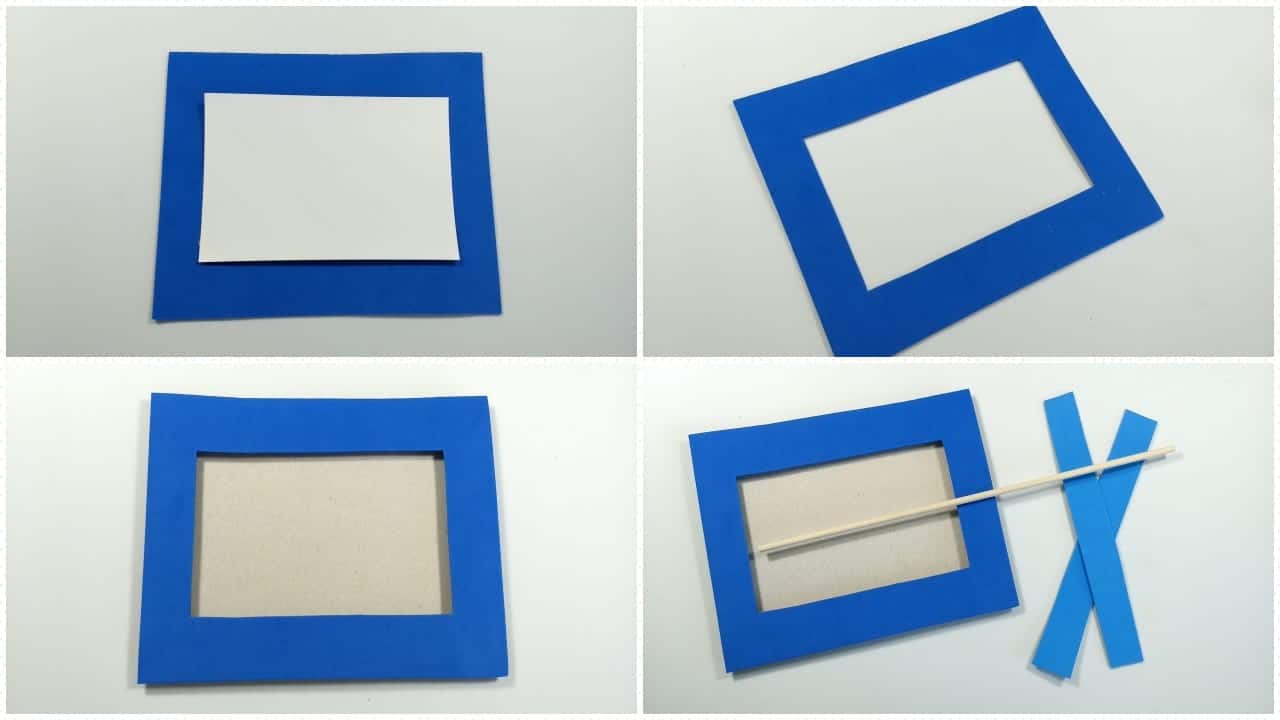
- Fold the eva rubber strips in half and glue them to the back of the cardboard as two rings to then be able to put the stick.
- Ready the word "summer" with eva rubber letters.
We decorate the work.
- Glue the letters to the bottom of the frame.
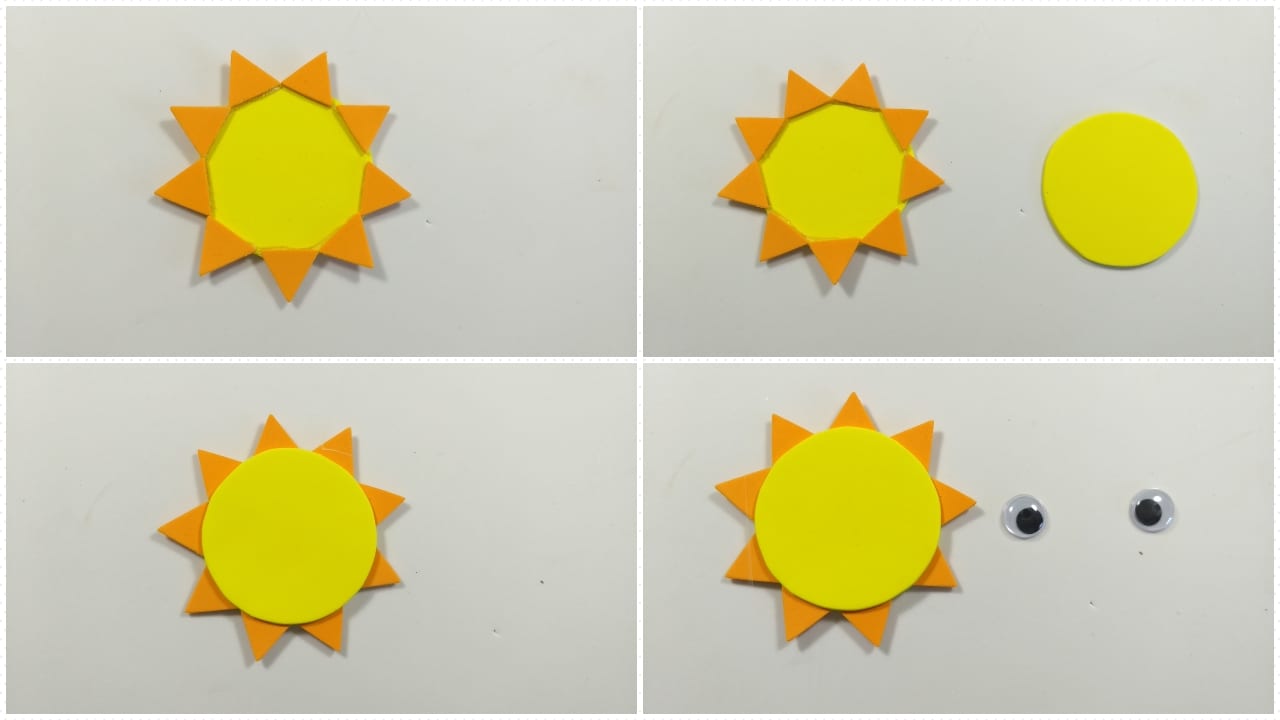
- Now cut out a circle about 6 cm in diameter in yellow eva rubber.
- Also form triangles that are going to be the sun's rays and glue them around.

- Once the rays are glued, paste another circle on top that will be the face.
- Sticking the eyes and give him the details with black permanent marker.
- Glue the sun to the top right of the photo frame.
- Now with a cord, join the stick and insert it through the rings.
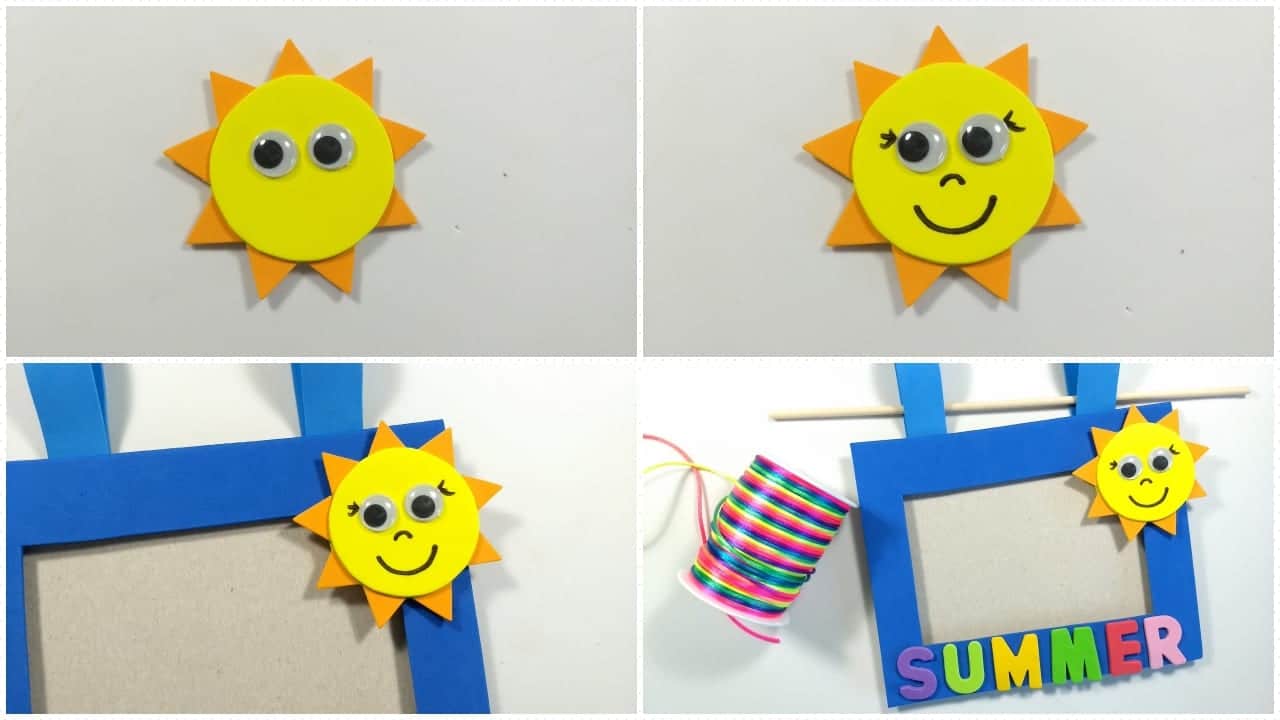
- You have finished your summer photo frame, I hope you liked it a lot.
