
Photo frames They are decorative elements present in all times. There are diversity of styles and a thousand colors.
Recycling becomes an incredible resource for decorate your home and elaborate, for example, this retro photo frame with cardboard.
In this post I am going to teach you how to do this project so that you can place the photo that you like the most in your home.
I have used a striped design because it is something that I love, but you can use an infinite number of colors.
Materials to make the retro photo frame
- A piece of cardboard that is thick
- Ruler
- Pencil
- Scissors
- Glue or hot glue gun
- Black and white duct tape or whatever you prefer
- Colored eva rubber.

Process for making the retro photo frame
Cut a piece of cardboard of the measurements that appear in the photo with the help of the scissors and the ruler or a cutter.

With the help of the photo that you are going to place inside the frame, trace the outline of it with a pencil or marker.
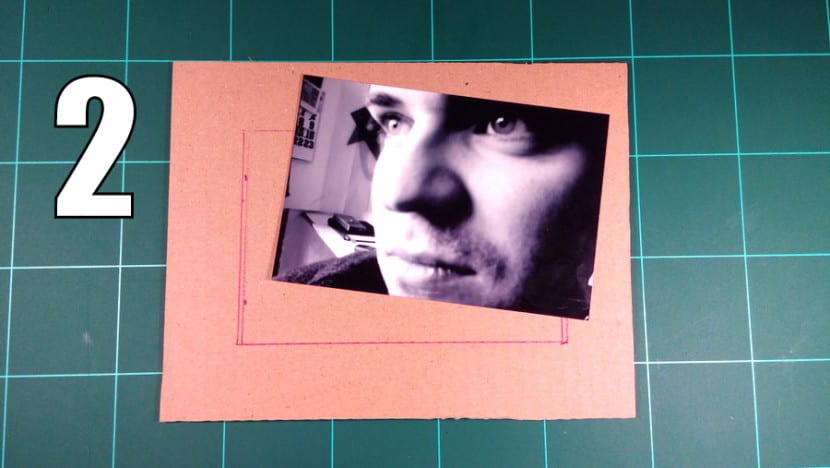
Cut out the rectangle you just did with the photo.

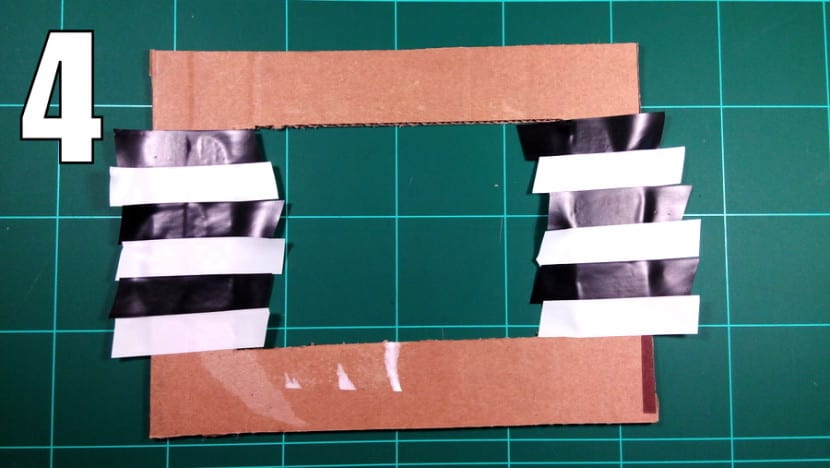
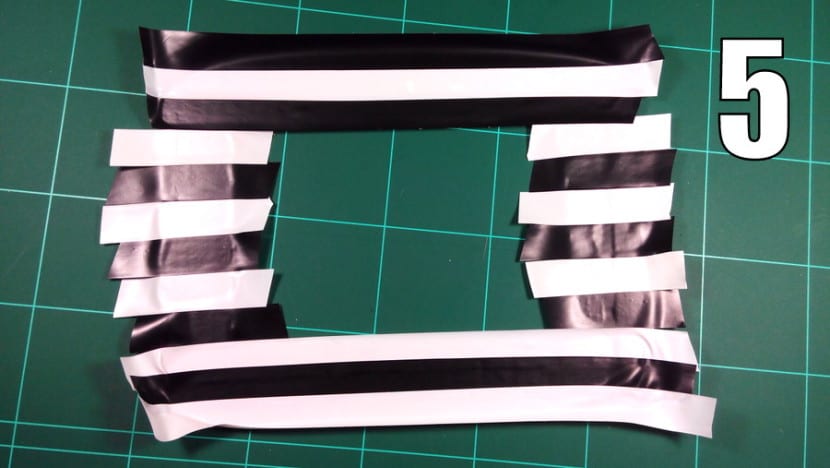
Go sticking pieces of duct tape in the photo frame and alternate the color white with black, making the design that you like the most; vertical or horizontal.
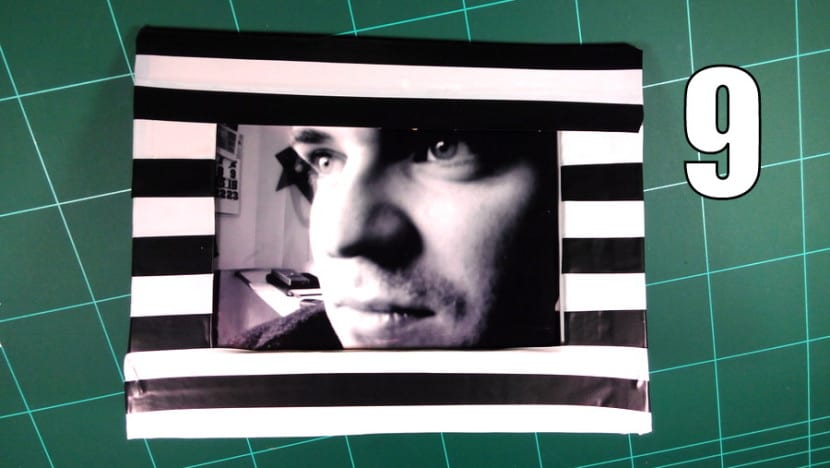
Once finished, it would look like this.
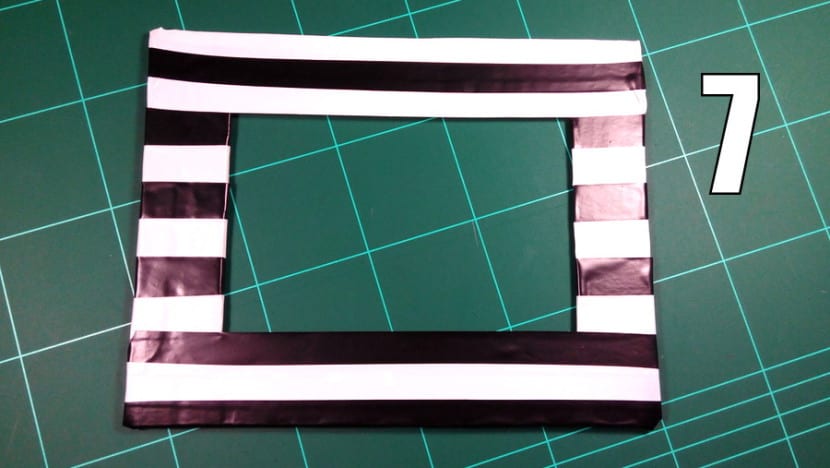
Paste from behind the excess tape so that the photo frame is well defined.

The finish has to be this.
Glue a piece of cardboard from behind that will work as a base so that the frame can be attached and placed in the place of the house that you like the most.

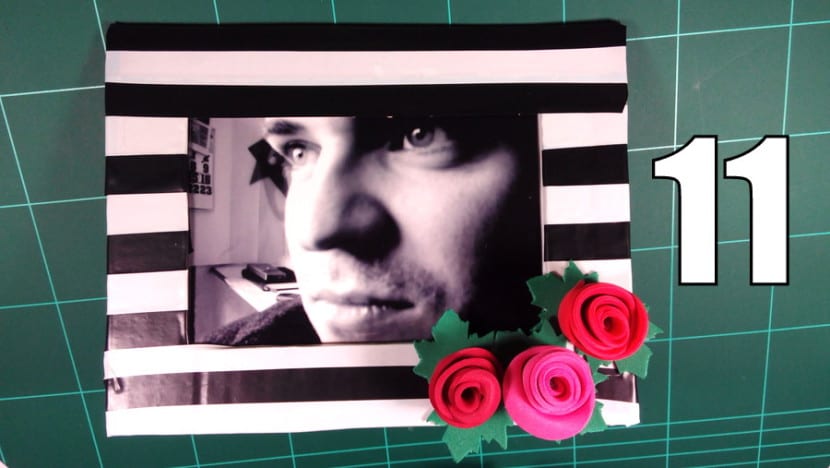
Place the photo from behind of the frame with the help of a piece of tape or glue.
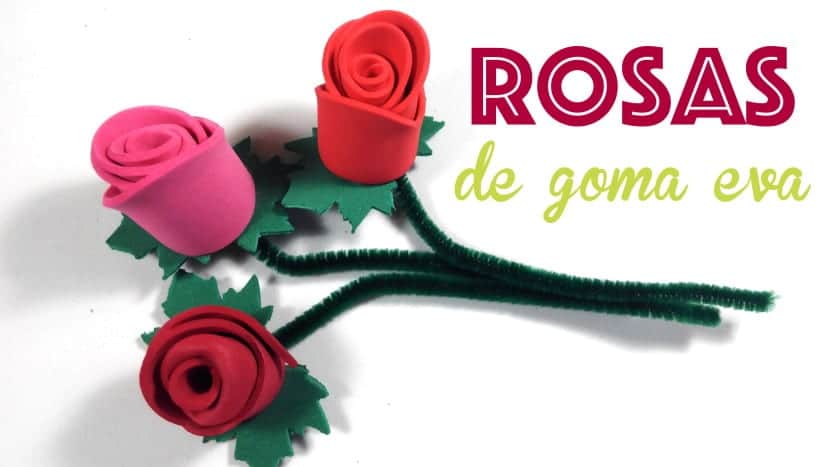
You can leave it like that or decorate it with these eva rubber roses.
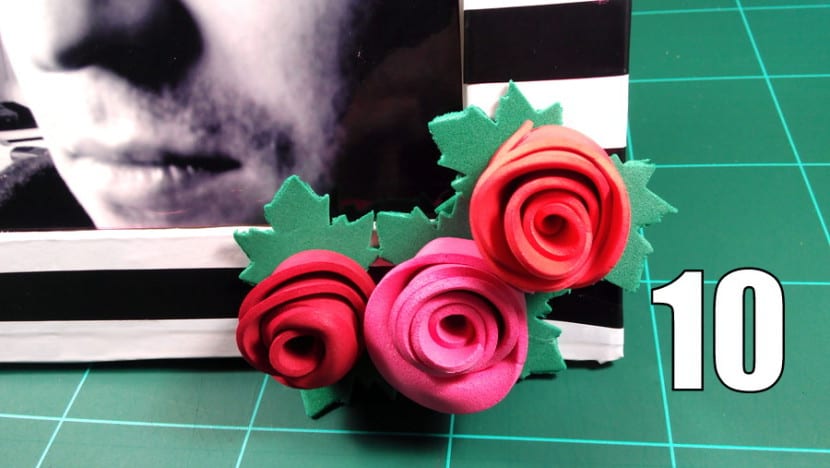
If you want to learn how to do them, CLICK on the image.
And that's how our retro photo frame looks. I hope you liked it and that you are encouraged to do it. Do not forget to let your imagination fly so that your creations are unique and super original.
See you on the next idea.
Bye!!