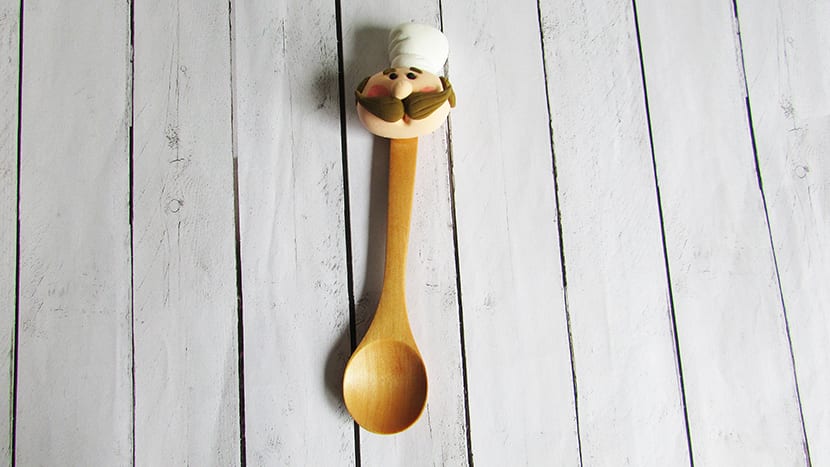
The details we add in the more they make that room in the house more welcoming. For this reason I have made a tutorial to create a spoon decorated with a clay cook, which you can hang on the wall or place in a bowl with more wooden utensils as a decor.
Materials that you will need to make the spoon with the cook
To make the spoon decorated with a clay cook you will first need:
- A wooden spoon
- Polymer clay
- Contact adhesive or instant adhesive
As for the clay colors that you will need to create the chef's face, they are the following:
- Blanco
- Meat color
- Black
- Brown
If you want to make blushes like the one you will see in the example, you will also need red eyeshadow.
Step by step to make the clay cook
Follow the instructions below to shape the chef's face.
- Make a flesh-colored ball.
- Roll it back and forth a bit to make it an oval.
- Squash it very gently with the palm of your hand.
- Glue a flesh-colored ball in the center as a nose
- To make the mouth, press the awl under the nose.

- Make two holes with the awl where the eyes will be.
- Roll two pieces of black color to make two balls.
- Stick them in the holes you just made for the eyes.
To make the blushes you can apply a little red eyeshadow with your finger or a brush.

Time to do his hair and mustache:
- Create two brown balls to make the whiskers.
- Roll down one side of each ball to create the teardrop shape.
- With the knife, mark the lines of the mustache.
- Glue the mustache between the nose and the mouth.

- Make two very small brown balls for the eyebrows.
- Roll them creating two churritos.
- Glue them a little above the eyes.

- Also take two other brown balls a little larger for the hair.
- Smash the balls.
- Glue them to the sides.
- With an awl, make small holes to imitate the hair.
Let's do now the cap:
- For the base, make a white ball.
- Roll it into an oval.
- Stick it on the head
- Make some lines with the knife, imitating the wrinkles of the hat.

- For the top, make another white ball a little bigger than the previous one.
- Create a drop by rolling the ball on one side.
- Flatten it a bit by pressing the tip and the rounded part at the same time.
- Mark other lines on it to mimic the wrinkles.
- Glue it on the base of the hat.
And you will have the figure ready. You just need to stick it on the spoon with the adhesive you have chosen.