With a simple cardboard box we have been able to make a great recycling. We have devised its form to build a wardrobe for dolls and thus store all their clothes. In my case I have chosen a cheerful medium pink tone with a star pattern, but you can always choose the tone and pattern that you want the most. This box is made occasionally, since its design is not made to last a long time, but the important thing is to be able to manifest the creation of a craft that you can even design with the little ones.
The materials that I have used are:
- a rectangular box with four flaps
- wrapping paper or any type of decorative paper to line the box
- another decorative paper of a different color to decorate the inside of the box (optional)
- scissors
- a wide brush
- glue glue
- hot silicone glue
- one doorknobs
- some magnets so they can close the doors
You can see this craft step by step in the following video:
First step:
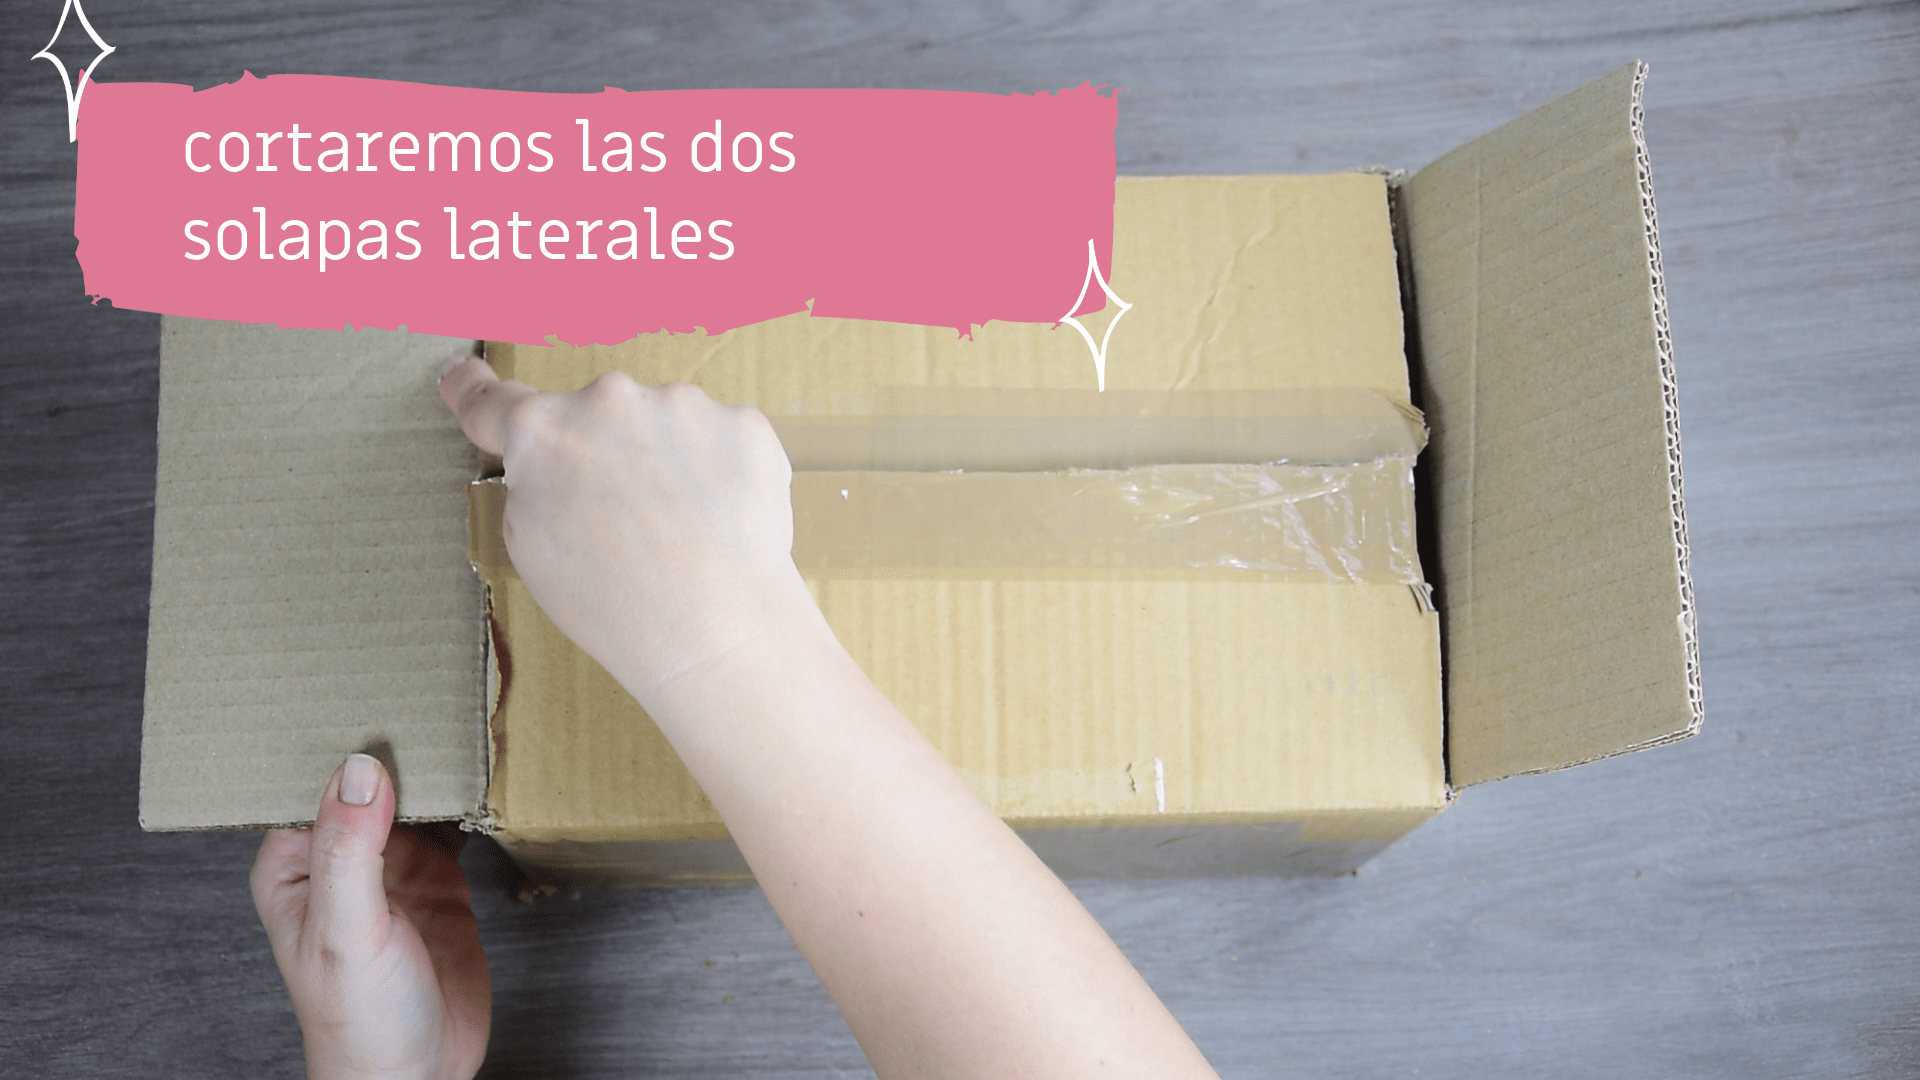
We choose a box with four flaps. Go to cut the two side flaps, the smaller ones. They will be the ones that will serve us to be able to use later and make us the function of shelves. We will start to measure the paper to go sticking it around the box. We will glue it with glue, but we must be careful when using it. It is important that the excessive humidity of the glue does not wrinkle the paper when gluing it, that is why We can use a wide brush to spread the glue as much as possible and that they do not remain in globs. If by chance you use a thicker than normal decorative paper, it will be much easier for it not to wrinkle so much.
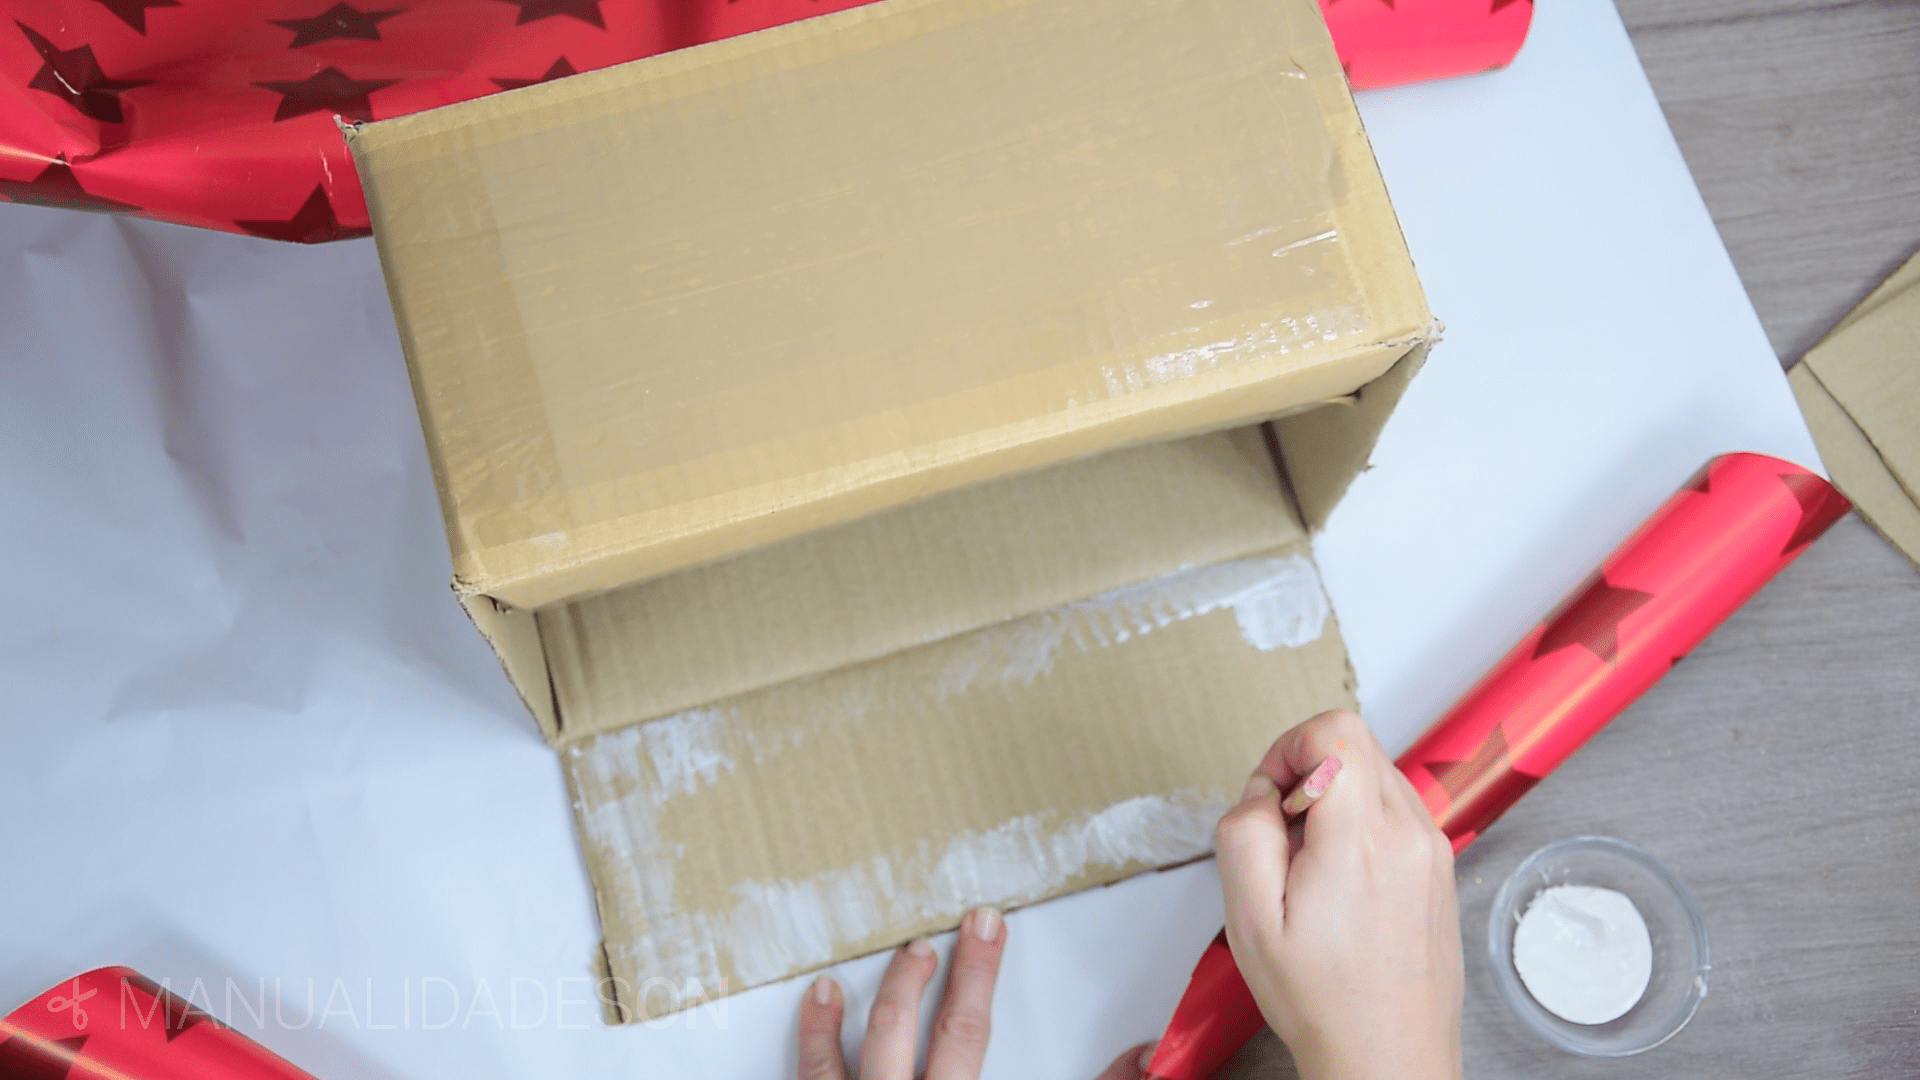
Second step:
How can we observe we are sticking the paper in all the corners of the box. You have to be careful when sticking it in the area that will make the doors, so that the paper is not excessively fair without being able to move well. I have lined the inside of the box of a different color so that it is contrasted with the outside.


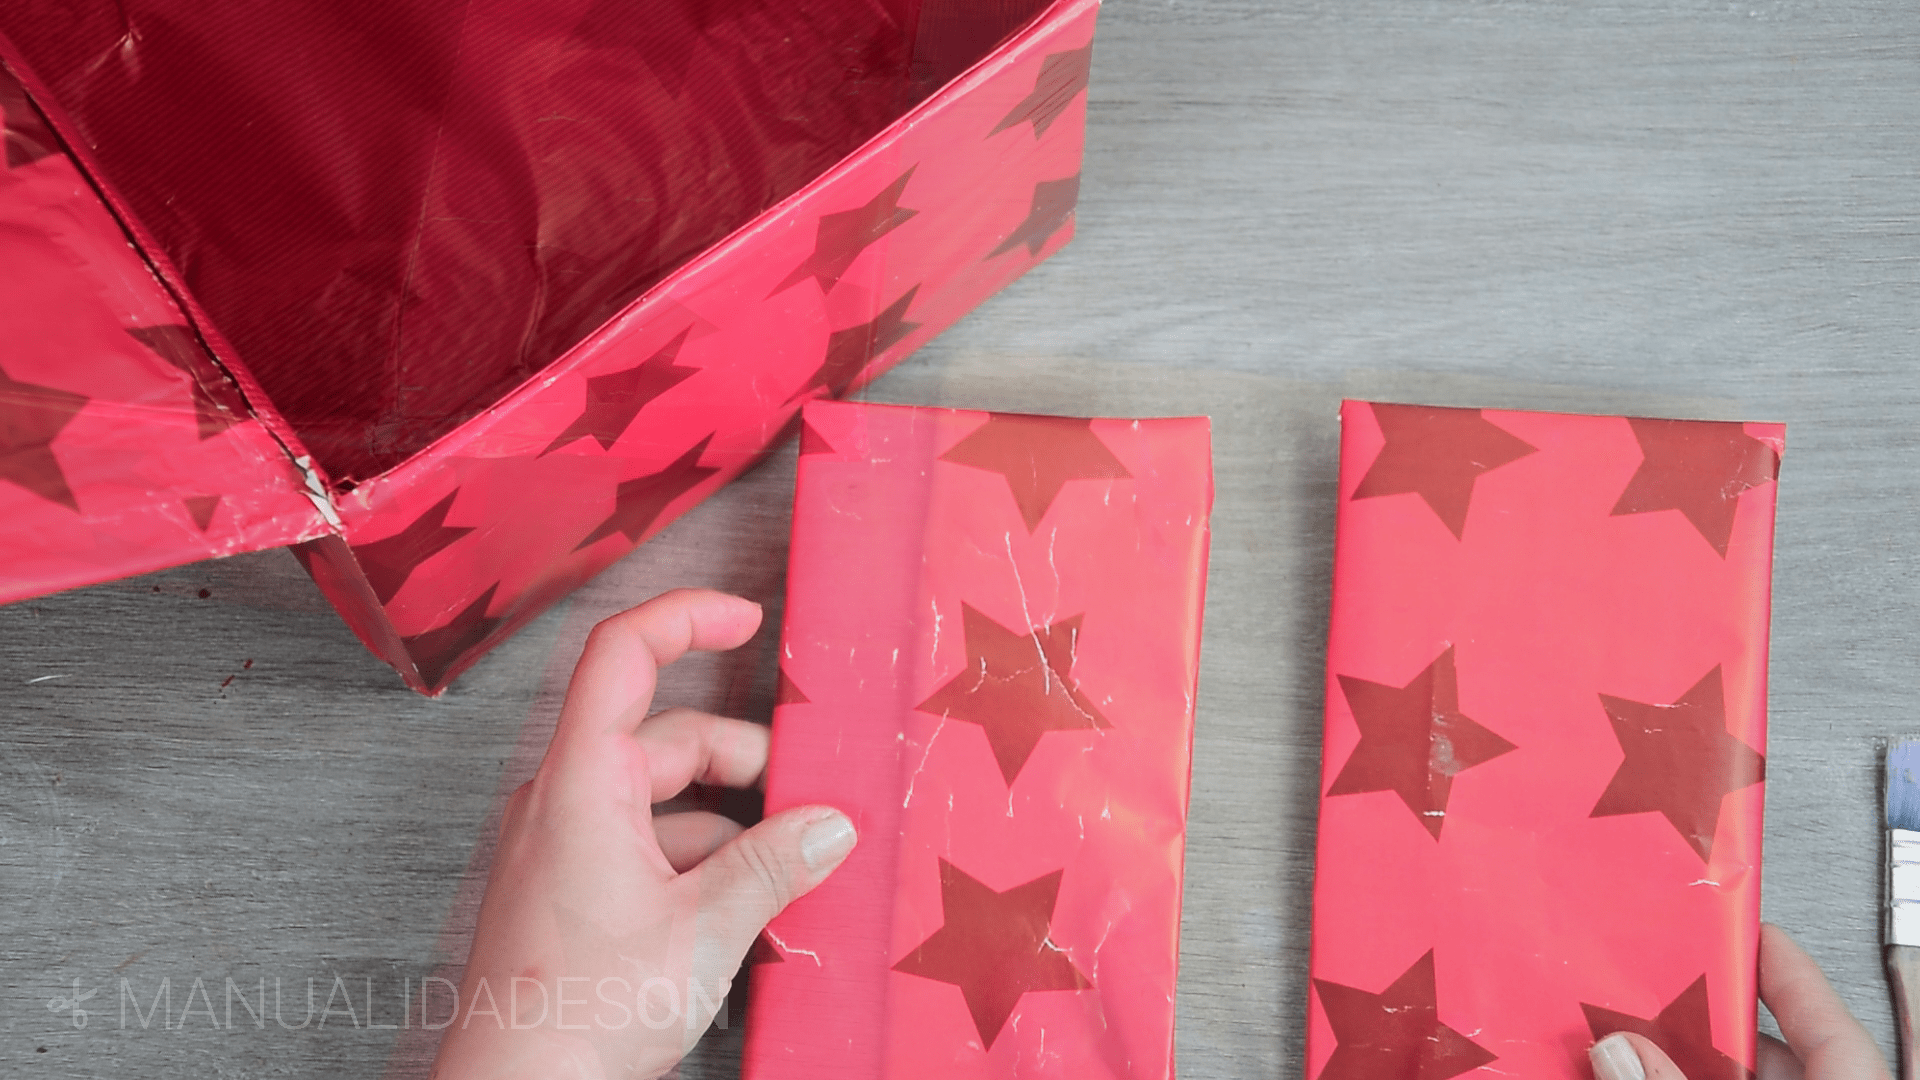
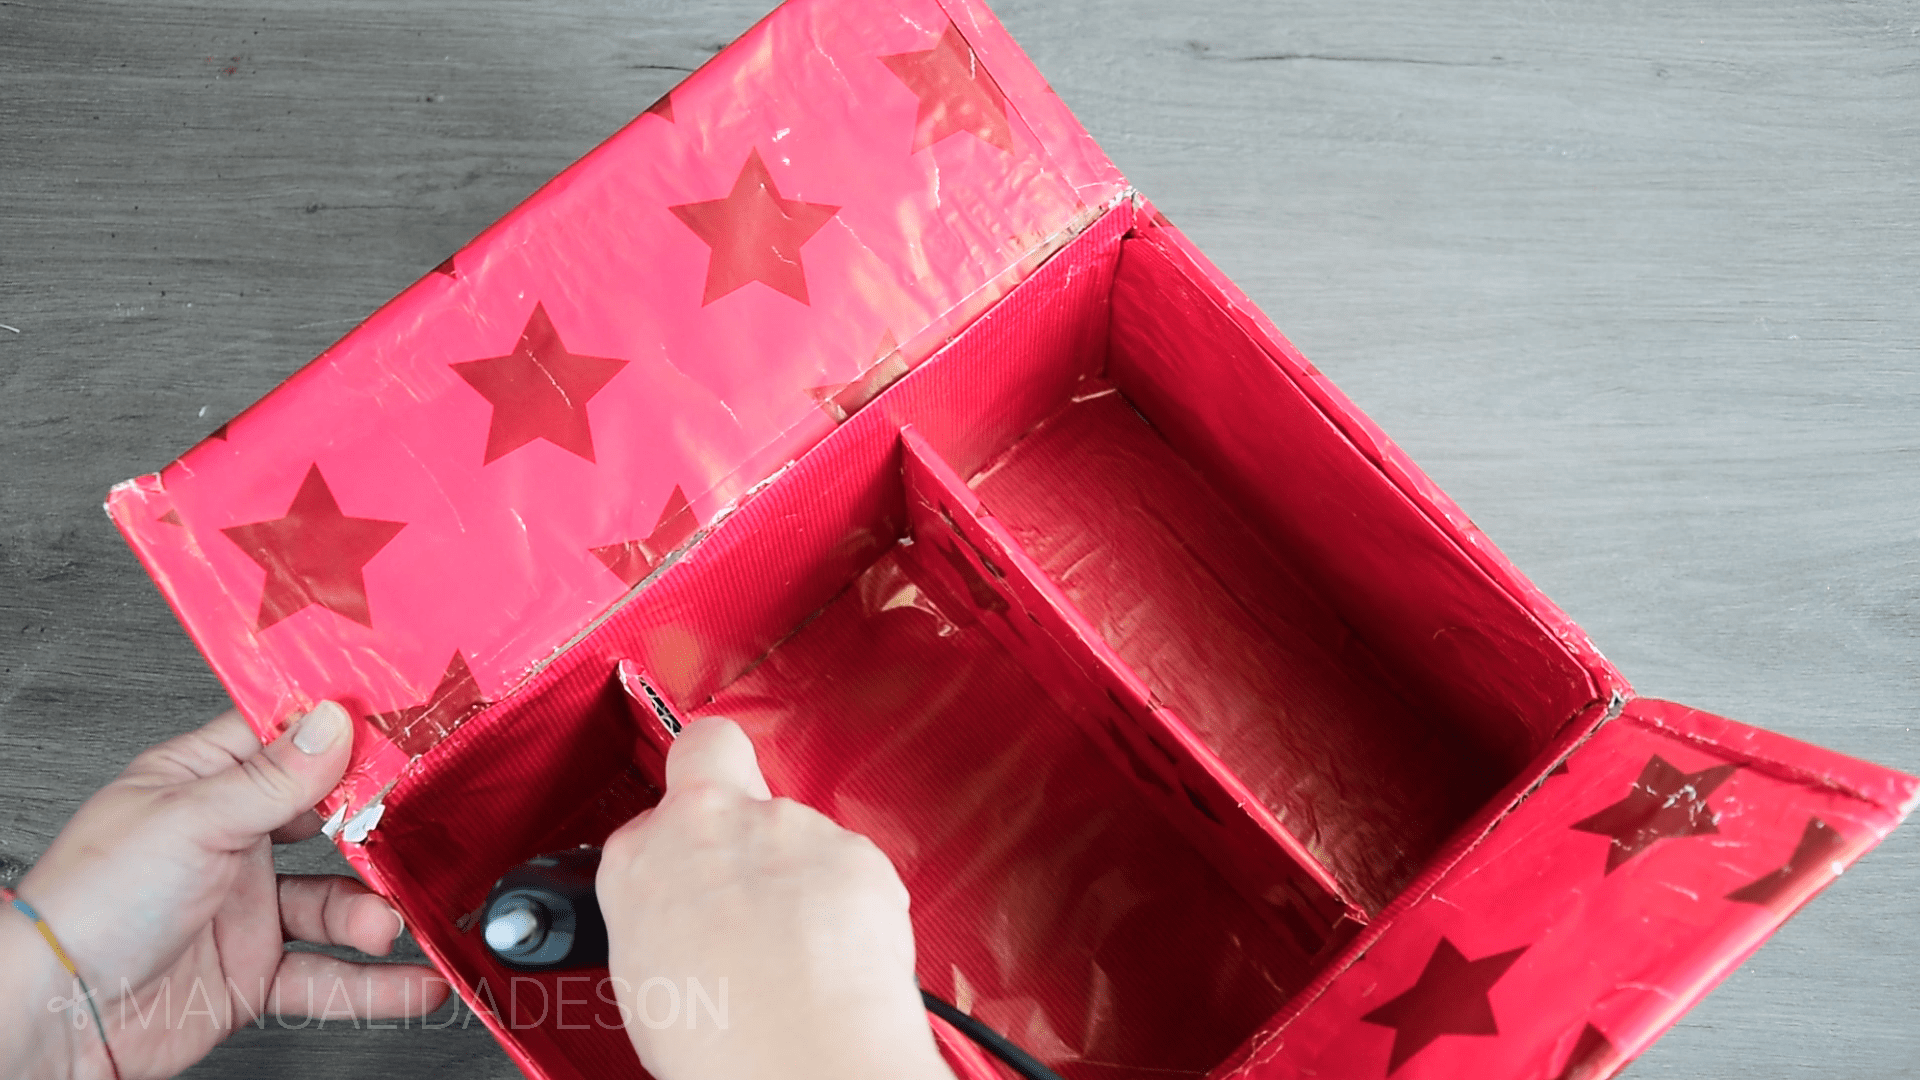
Third step:
The two flaps that we had trimmed We cover them with paper. We will place them inside the box and we hold them with hot silicone.
Fourth step:
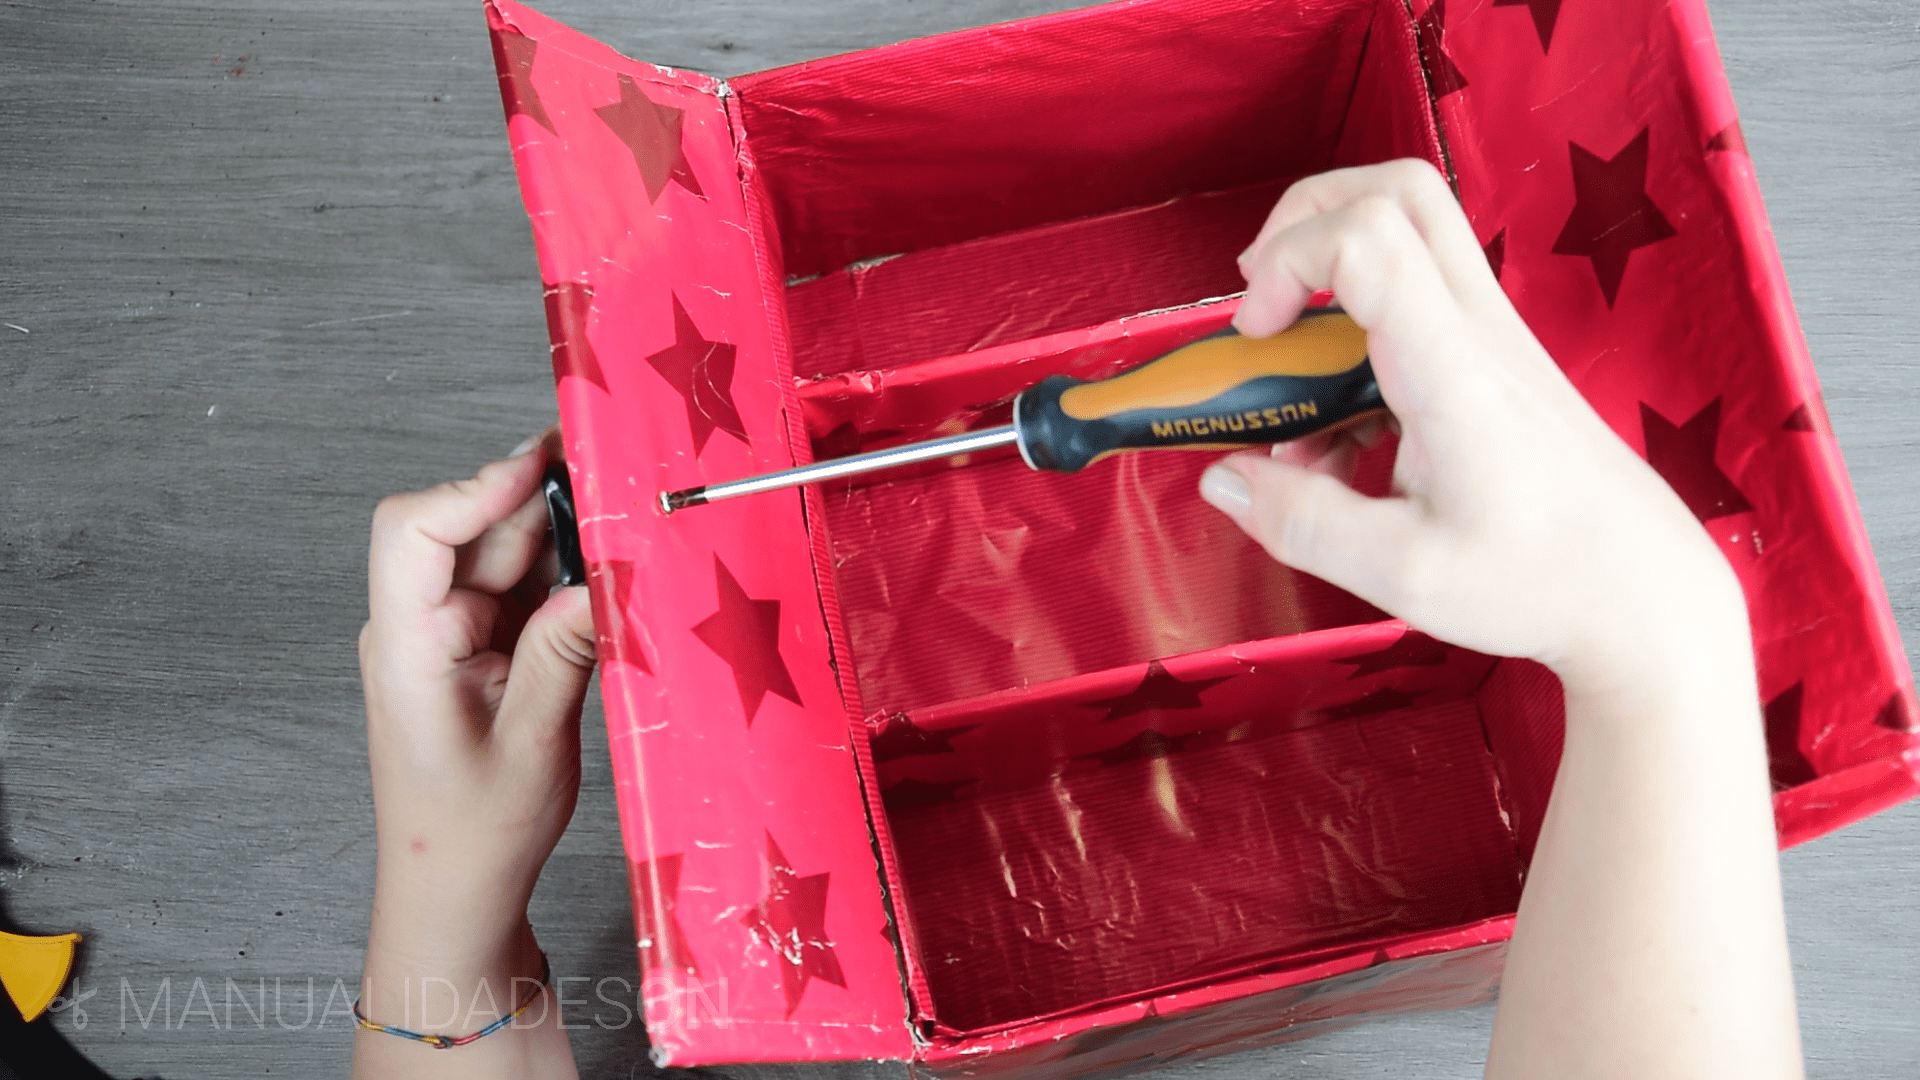
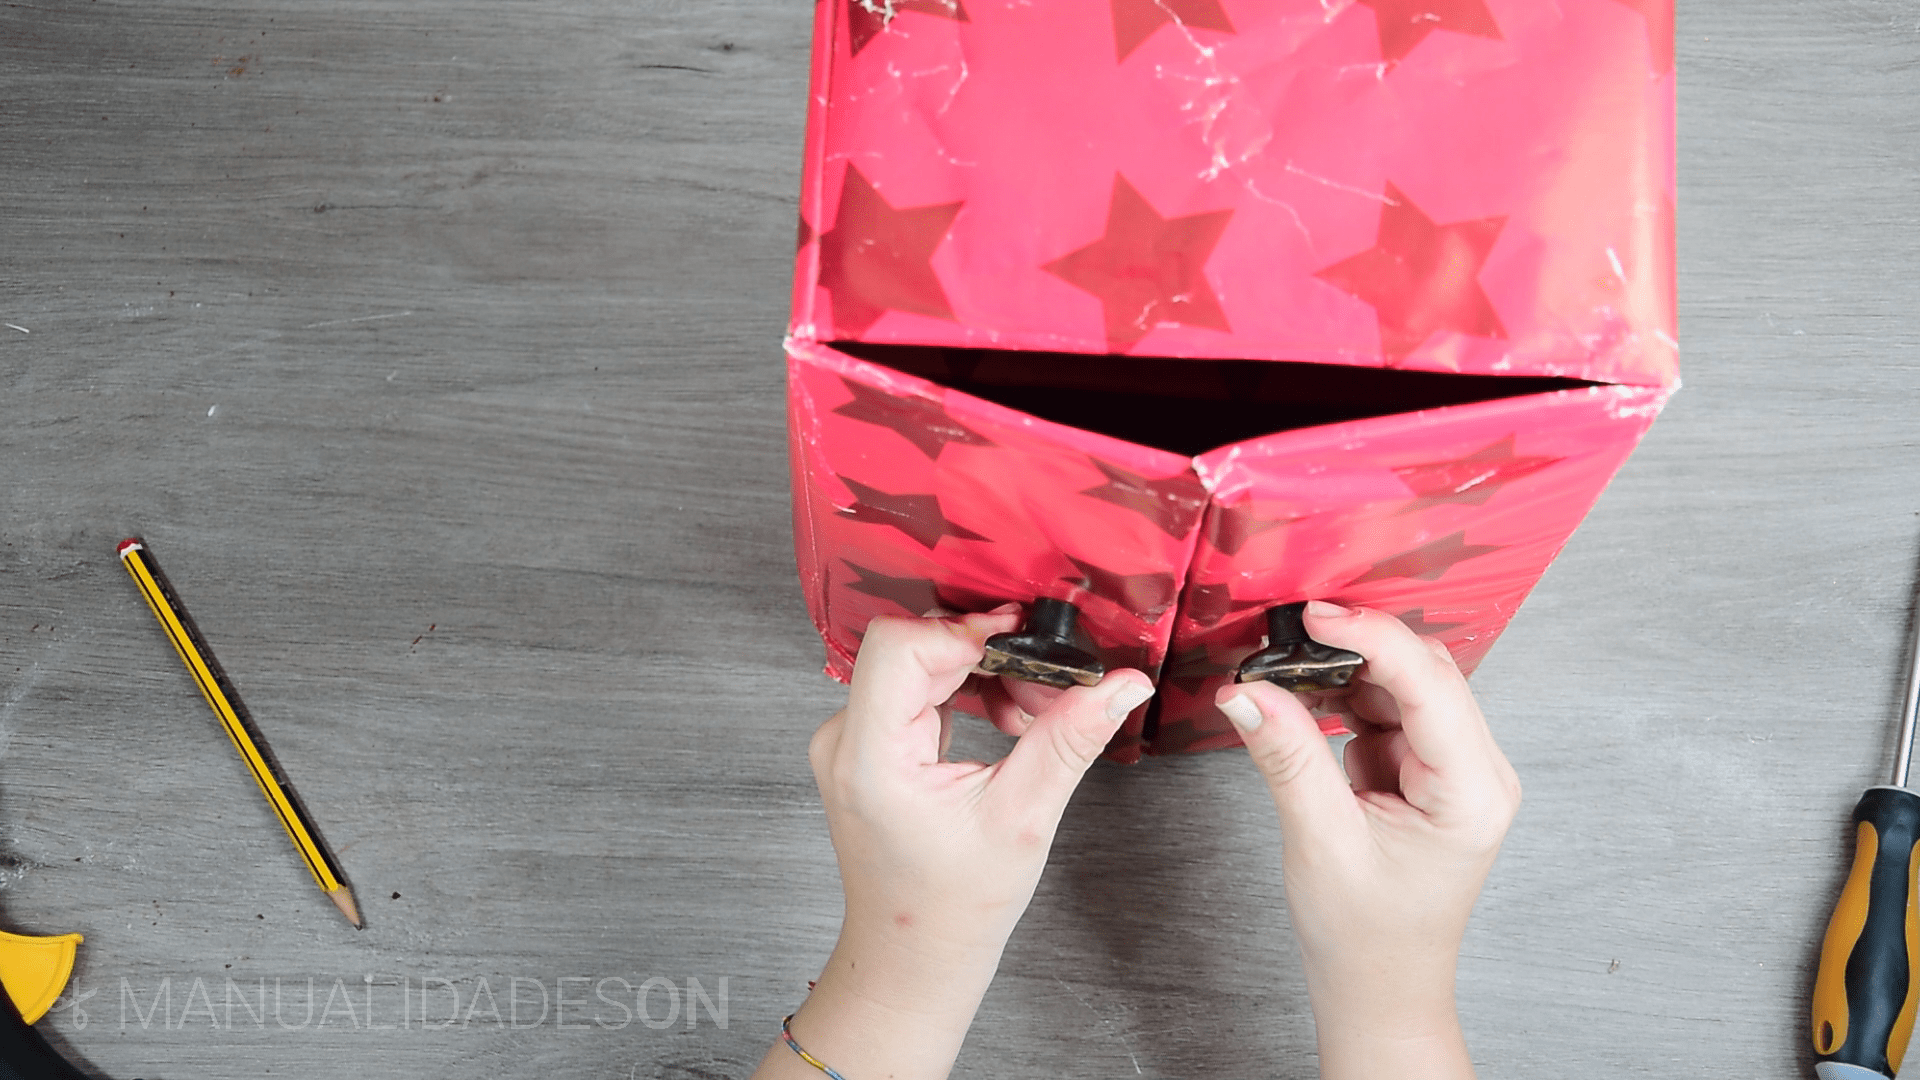
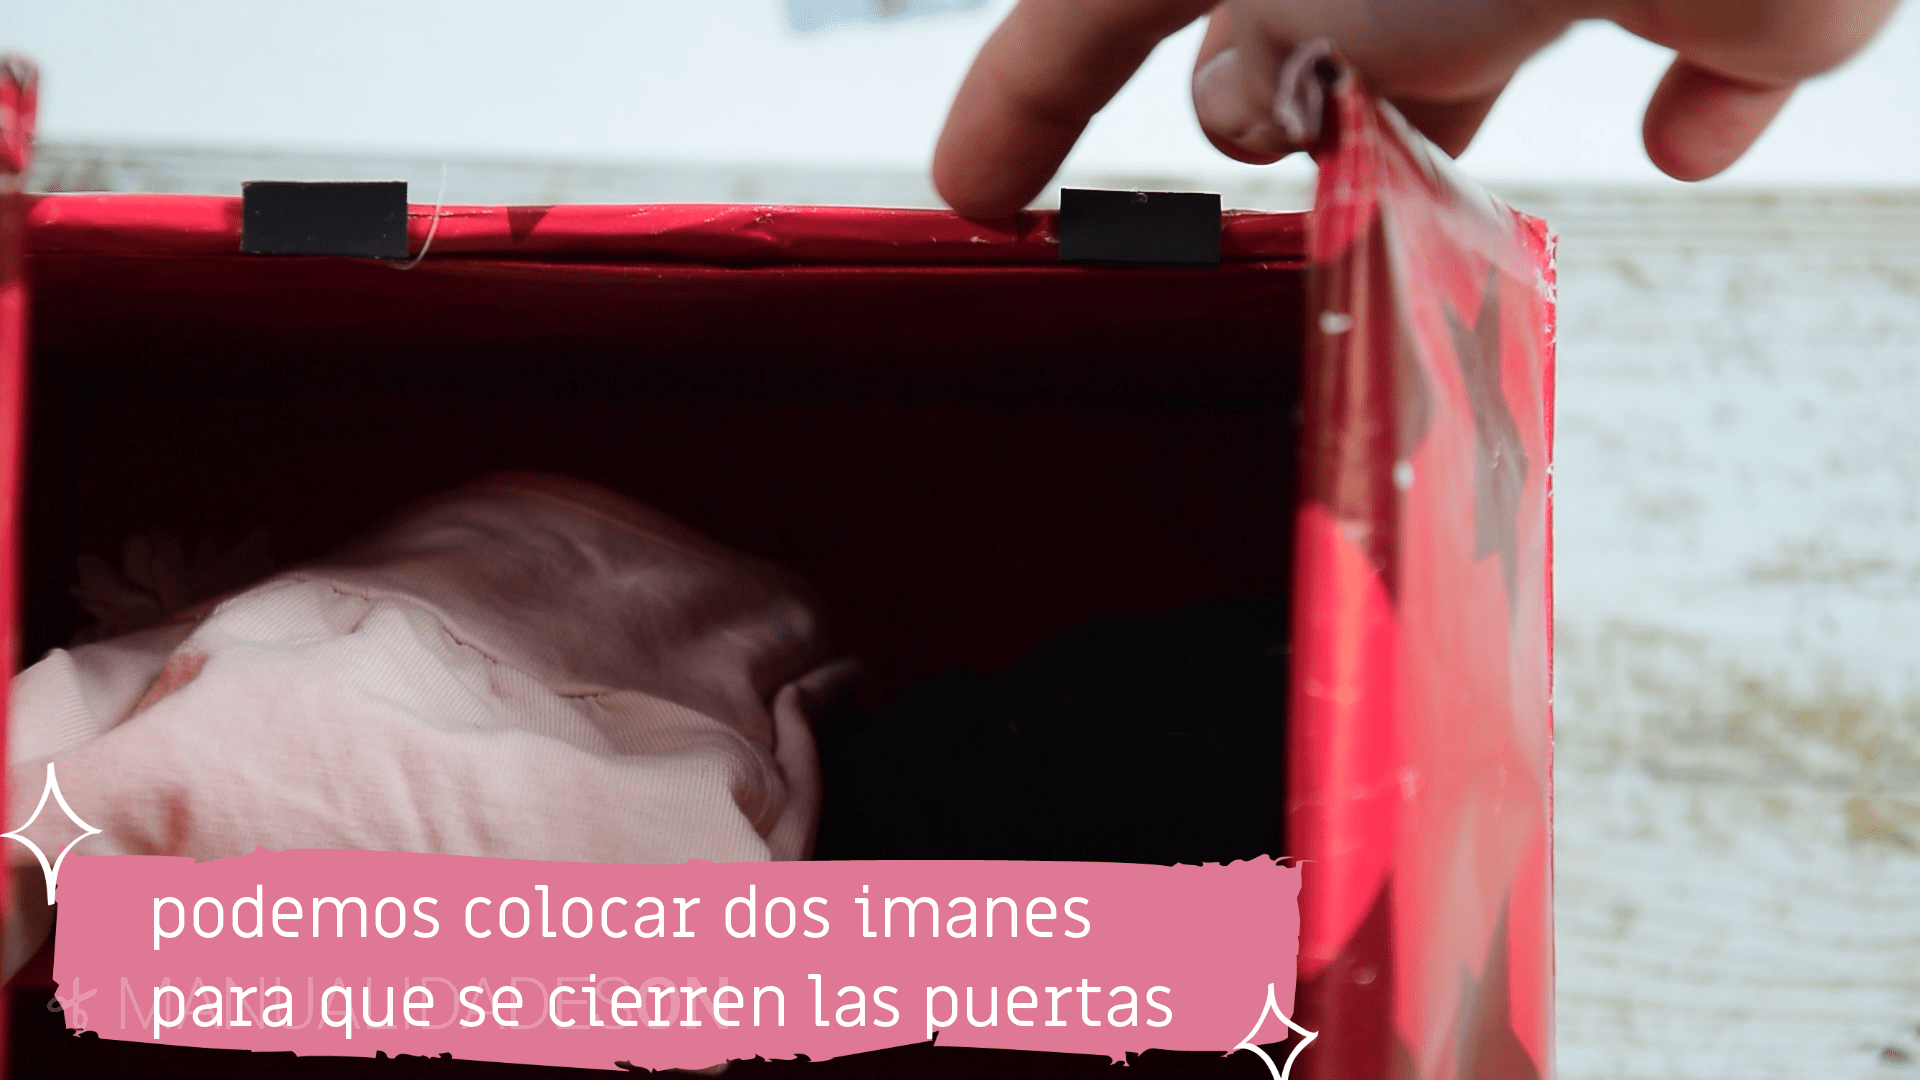
We will place the doorknobs. With the help of a screwdriver We drill the part where the knobs will be attached. I have chosen metal ones that can be screwed on, but you can use plastic or wooden ones. Finally place some small magnets between the box and the doors so that the doors can be closed properly.