
Hello! In today's craft we are going to make a dog tag reusing magic plastic of a tuper of take out food.
Do you want to see how to do it?
Materials that we will need to make our dog tag
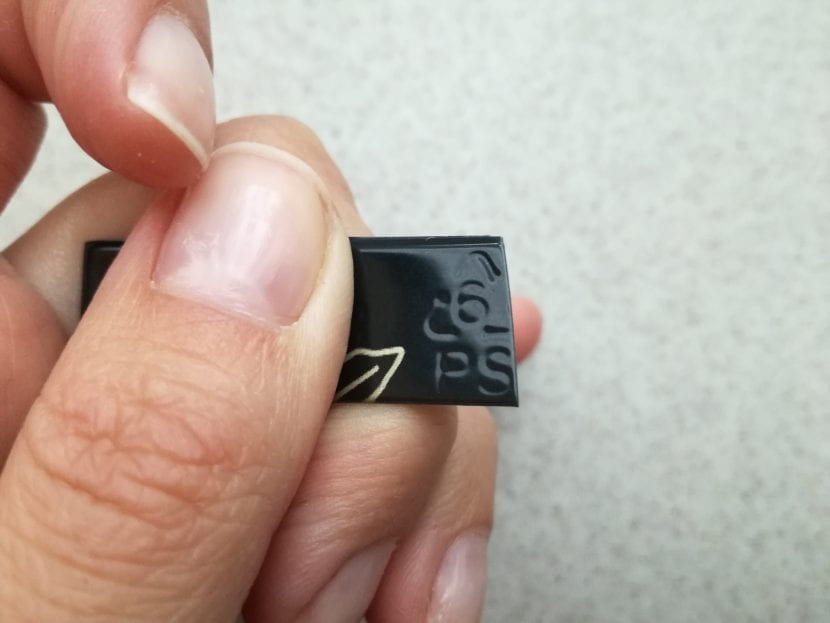
- Magic plastic And what is that? Well, it is a type of plastic that is used especially for take-out food tupers. This plastic being subjected to a heat source, such as an oven, reduces its size up to seven times and increases in thickness up to also seven times. This means that it is a plastic that becomes harder and therefore is perfect for making key rings or even jewelry. How do we identify that it is magic plastic? Very simple, somewhere on the top or base of the plastic there should be a triangle with the number 6, this indicates the type of plastic. In the following image you can see it:
- Permanent markers
- Scissors
- Albal paper
- Oven
Hands on craft
- The first step to make our nameplate is to cut out the smooth parts of the tuper to be able to use them in crafts.
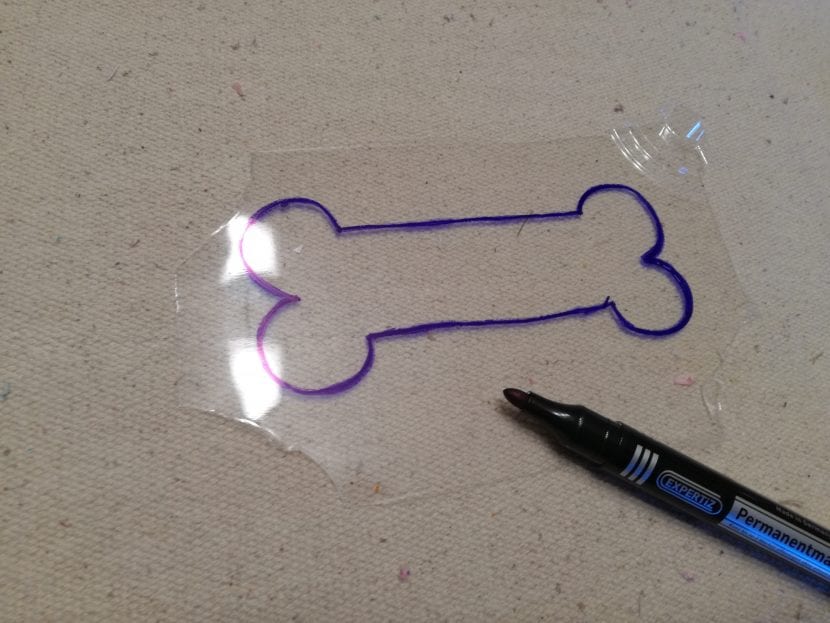
- We take a grateful part and go draw the figure of a bone. You can print an image or draw on paper first and then put the plastic on top and trace. For this we will use a permanent marker.
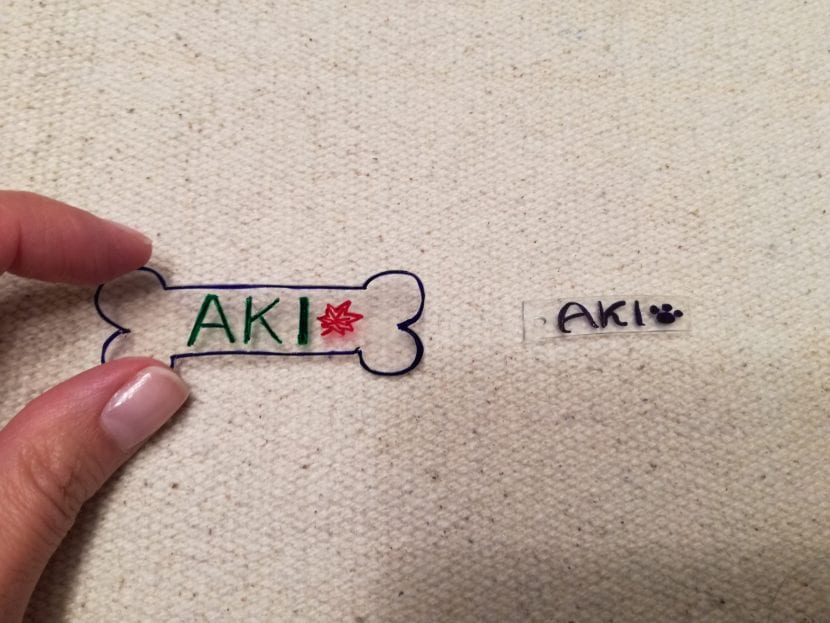
- We put in the center the name of our dog, in my case Aki and we can add some drawing, I have put an autumn leaf since Aki means autumn in Japanese.

- On another piece of plastic we will put the phone numbers to those who have to contact us if our dog gets lost. Make it as legible as possible. We can make different versions to choose which one we like the most after the oven.
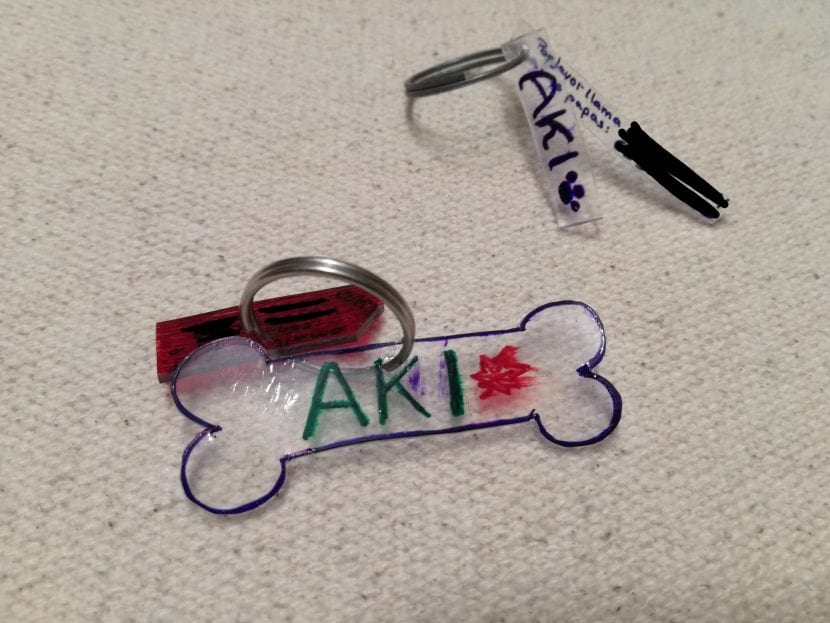
- We review everything done in marker, we make a hole with a paper drill and we preheat the 150 ° oven.
- In the oven tray we put albal paper and the magic plastic that we have designed. We put in the oven and wait. After 2-3 minutes the plastic will begin to move and wrinkle, do not panic, is what has to happen. As soon as the plastic stops moving and is smoothed again, we turn off the oven and we take out the tray.

- Now you have to act fast. While the pieces are still hot (they cool very quickly) we can flatten them With the help of a kitchen trowel, in the event that any piece has not been completely flat.
- Es It is advisable to put a varnish or a product that protects marker. I have put transparent nail polish, yes, apply it by tapping without dragging the brush or the marker will smudge.
And ready!
I hope you cheer up and do this craft.